
Hello, welcome to my blog!!
I want to start out by thanking everyone for the support and nice comments you all leave for me. I truly appreciate the support of this blog!! I enjoy card making and bringing my creations to you, this wouldn’t be possible without your support, so again, thank you!! *Affiliate links are used at no additional cost to you. When you purchase products through my links I receive a small commission from these sales, which helps me to purchase new products for the cards I share on my blog. Thank you so much for your support, it is greatly appreciated!!
Thank you for visiting my new blog!! I have created a brand new blog that allows you to subscribe and receive email updates each time I post a new project. If you would like these email notifications, simply enter your email into the space provided along the right side of my page then click subscribe. My original blog (kampakreations.blogspot.com) will remain active for you to see all of my past projects, but going forward I will be posting only on my new blog.
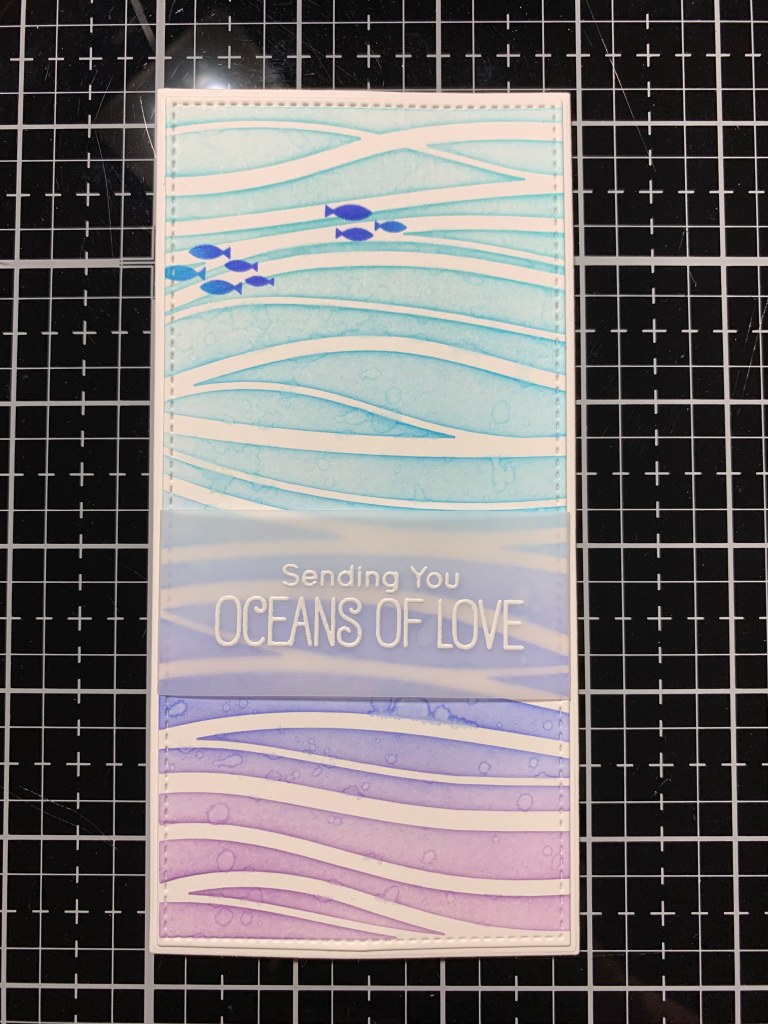
Today I have a mini slimline card created using the Mermazing stamp set. This is an adorable stamp set that includes three mermaid images, sea elements and ocean themed sentiments. There are also coordinating dies available for this set. I will be creating a 6 x 6 ink blended background that can be made into two mini slimline cards, however, today I will be using only one of the panels and saving the other for a future card. I will be using regular Distress Ink for my ink blending and Zig Clean Color Real Brush Markers for my coloring. Let’s get started!

I will be doing all of my work today on my Tim Holtz Glass Media Mat.
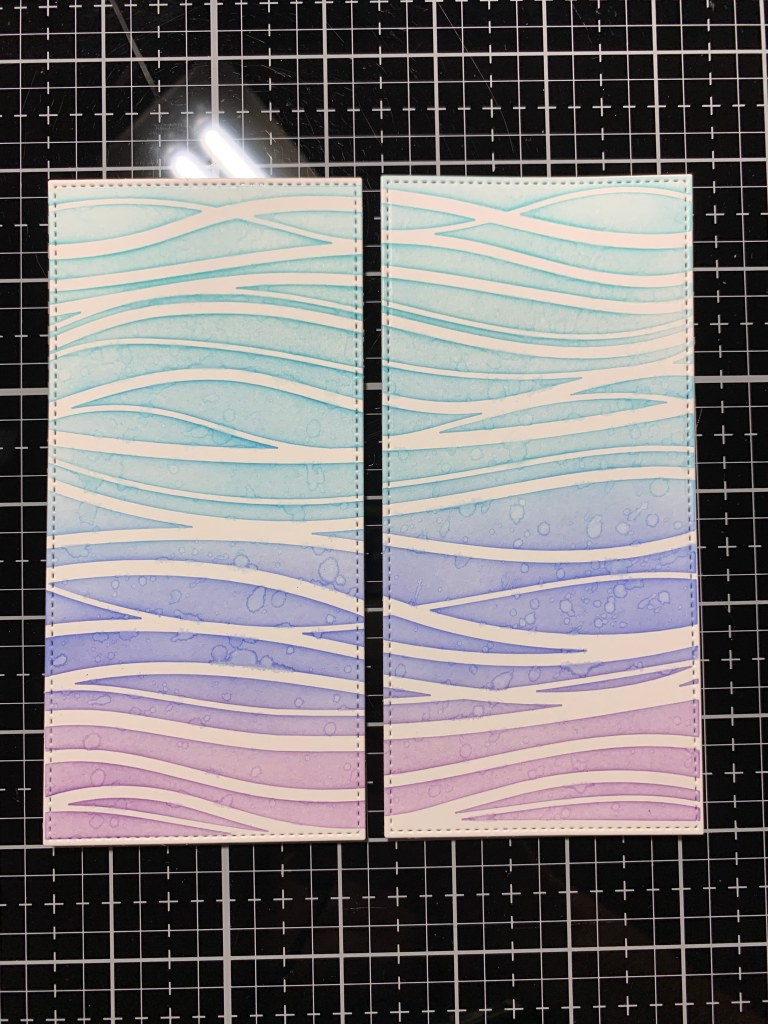
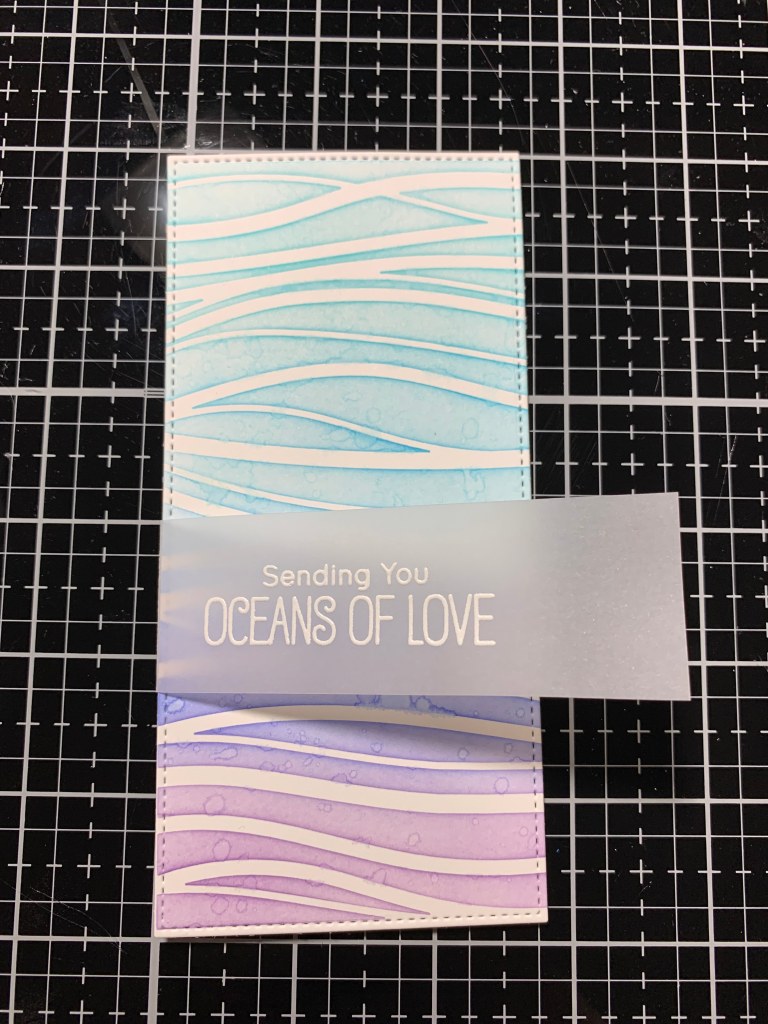
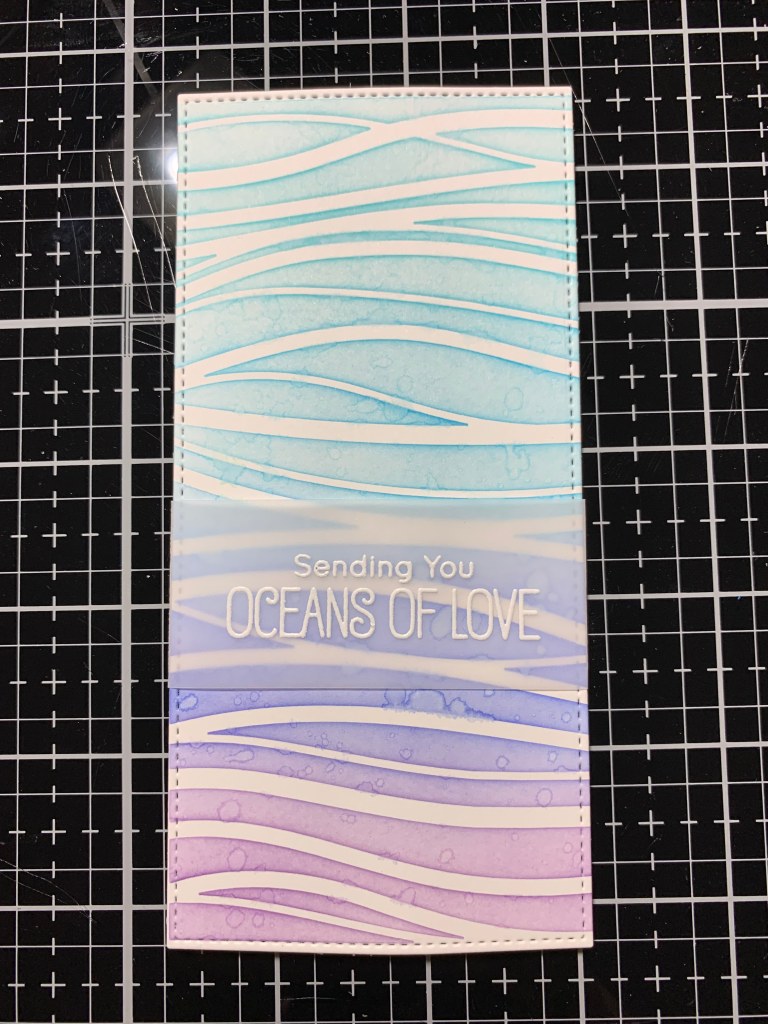
To start I cut a 6 x 6 panel out of White Cardstock using my Guillotine Paper Trimmer. Taking the Waves Stencil I lightly spray the back of it with Pixie Spray and allow it to dry for several minutes. I then place the stencil over my panel and gently rub my fingers over the lines to adhere it down. Next I place the panel onto my Make Art Stay-tion and hold it in place with the magnets. Using my Blending Brushes I begin by blending Salvaged Patina Distress Ink over the top area of the panel, fading the ink out just a bit. Next I blend Mermaid Lagoon Distress Ink onto the panel blending back into the previous color a bit and fade the ink out. I then blend Blueprint Sketch Distress Ink, blending back into the previous color a bit and then fade the ink out. For my final color I blend Dusty Concord Distress Ink to cover the bottom of my panel and blend back into the previous color a bit. *When joining colors I like to fade the ink out to where the next color will join. I then blend my next color back into the previous color to create a seamless blend.


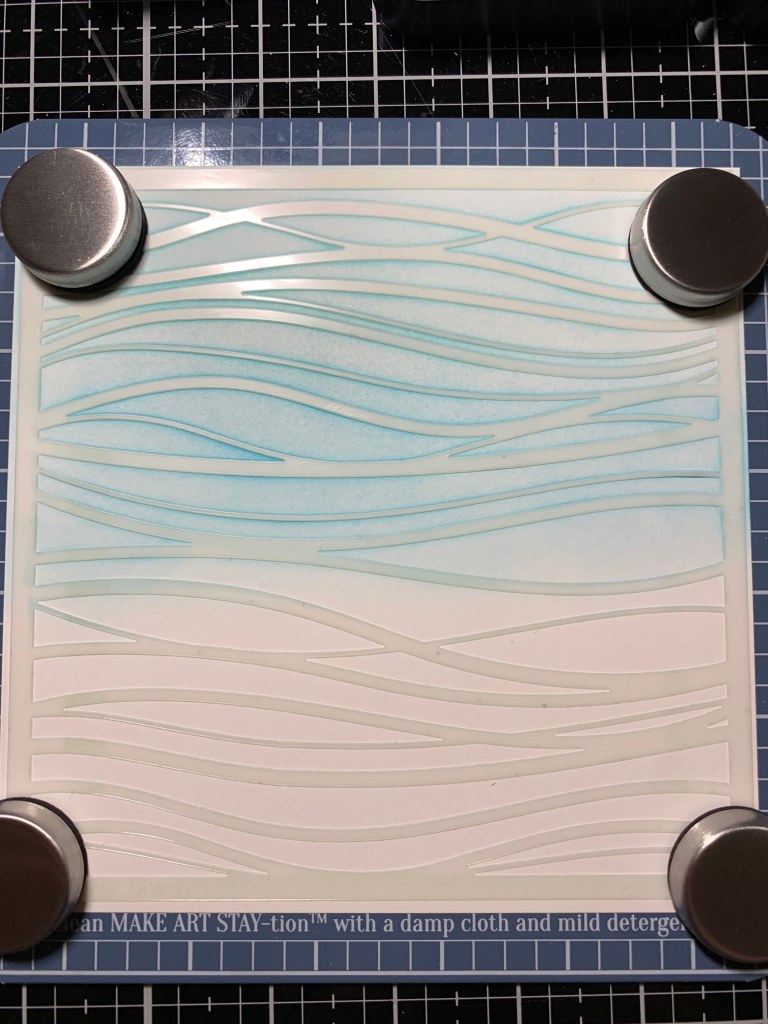
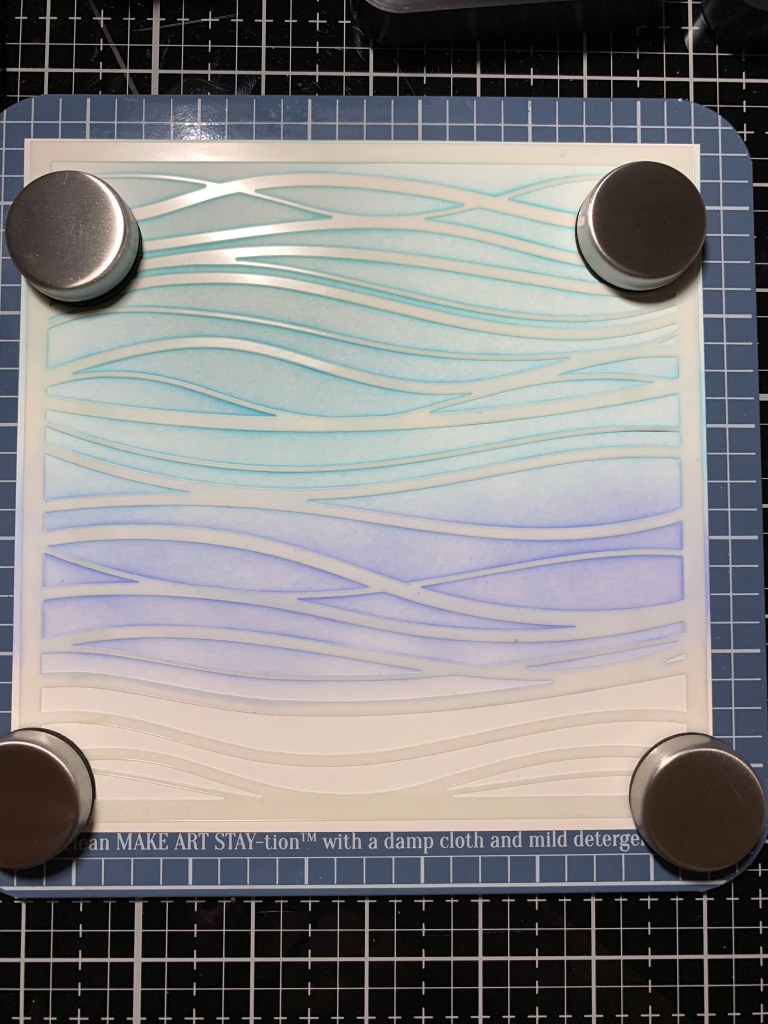
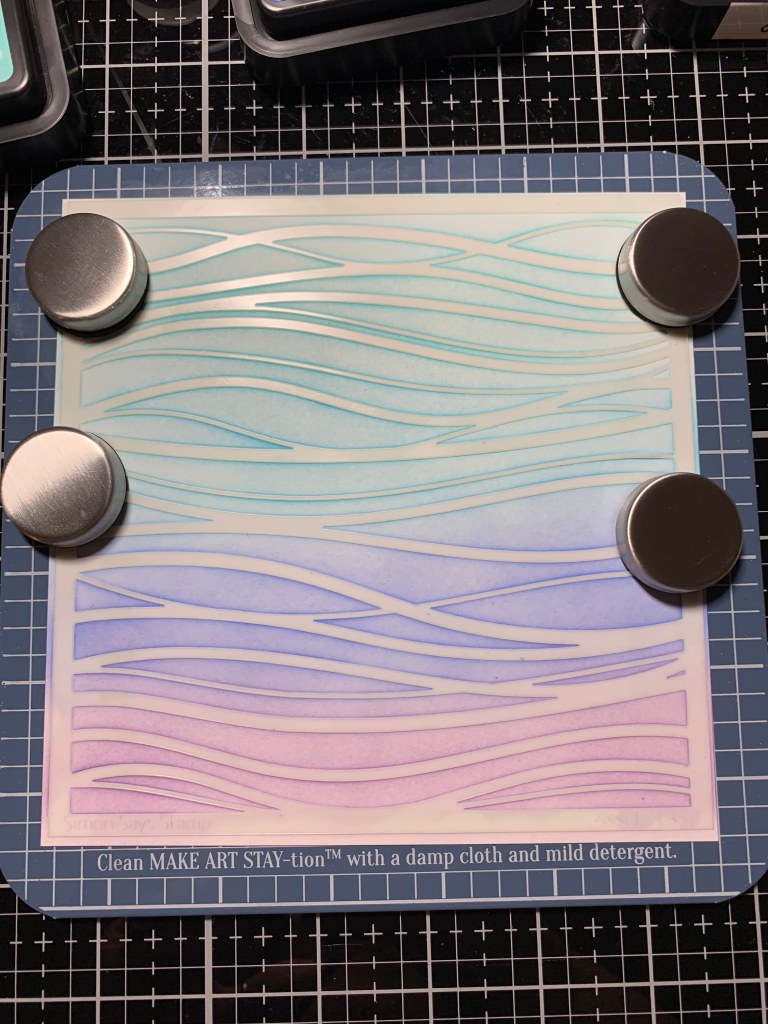
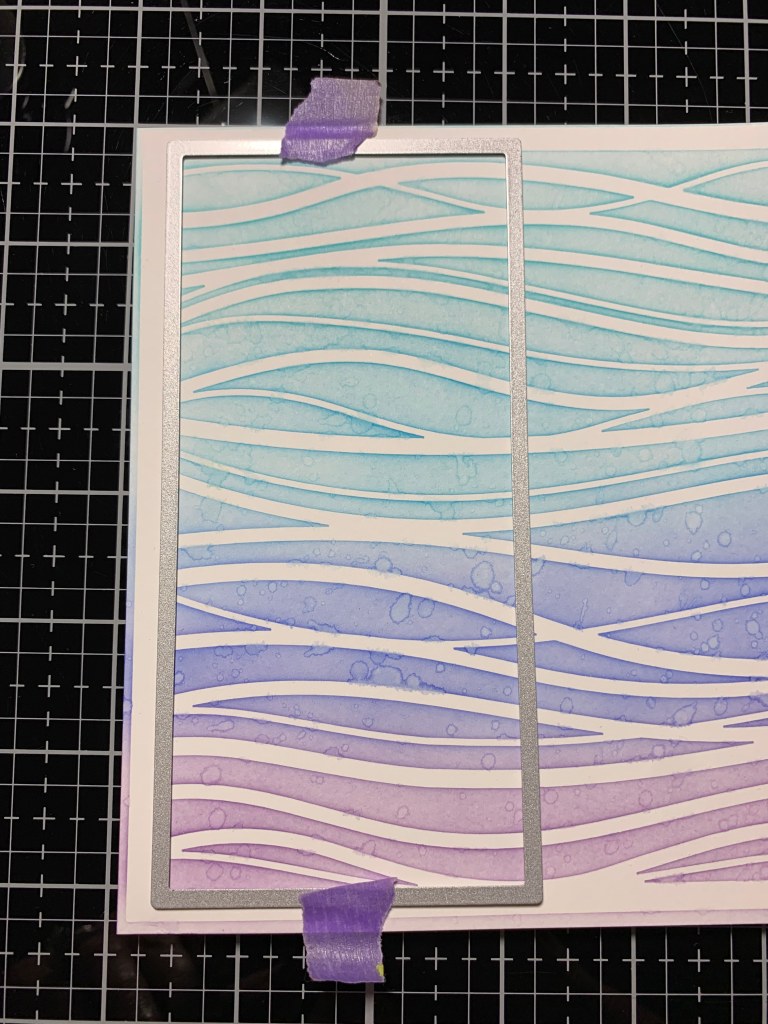
Before removing the stencil I want to add a little texture and interest to my ink blends. I take some clean water and flick it onto the panel with my fingers then lay a paper towel over the panel to pick up the water. I then gently remove the stencil from my panel.


Taking the stitched rectangle from my Master Layouts 7 Die Set, I line up the die on the edge of my ink blend and run them through my Big Shot Die Cut Machine. I then line up the die again on the other side of the panel and run them through my Big Shot. I now have two panels and will save the other for a future project. I love getting two cards out of one panel!!
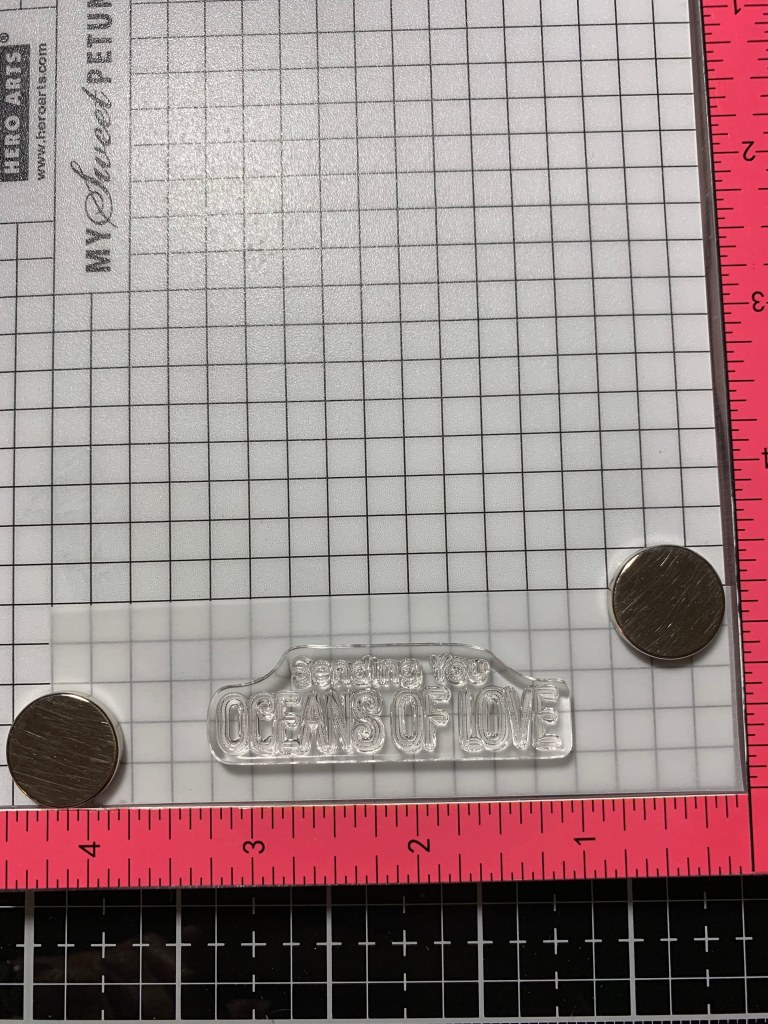
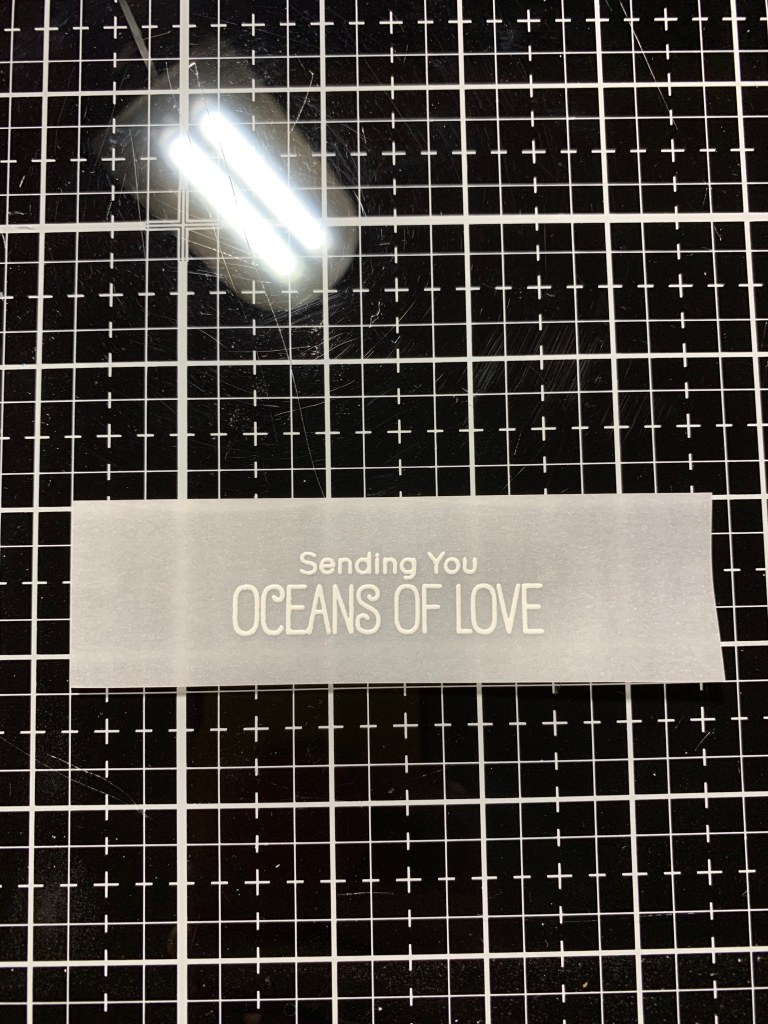
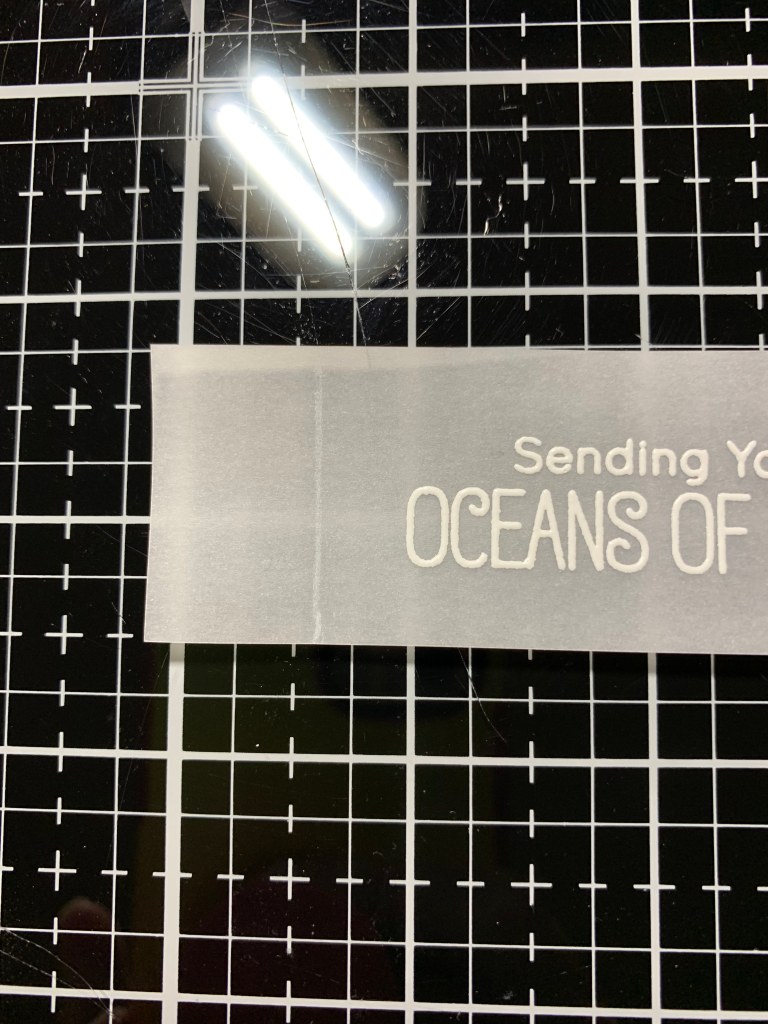
To create a sentiment I cut a 1 1/4″ x 4 1/4″ piece out of Vellum using my Guillotine Paper Trimmer and place it into my MISTI Stamp Positioner and prep it with my Anti Static Powder Tool. I then center a sentiment from the Mermazing Stamp Set and stamp it with Unicorn White Ink. I add White Embossing Powder and heat set it with my Heat Tool.

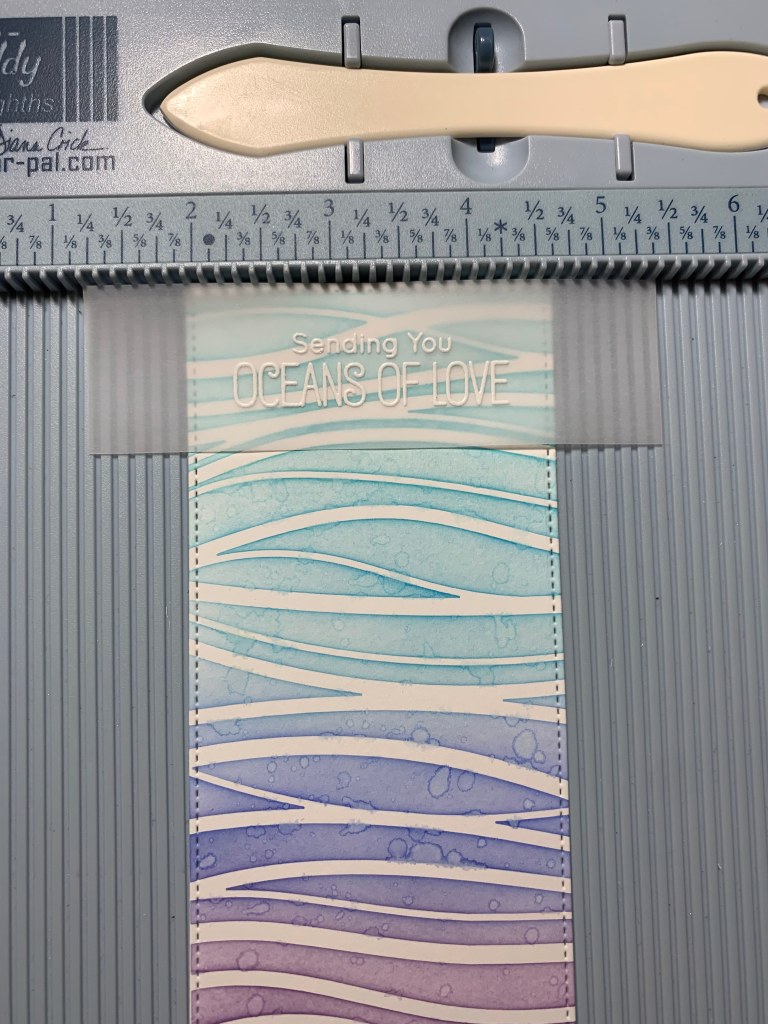
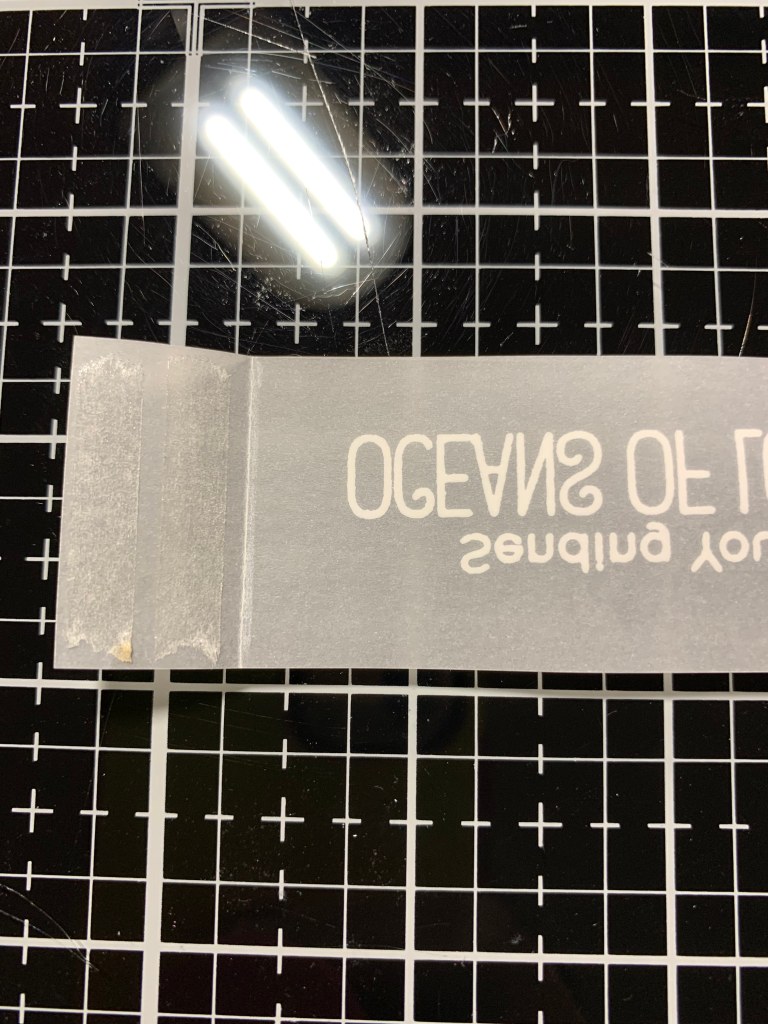
When using Vellum sentiments on my cards I like to score one end before attaching to my card. I set the panel in my Scor Buddy and center the Vellum sentiment over the panel where I will want it mounted, then score the left side. I then fold on the score line and add some Double Sided Tape Adhesive to the back of the flap and also to the back of the other end of the Vellum strip. I then wrap the scored end around the panel adhering it to the back then wrap the other end around the right side of the panel and adhere it to the back. *Because I scored the end straight, my sentiment strip is lined up evenly over my panel when it is adhered.
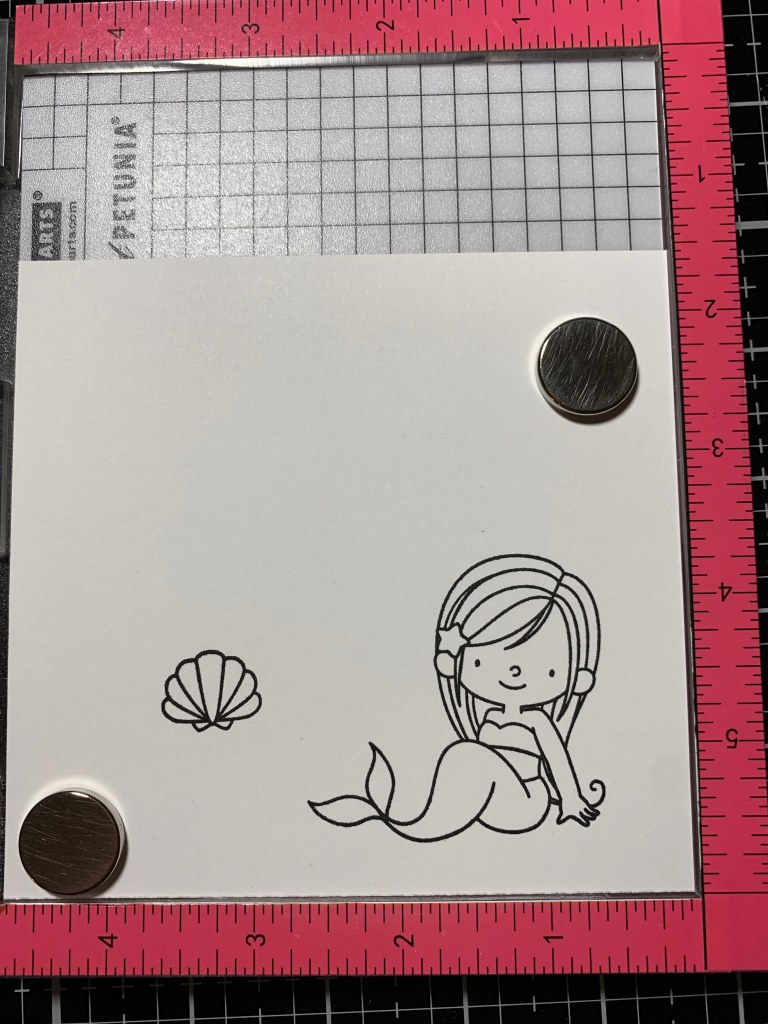
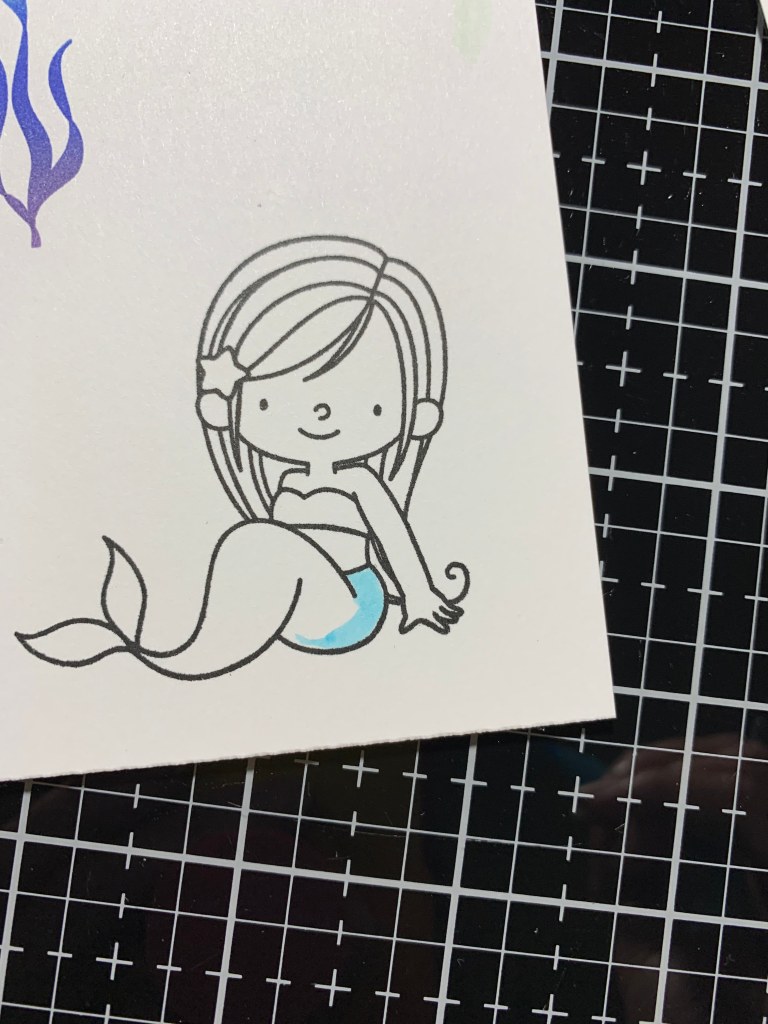
For my images I place a piece of Bristol Smooth Cardstock into my MISTI and choose the images from the Mermazing Stamp Set that I want to color and stamp them using Versafine Black Onyx Ink which is an ink that is waterproof and will not bleed when watercoloring. Next, I choose some solid images from the same Mermazing Stamp Set that I will be stamping onto the same piece of cardstock. Using my Mini Blending Brushes I tap Salvaged Patina Distress Ink onto the top area of the images. I then add Blue Print Sketch Distress Ink just below the previous color then finally add Dusty Concord Distress Ink to the bottom of the images. I overlap each color just a bit to blend the colors and stamp the images onto the panel. I repeat this process with each color until I am happy with the vibrancy of each color.


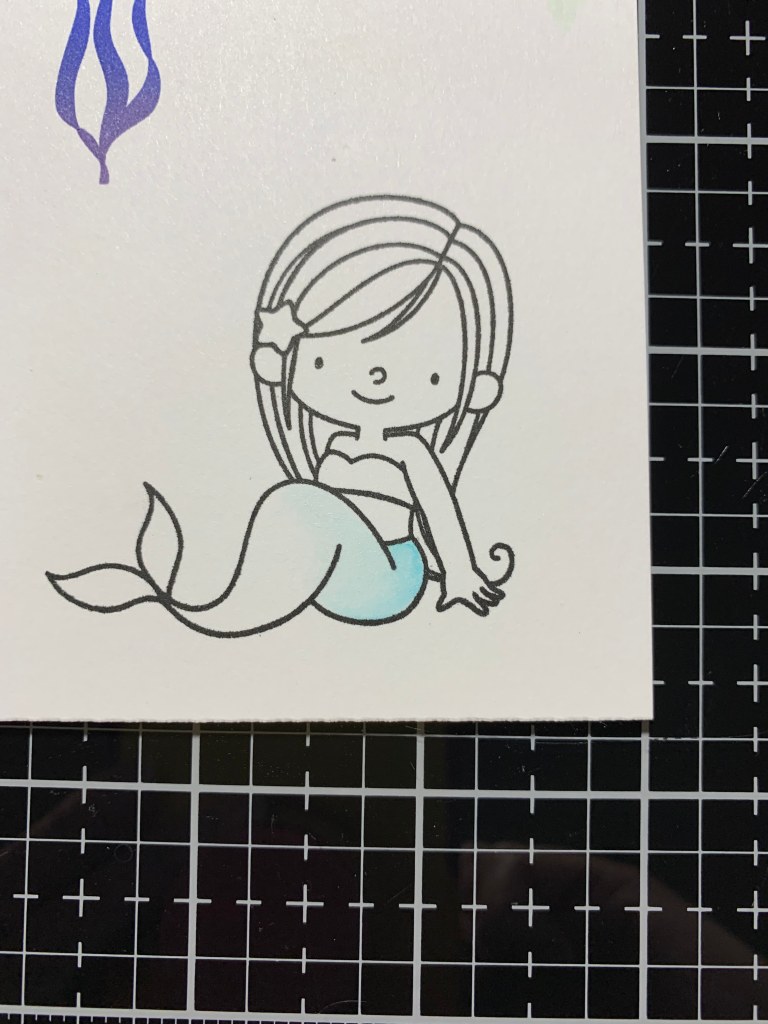
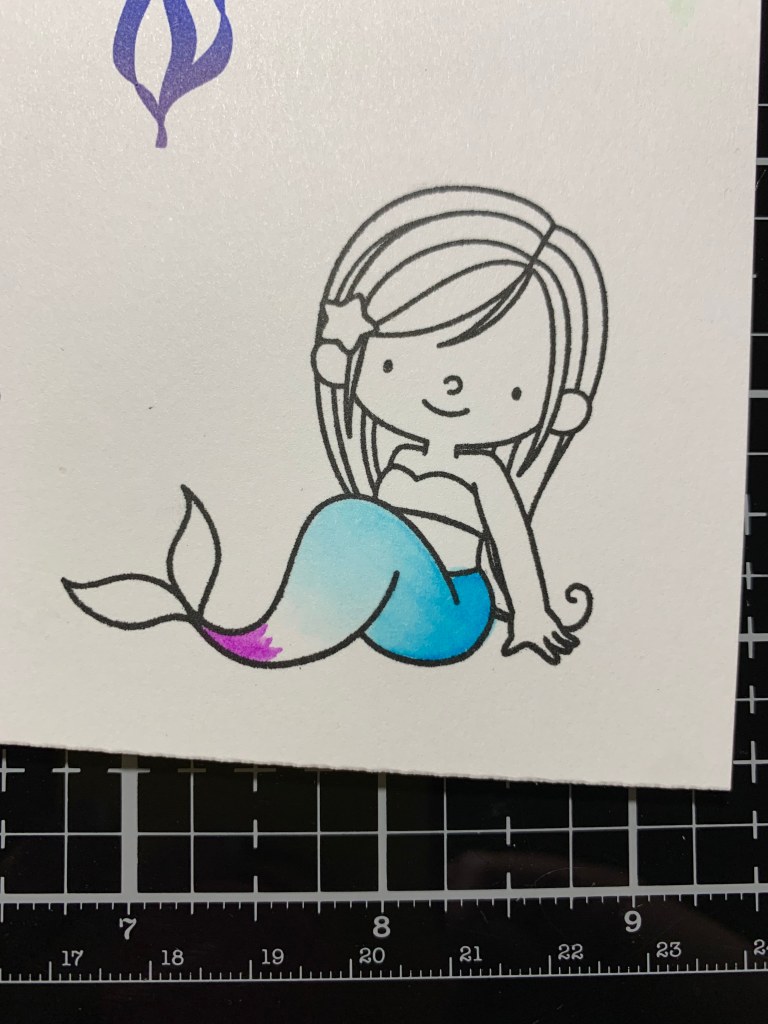
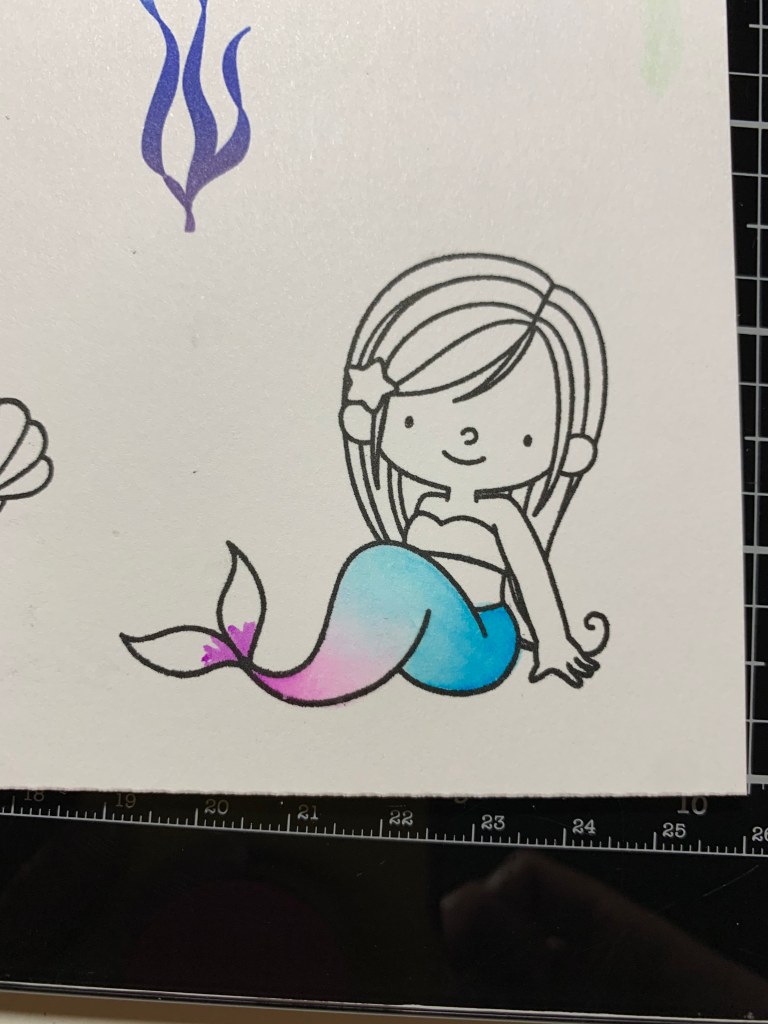
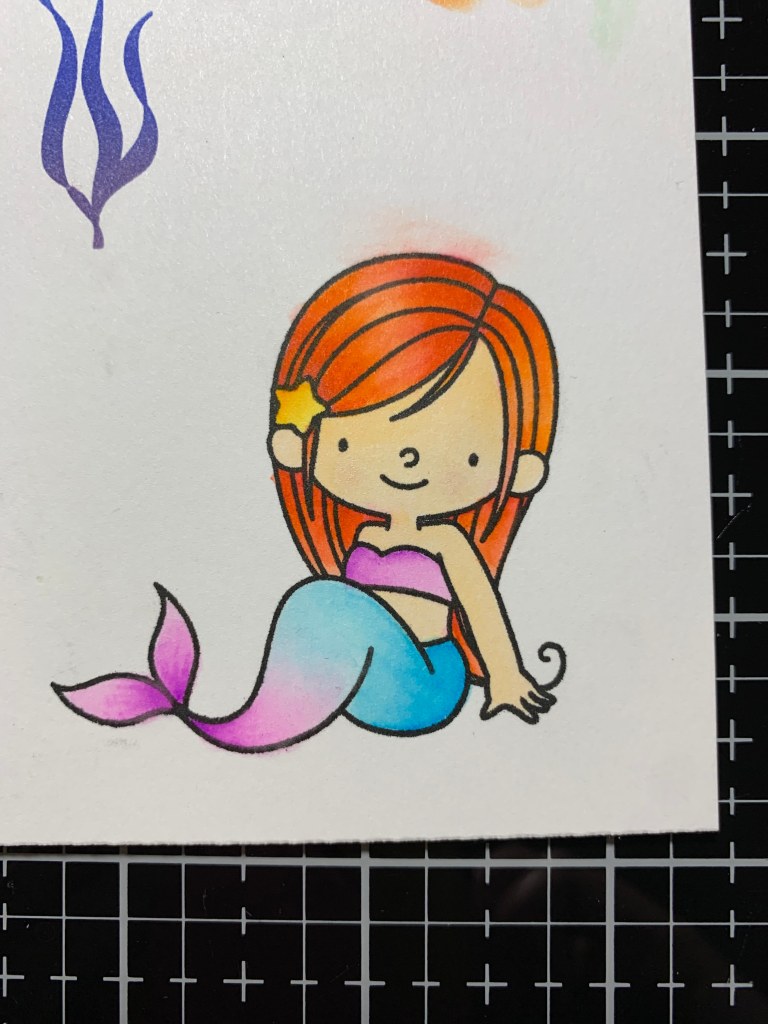
I now start coloring my images. I will be using my 36 Count Zig Clean Color Real Brush Markers to color the images. I start by adding 036 Light Blue then take my Water Brush filled with clean water to pull and blend the color out down towards the bottom portion of the image, fading it out to white. I decide that I want the color darker so I add 031 Cobalt Blue and use my Water Brush to pull and blend the color out, fading it out as I blend.


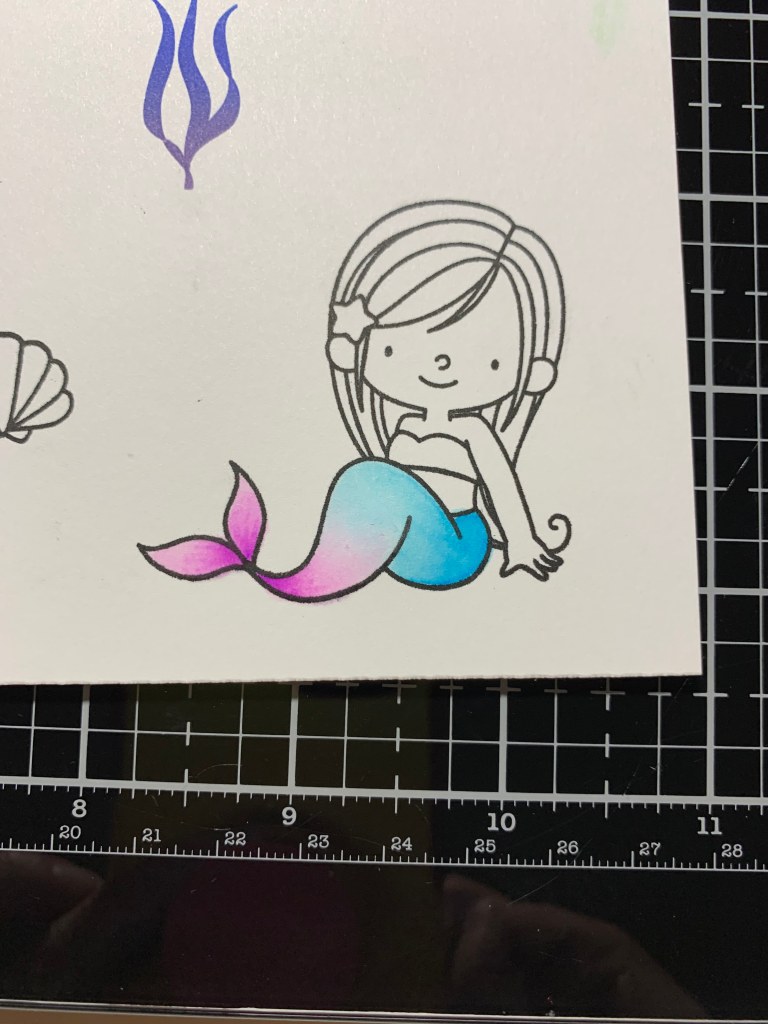
Next, I add 081 Light Violet to the opposite end and use my Water Brush to pull and blend the color out. I fade the color out to white as it meets the previous color. I add the same 081 Light Violet to the end of the tail and again blend and fade the ink out. For the mermaid’s top I add the same 081 Light Violet color and blend the color out.
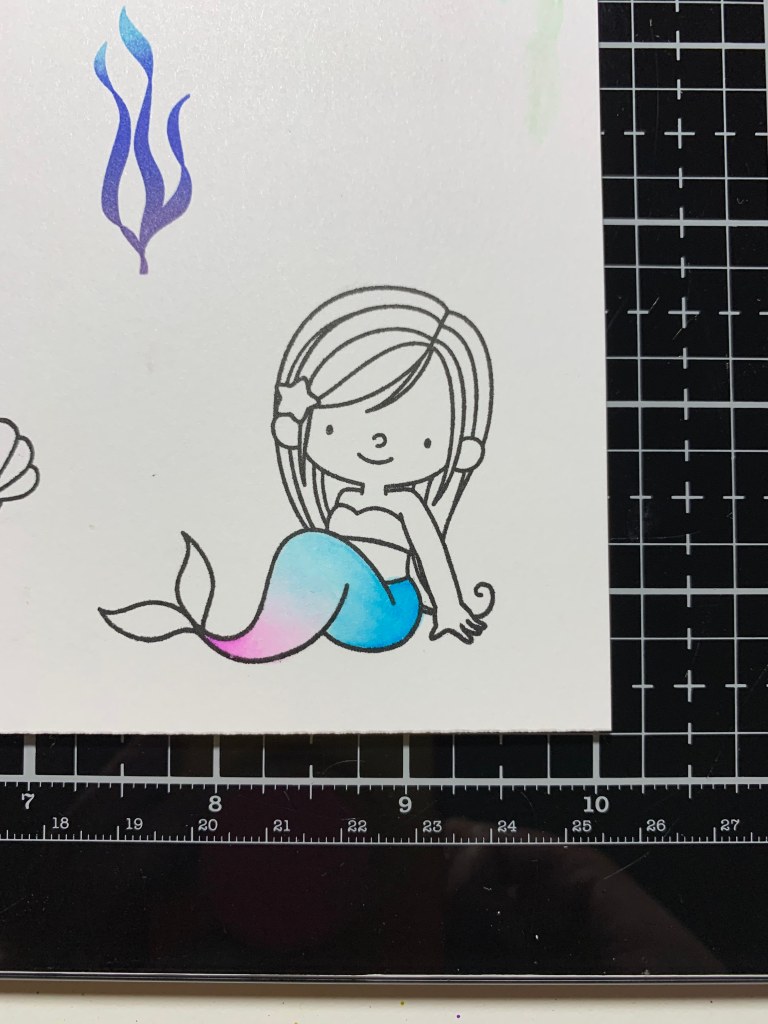
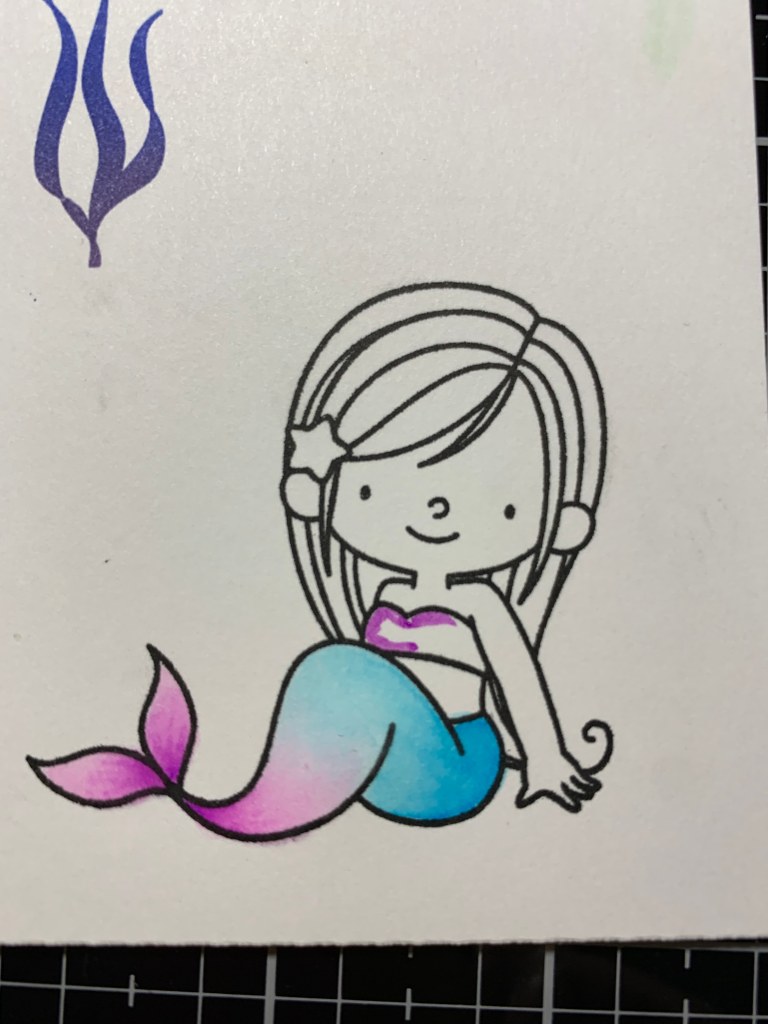

For the small star I add 070 Orange to the edge then add 052 Bright Yellow and blend the color out.
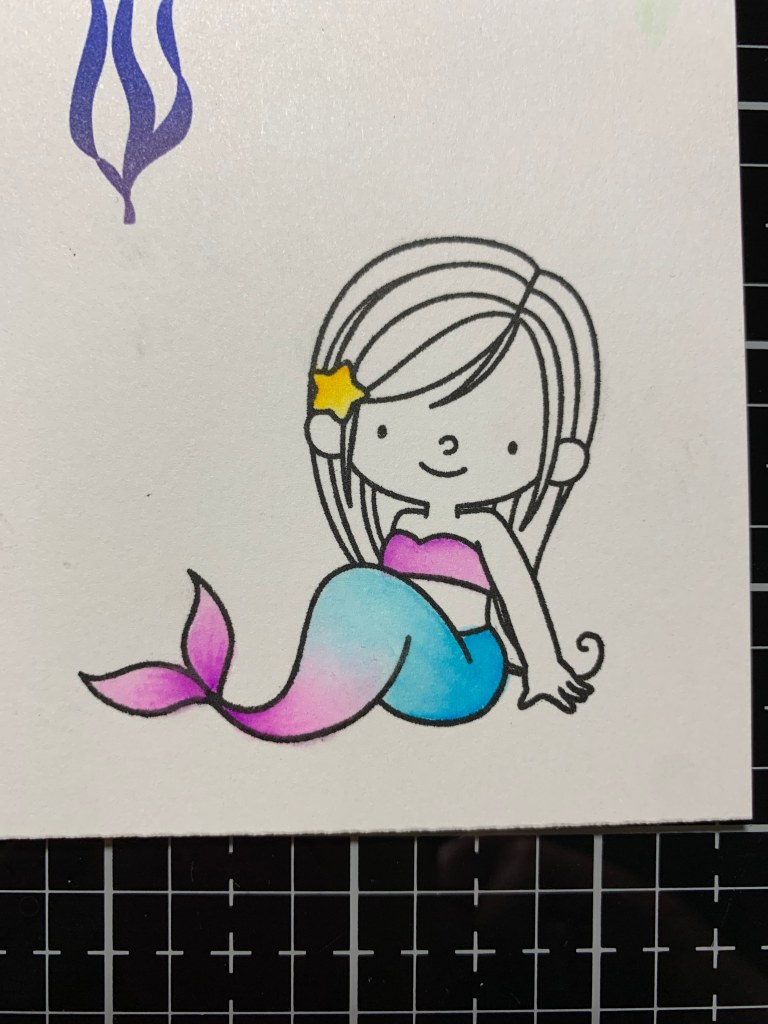
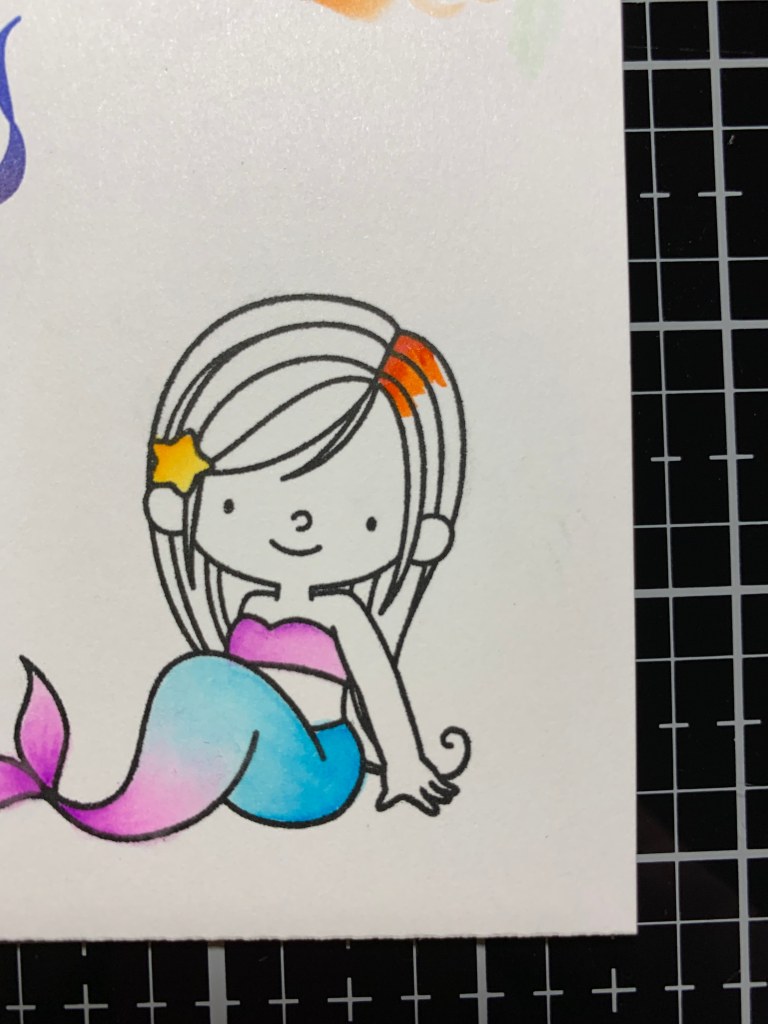
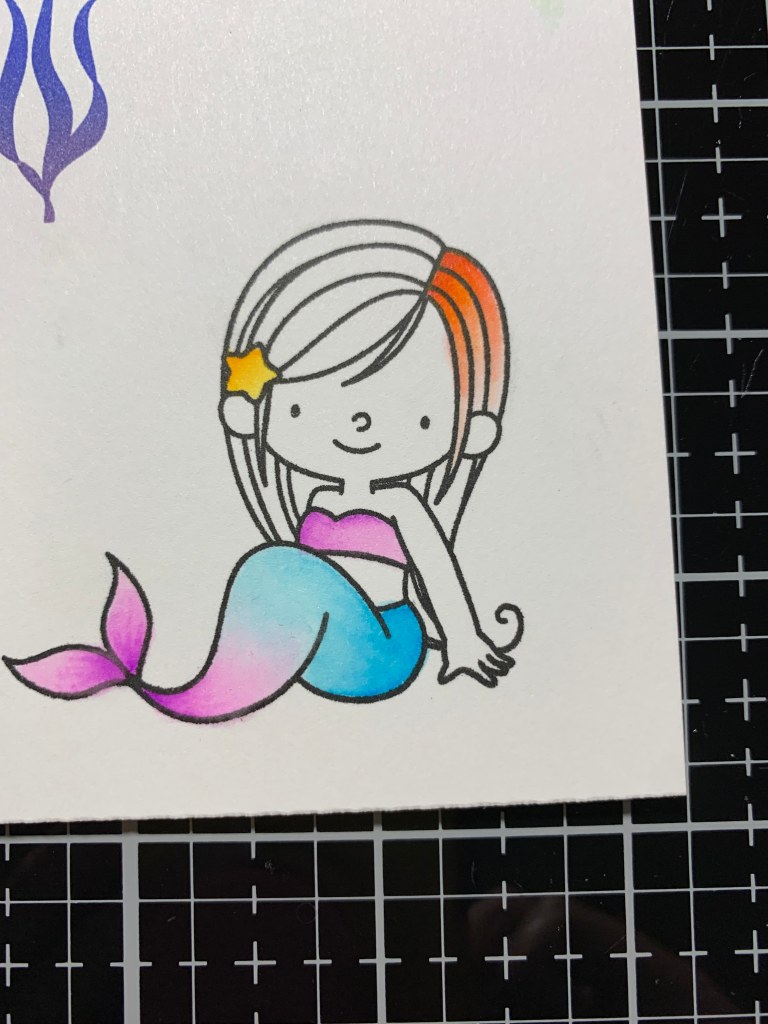
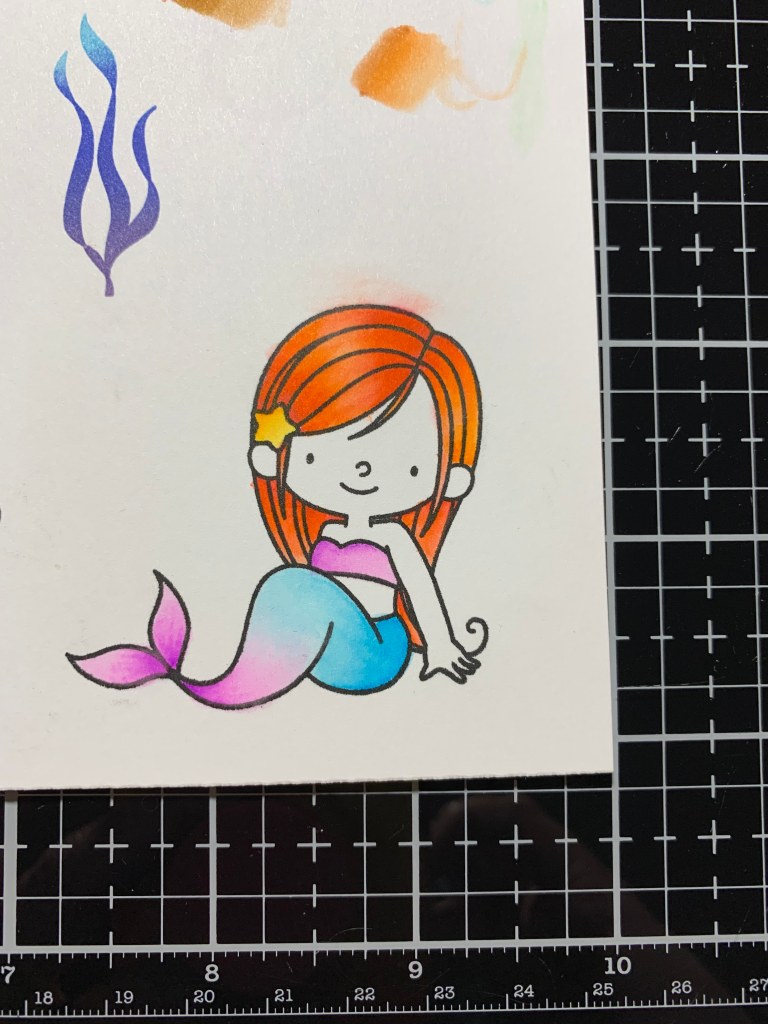
Next I color the mermaid’s hair, I add 022 Carmine Red then add 070 Orange just below it and use my Water Brush to pull and blend the color out, fading it towards the bottom. I use this same color combo to color the remainder of the hair. *Wherever you want highlights to be, just fade the color out in that area. For the mermaid’s skin I add 071 Flesh to color the entire areas and add 028 Pale Pink to her cheeks. I then use my Water Brush to blend the color.

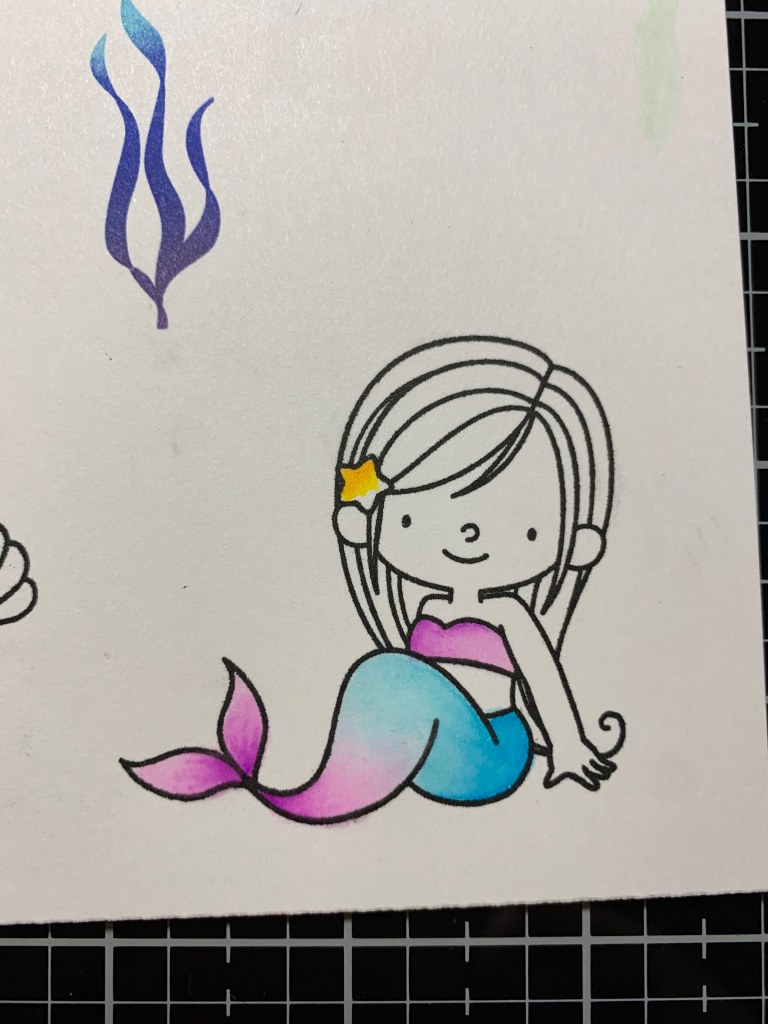
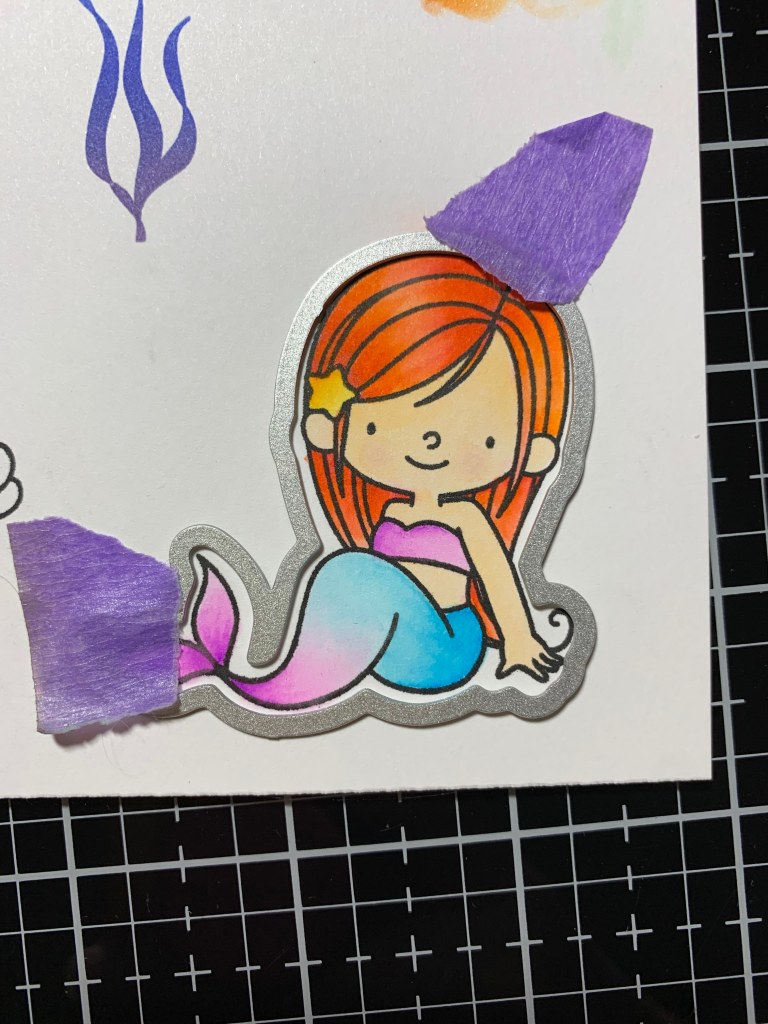
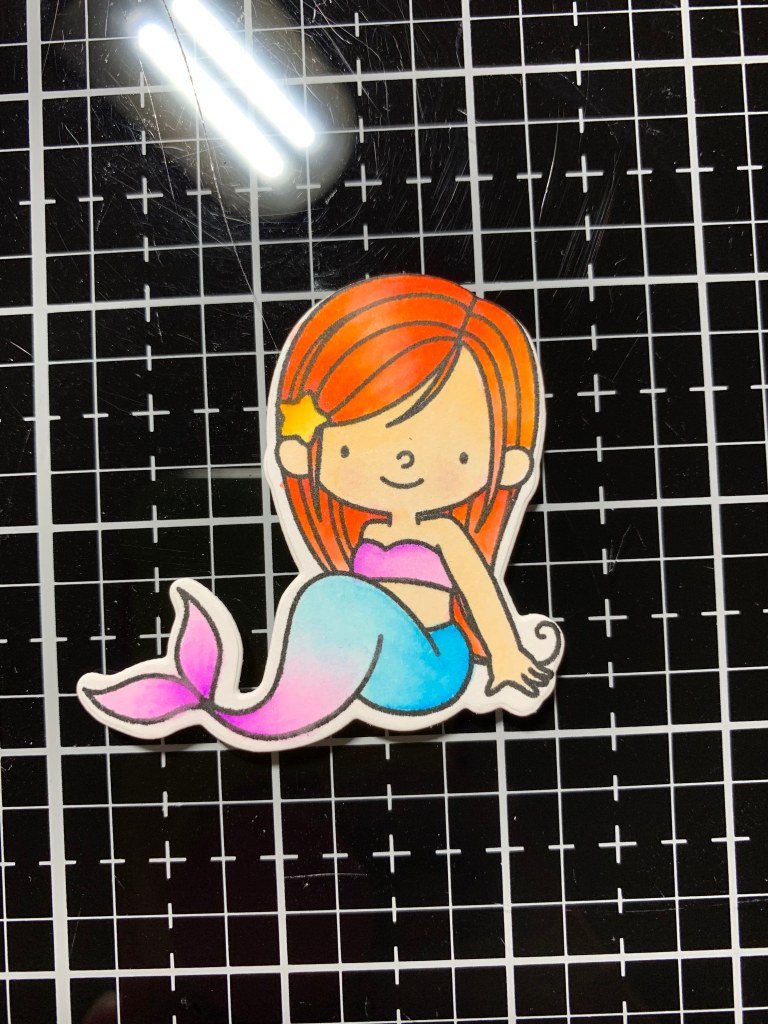
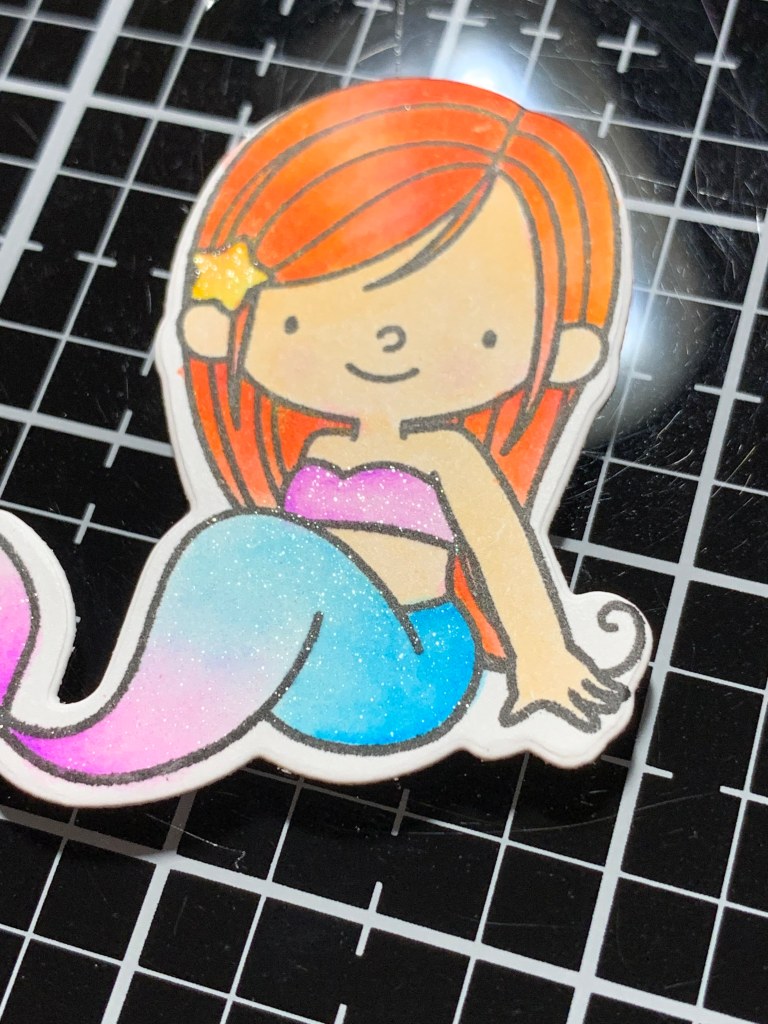
Using the coordinating Mermazing Die-Namics I cut out my image, running them through my Big Shot. For some added sparkle I use my Aqua Shimmer Pen to paint over the areas of the star, top and tail of the mermaid.
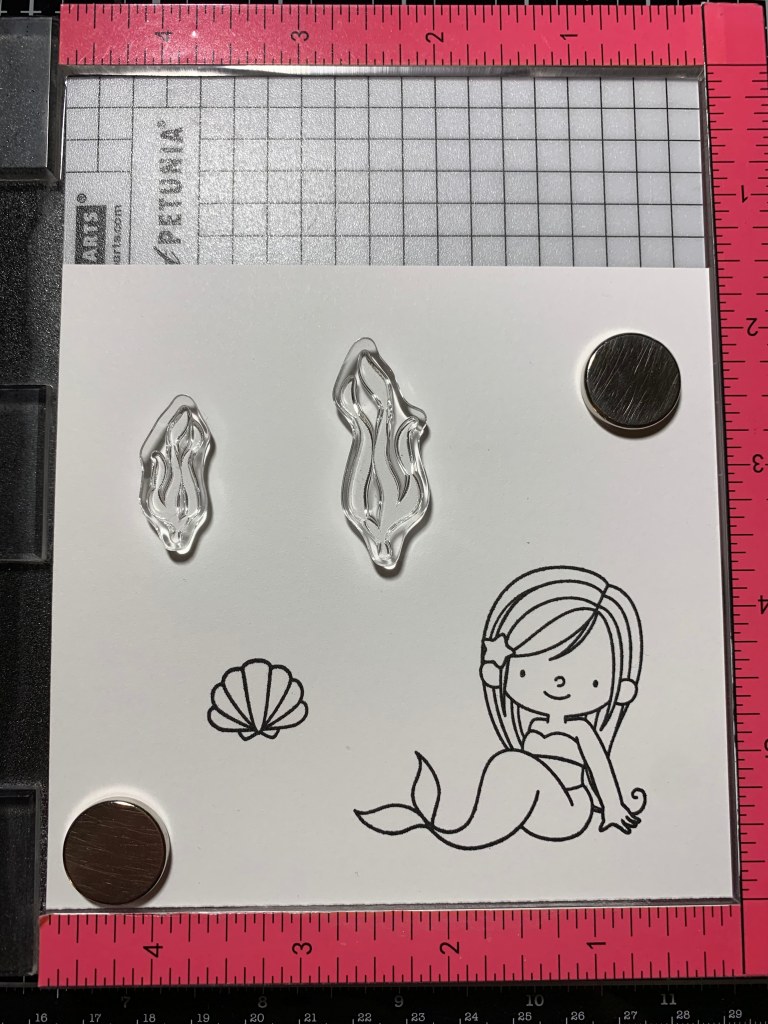
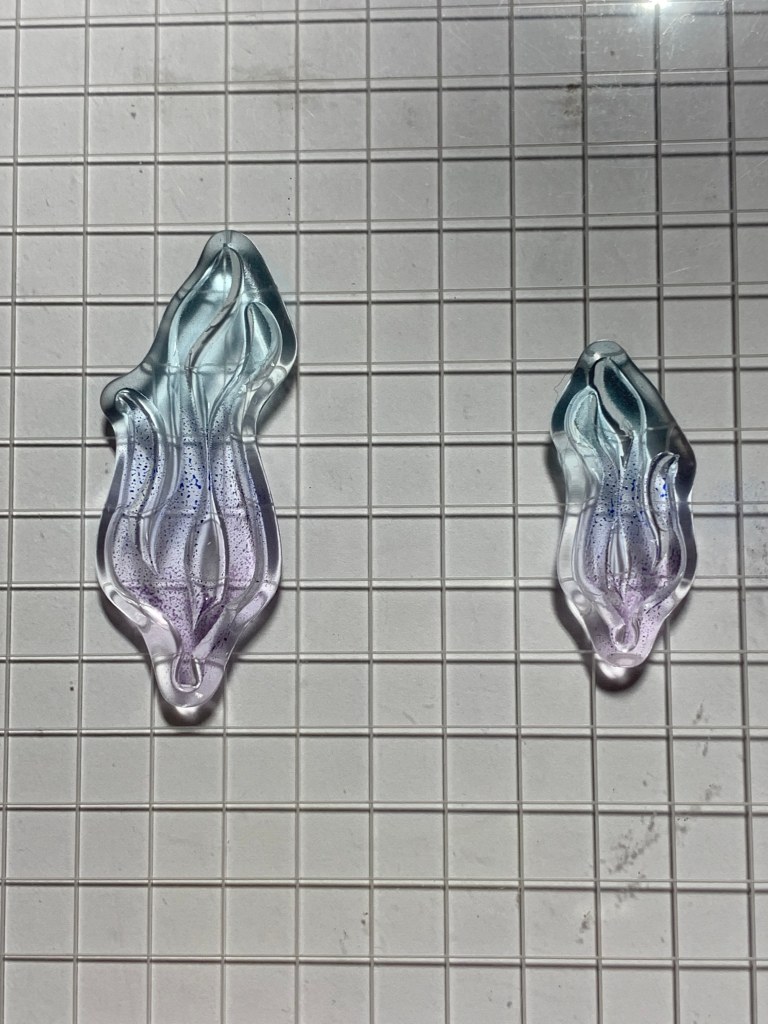
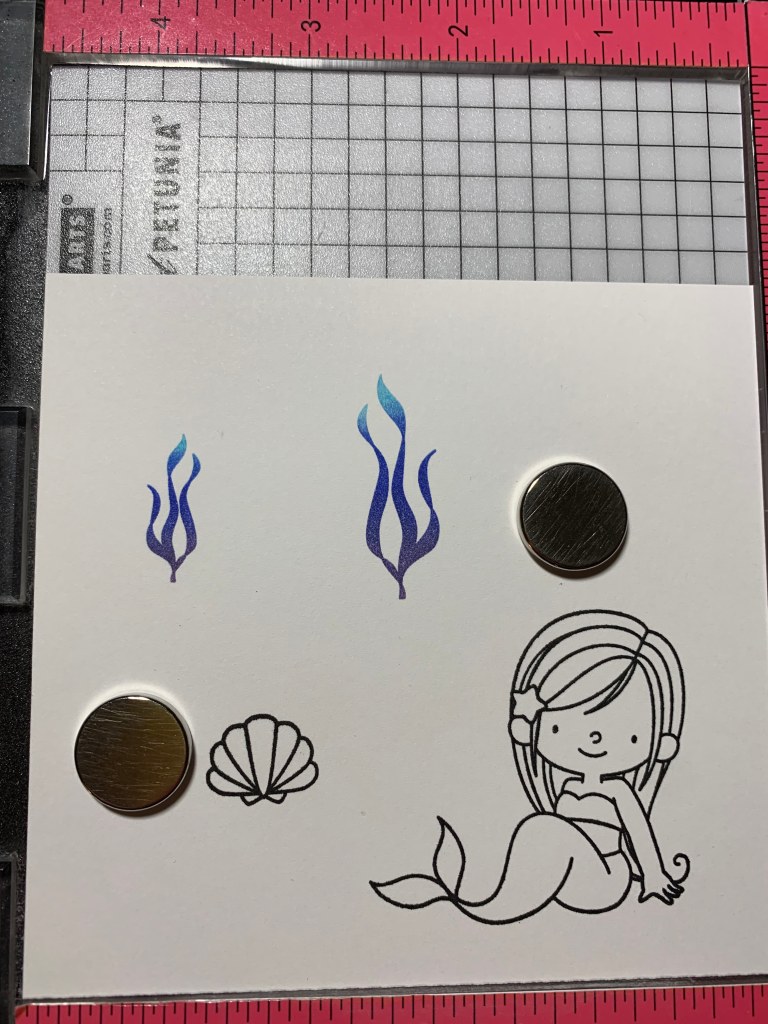
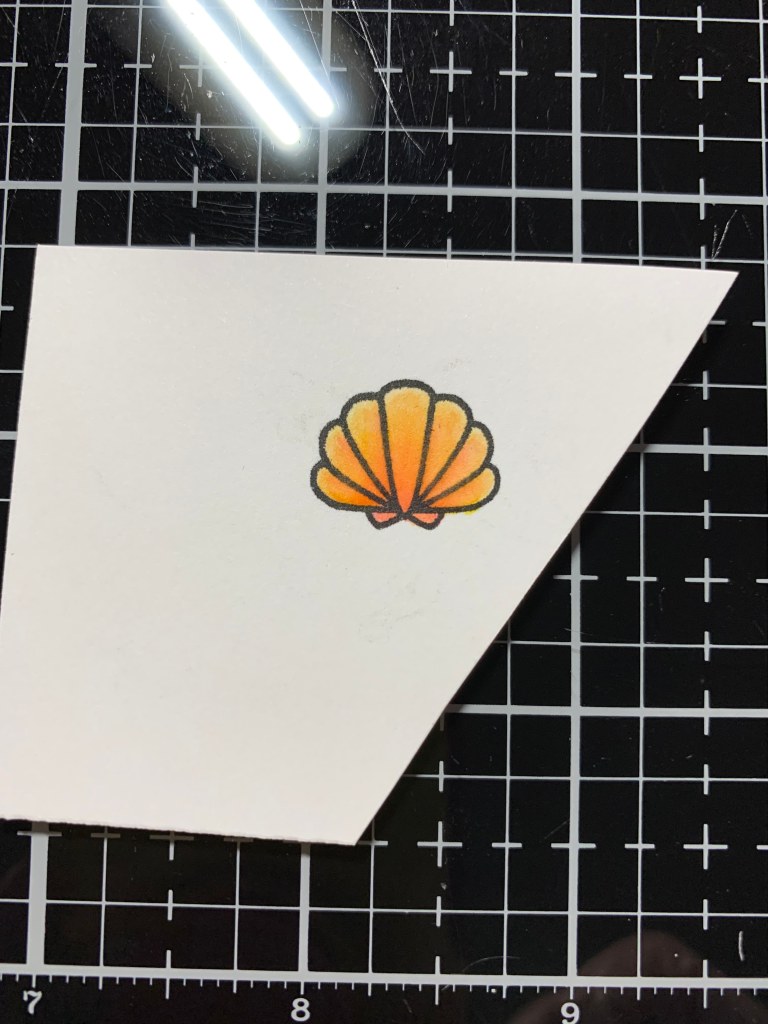
I finish my coloring my adding 021 Light Carmine to the base of the shell and add 050 Yellow to the rest and blend the colors with my Water Brush. I use the coordinating Mermazing Die-Namics to cut out the shells and seaweed, running them through my Big Shot.

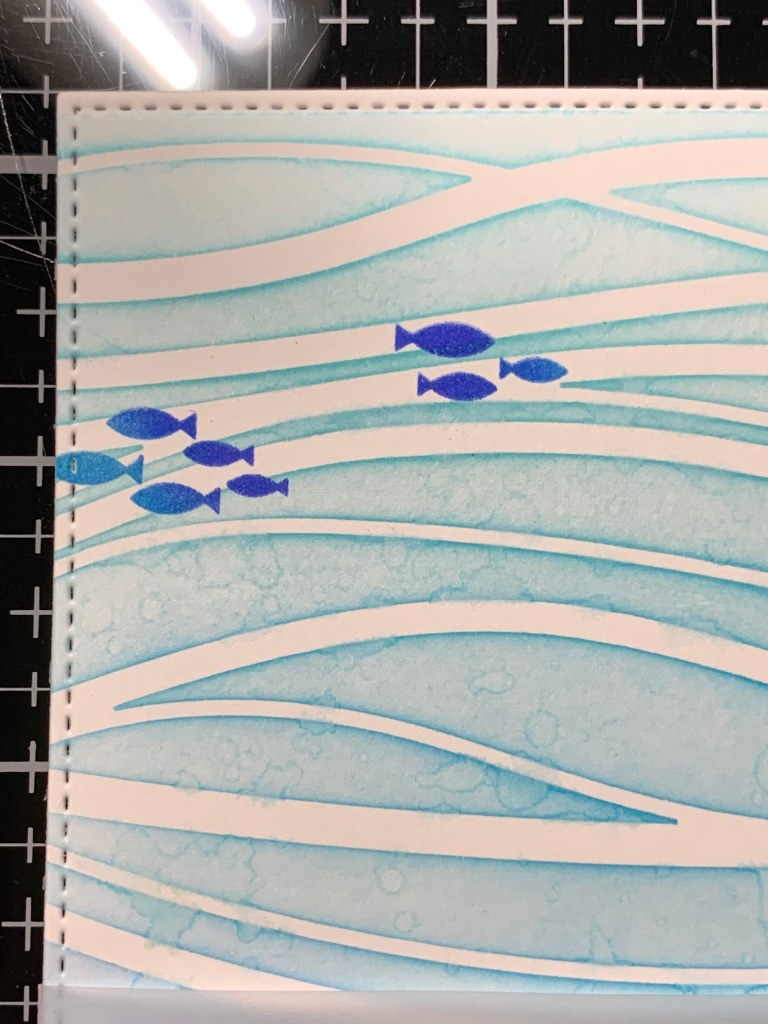
I want to stamp some small solid fish images directly onto my panel. To do this I place the panel into my MISTI and temporarily layout my die cut image to figure out my stamp placement. I then take the two small fish images from the Mermazing Stamp Set and stamp them onto the panel using the same inking technique with my Mini Blending Brushes and ink colors as I did earlier with the seaweed images.
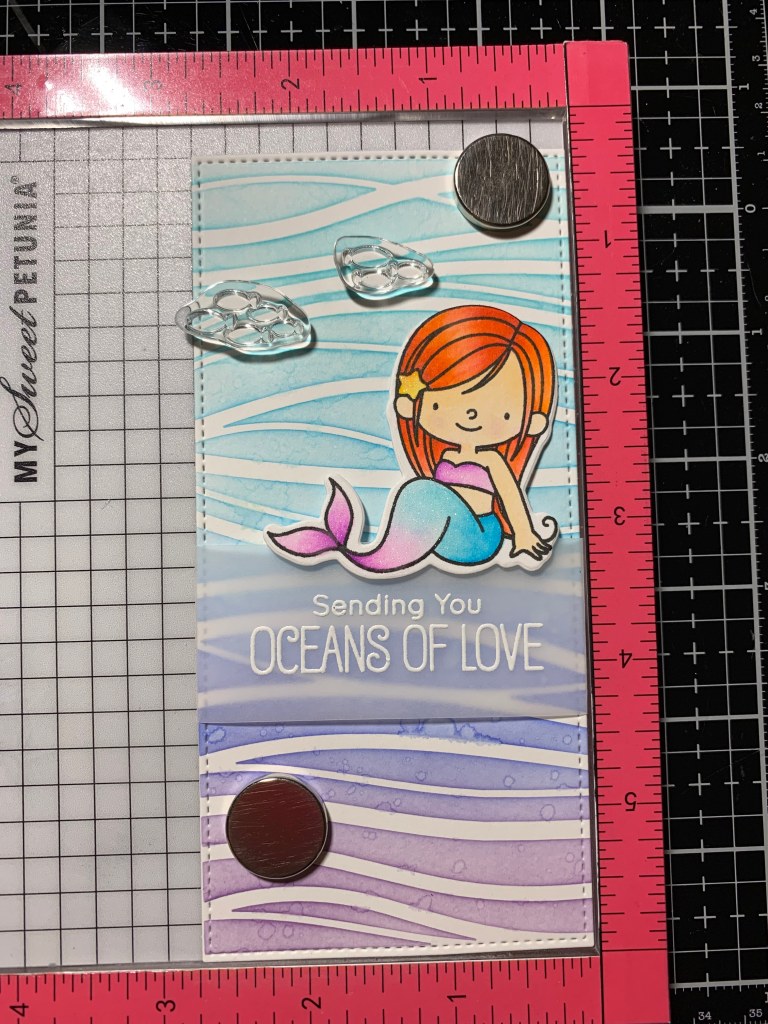
Next, I take the layering rectangle die from the Master Layouts 7 Die Set and cut out of White Cardstock. I then adhere the two panels together using Double Sided Tape Adhesive. To pop my image up a bit I add Foam Tape to the back of the mermaid then adhere her just above the sentiment. Using Liquid Glue I adhere the shell and seaweed images onto the panel, sorry I missed taking photos of this step.

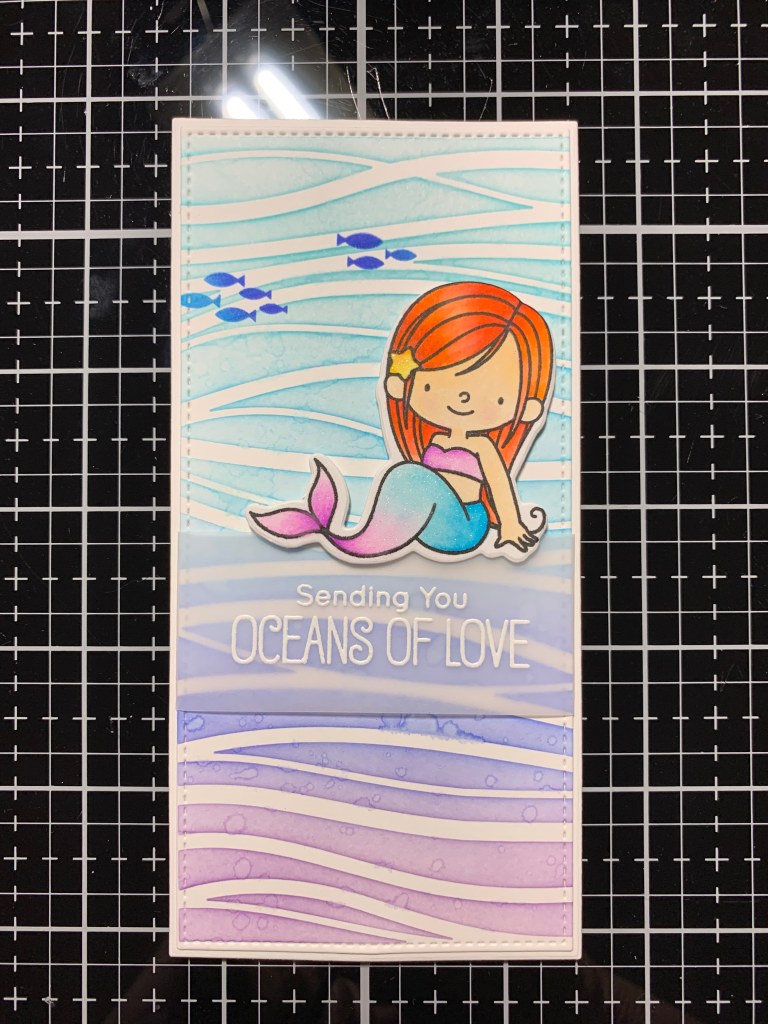
For my card base I place a 6 1/4″ x 6 1/2″ piece of Lovely Lavender Cardstock into my Scor Buddy and score it at 3 1/4″ creating a side folding mini slimline card base. To add some dimension, I trim a 2 1/4″ x 5 1/4″ piece of Fun Foam using my Guillotine Paper Trimmer and adhere it onto the back of my panel using Double Sided Tape Adhesive then adhere it onto the card base. Using my Jewel Picker I add some Water Droplets with Liquid Glue and this completes my card.


I hope you enjoyed today’s card. What a fun stamp set to play with!! The images are so cute and large enough that it makes coloring simple and easy for any coloring medium. I really love the vibrancy Zig markers create. Anytime I use my Zig markers I make sure that I am coloring on Bristol Smooth cardstock. There is something about this cardstock that allows the ink to easily blend. If you are new to my blog, I have recently started up this blog on a new platform. If you are interested in seeing my past blogs and projects, please visit kampakreations.blogspot.com. All future blogs will be posted on my new platform.
If this is your first time visiting my blog, welcome and I hope you return. If you are a returning visitor, thank you so much for your support!
If you would like to be notified by email each time I post a new project, there is an option to add your email (located on the right side of my page) then hit the subscribe button. Should you have any questions or comments please leave them in the comments section. I’d love to hear from you and what you thought about today’s card.
Thank you for visiting and I hope you come back soon!
Happy Stamping and God Bless!!
Jeannie

Jeannie, great blog! And you did it all on your own! Lovely! This card is also super cute 🙂
LikeLike
Thank you so much Jess!!
LikeLike
Jeannie (sorry if this posted twice) the blog looks great! Yahooo! You did it!
Also this card is super cute 🙂
LikeLike
Thank you Jess, and for helping along the way!!
LikeLike
This turned out very lovely. I like how you colored the background and the mermaid.
LikeLike
Thank you so much Nana!!
LikeLike
Very cute card! Love it. Love your impeccable blending as well. Just wondering how you like your Wendy Vecchi Make Art Stay-tion? Looks like it would make ink blending easier!
Thanks for all your great ideas!
LikeLike
Thank you for your kind words Val!! I just have the small 7 x 7 Stay-tion, and I really like it!! It does make ink blending easy! I did use Pixie Spray on this stencil before holding it down with the magnets only because there are some delicate areas on this stencil. I like the Stay-tion as the magnets hold everything down nice without snapping together onto each other.
LikeLiked by 1 person
Great card!
LikeLike
Thank you so much Patty!!
LikeLike