I want to start out by thanking everyone for the support and nice comments you all leave for me. I truly appreciate the support of this blog!! I enjoy card making and bringing my creations to you, this wouldn’t be possible without your support, so again, thank you!! *Affiliate links are used at no additional cost to you. When you purchase products through my links I receive a small commission from these sales, which helps me to purchase new products for the cards I share on my blog. Thank you so much for your support, it is greatly appreciated!! Don’t forget to check out my previous blog for MANY more card projects! You can find them HERE.
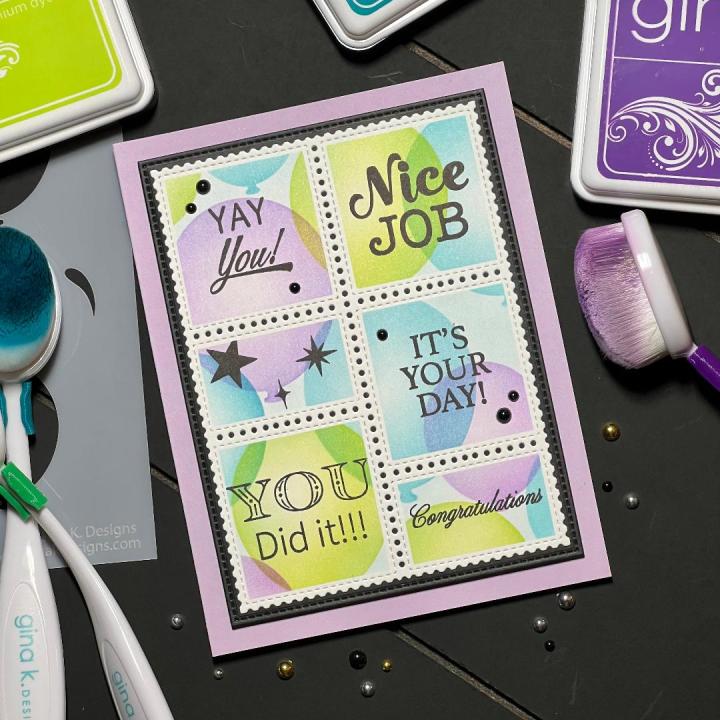
Today, I have a fun card that I created using the new Big Congrats stamp set, illustrated by Debrah Warner for Gina K Designs April release. This set is filled with so many fun sentiments and greetings that are perfect for any occasion to say “Congratulations!” With so many different font styles to choose from, this set will easily go on any card! I chose to make a fun postage grid style card today. I used the Master Layouts 14 die set and masked off each section using Gina’s Masking Magic Strips. The 1/4″ strips fit perfectly within the stitched areas of this die, not only allowing you to ink blend each section, but it allows stamping or ink blending right up to the edge of the tape. There is also a coordinating stencil available for purchase that works for quick and easy ink blending, that would have been perfect for this card, however, I wanted to stencil the balloons in the background so I figured the masking tape would be easiest. Also, I noticed that the stencil grid does not allow for stamping right up against the edge, so if there is any stamped image that runs off the edge, I wouldn’t be able to get complete stamping. I like both products for different reasons. All of the stamps, cardstock, dies and inks I use are from Gina K Designs. Let’s get started!!

I will be doing all of my work on my Tim Holtz Glass Media Mat.
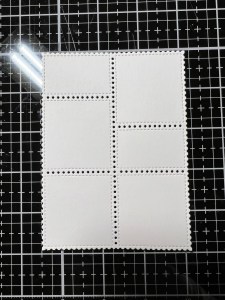
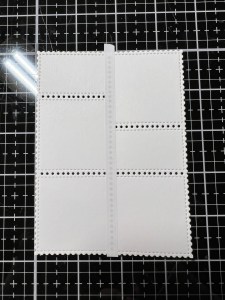
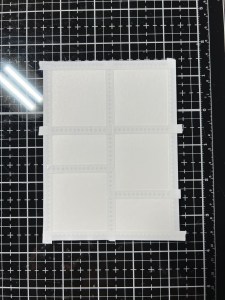
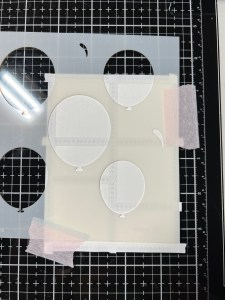
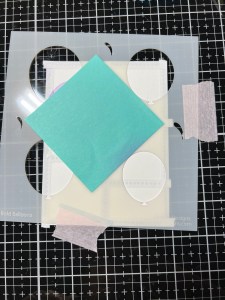
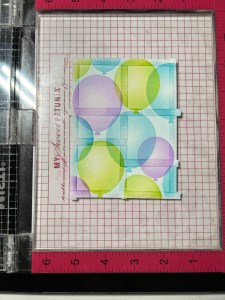
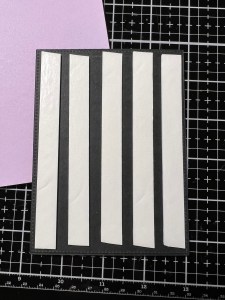
To start, I take the postage die from the Master Layouts 14 Die Set and cut out of Layering White Cardstock, running them through my Platinum 6 Die Cutting Machine. I then take 1/4″ strips from the Masking Magic Strips and lay them over all of the perforated sections of the die cut piece, including all four edges.

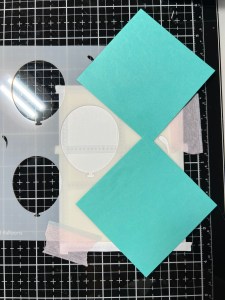
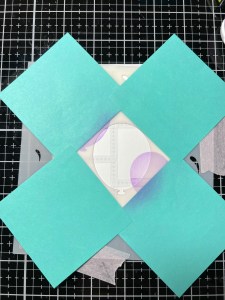
Next, I choose one of the balloons from the Bold Balloons Stencil and place it over my panel, taping it down so it doesn’t shift. I then tape some sticky notes to mask off around my image to prevent any unwanted ink getting onto the panel. Using my Blending Brush, I blend Wild Lilac Ink over the opening of the stencil. I concentrate the ink blend more around the edges of the balloon, keeping it a bit lighter towards the center. **After each ink blend, I take soft cloth to remove the ink from the stencil so that I don’t cross contaminate ink colors on the balloons.
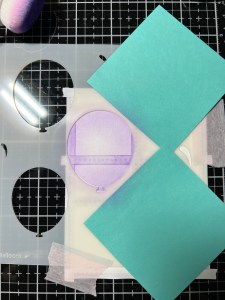
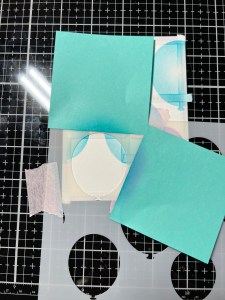
I remove the stencil and choose another balloon, this time of different size. I then tape down the stencil and again, mask off the balloon. Using the same Wild Lilac Ink, I blend as I did previously, keeping the center a bit lighter. *When blending balloons in assorted colors, I like to scatter and blend them in the same color before moving onto the next color. For me, it is easier to visualize the arrangement and the color of each balloon. This finishes up my first color and I can now move onto the next color. In the end, I ended up adding another lilac balloon in the lower left corner.

Making sure my stencil is clean, I now place the largest balloon over the panel and secure it down with tape. I place sticky notes around the balloon and use my Blending Brush to blend Turquoise Sea Ink, again, keeping the blend lighter in the center. I repeat this process, choosing different sizes of balloons until I am satisfied with the color arrangement. **When adding different colored balloons, I like to overlap previous balloons a bit. This gives a more natural flow of the balloons and I love the transparent look it gives!


Again, making sure my stencil is clean from the turquoise ink, I choose a balloon size and place the stencil over an open area, overlapping previous balloons and secure the stencil down. I mask off the balloon then use my Blending Brush to blend Key Lime Ink, keeping the center lighter in color. I clean off the stencil and move it around, blending the lime ink in various sizes until I am satisfied with the panel. *If see any areas the need one of the other colors, I go back and add them. I like to add portions of the balloons, hanging off the edges of the panel… this adds to the natural look of the floating balloons.

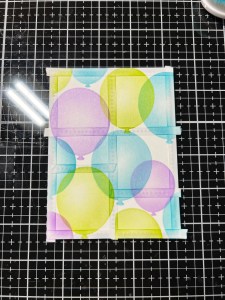
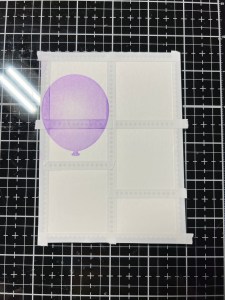
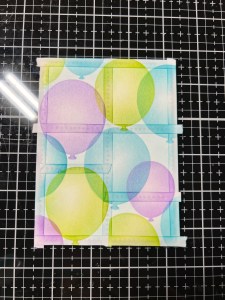
Now that my balloons are all added, I take my Blending Brush with the leftover Turquoise Sea Ink on the bristles and lightly blend around the edges of each window of the panel, this defines each section and helps frame everything.
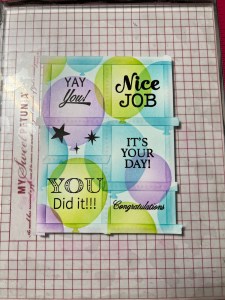
Next, I place the panel onto my Grip Mat that I have in my MISTI Stamp Positioner. I then take multiple greetings from the Big Congrats Stamp Set and place them onto each section of my panel. For the center section on the right side, I choose a sentiment from the Happy Hydrangea Mini Stamp Set. For the center left section, I use the star from the Big Congrats Stamp Set and two stamps from the Birthday Sparkle Stamp Set. I then pick up all of the stamps with the door of my MISTI and stamp them onto the panel using Amalgam Obsidian Black Ink.

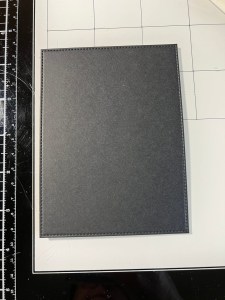
Now for the fun part, the big reveal!! I carefully remove the Masking Magic Strips, and just look at how beautiful each section is! I am always amazed at how evenly sectioned the ink blending is using the masking strips, this is such a fun set to play with!! Next, I take the stitched rectangle layering die from the same Master Layouts 14 Die Set and cut out of Black Cardstock, running them through my P6. Using Liquid Glue, I layer the panels together. ***Did you know that the stitched layering die from this Master Layouts 14 Die Set was made to also layer onto the largest rectangle die from Master Layouts 1 Die Set?! If you own both sets you now have the option for a plain or stitched panel when layering using ML1… I love how Gina thinks of us and coordinates some of these sets to work together!
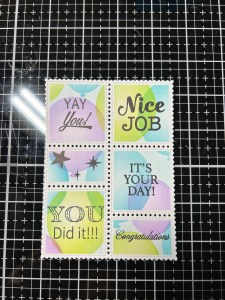
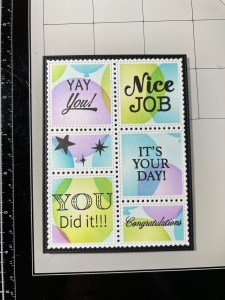
To give my panel a little lift I add Foam Tape to the back then adhere it onto a Lovely Lavender Cardstock card base.

Using my Pick & Stick Tool, I add a few Black Pearls with Liquid Glue and this completes my card.
I hope you enjoyed today’s card. Such a fun and versatile stamp set to congratulate someone for so many different occasions! I used only a few of the smaller stamps, this set has so many more sentiments and greetings to choose from. If you like this set, Deborah has two more sets like this…. Big Birthday and Big Thanks. I love having sets that give so many options to choose from! Thank you so much for visiting my blog!
If this is your first time visiting my blog, welcome and I hope you return. If you are a returning visitor, thank you so much for your support!
If you would like to be notified by email each time I post a new project, there is an option to add your email (located at the top menu, or on the right side of my page) then hit the subscribe button. Should you have any questions or comments please leave them in the comments section. I’d love to hear from you and what you thought about today’s card.
Thank you for visiting and I hope you come back soon!
Happy Stamping and God Bless!!
Jeannie
