
I want to start out by thanking everyone for the support and nice comments you all leave for me. I truly appreciate the support of this blog!! I enjoy card making and bringing my creations to you, this wouldn’t be possible without your support, so again, thank you!! *Affiliate links are used at no additional cost to you. When you purchase products through my links I receive a small commission from these sales, which helps me to purchase new products for the cards I share on my blog. Thank you so much for your support, it is greatly appreciated!! Don’t forget to check out my previous blog for MANY more card projects! You can find them HERE.
Tonight is Gina K Designs August release and the new products are now available on her website!! The new release can also be found HERE. Be sure to check out Gina’s live presentation, starting at 7:00 PM CST where she will showcase all of the new products up close as well as talk with some of the illustrators, showing lots of card examples. Included in this release is a brand new kit, lots of stamps and dies and a new Master Layouts die set! I can’t believe she is releasing #17 already!! I LOVE the Master Layouts, they are so creative and make layering panels so easy… I use at least one ML die set on almost every card I make! Today, I have a card that I made using the Daily Grind stamp set, illustrated by Beth Silaika for Gina’s release. This stamp set is filled with many coffee themed images as well as lots of fun sentiments! This set is available as a stand alone stamp set or stamp/die bundle. All of the stamps, dies, cardstock (except for my focal image) and inks I use on today’s card is from Gina K Designs. Let’s get started!!

I will be doing all of my work today on my Tim Holtz Glass Media Mat.
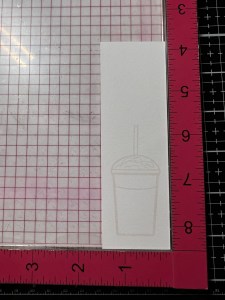
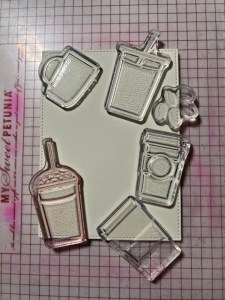
To start, I place a piece of Bristol Smooth Cardstock onto my Grip Mat, into the corner of my Misti Stamp Positioner. *This grip mat holds my cardstock in place without having to use magnets. I then choose an image from the Daily Grind Stamp Set and stamp it onto my cardstock using Whisper Ink. This is a great ink color to use for no-line coloring or to use as a guide (which is what I will use it for) for your coloring. *I will leave my stamp attached to the door of my MISTI in the same position to stamp my image again, after my coloring.

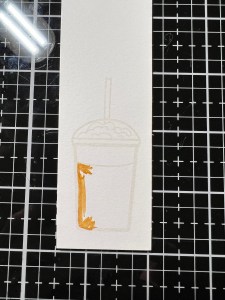
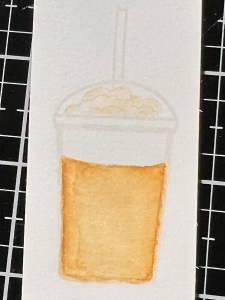
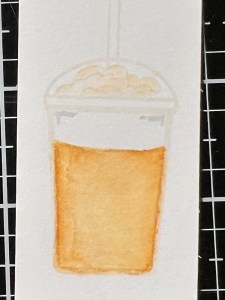
For my coloring, I will be using my Zig Clean Color Real Brush Markers as well as a Water Brush. Before coloring, I like to swatch out some colors I may want to use onto a scrap piece of the same cardstock I stamped my image onto. This helps me to decide which shade to go with and see how the color blends on the cardstock. To start my coloring of the drink, I take Mustard – 067 and draw some color on the left side of the cup. I then take my Water Brush filled with clean water and blend the color out, towards the center of the image. I then add the same color along the right side of the image. Again, I take my Water Brush and blend the color out towards the center of the image.
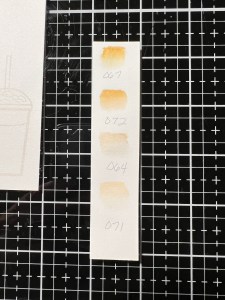
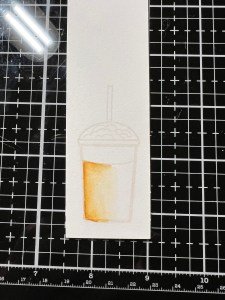
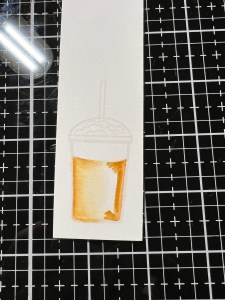
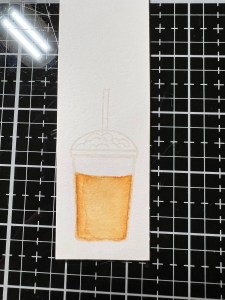
To add some color to the whipped topping, I add Light Beige – 071 to the bottom areas of the outline then blend the color using my Water Brush. To create a slight shadow under the lid, I add a small amount of Light Gray – 091 to the corners, then blend the color out, using my Water Brush.

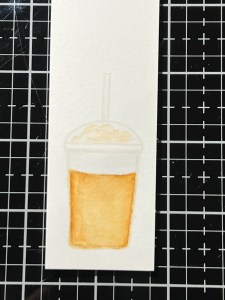
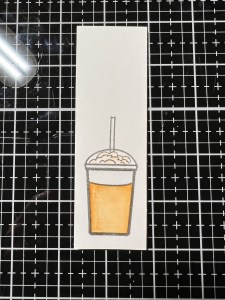
Now that my coloring is complete, I place my colored cardstock piece back into my MISTI and stamp it again using Stormy Sky Ink to define the details and lines. This stamp set is also available as a stamps/die combo, however, I do not have the dies so I fussy cut my image out using my Micro Tip Scissors. I will set my image aside as I work on the other elements of my card.


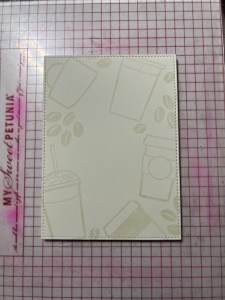
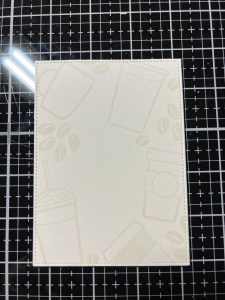
Taking the largest stitched rectangle die from the Master Layouts 2 Die Set, I cut out of Ivory Cardstock, running them through my Platinum 6 Die Cut Machine. I then place the panel onto my Grip Mat and place several images from the Daily Grind Stamp Set around the outside of my panel, allowing them to hang off the edges. I pick the stamps up with the door of my MISTI and stamp them onto the panel using Whisper Ink.
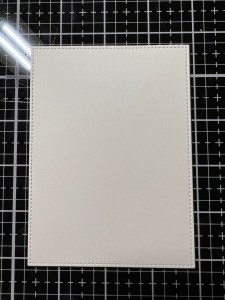
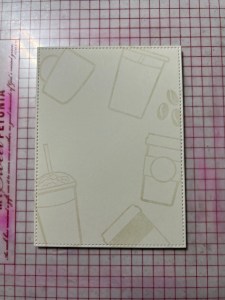
Using the same coffee bean images from the Daily Grind Stamp Set, I stamp them using Whisper Ink to fill in the open areas of the panel.
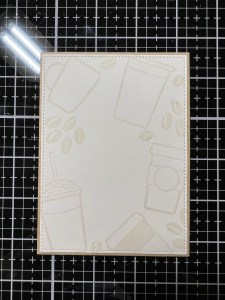
Next, I take the largest layering rectangle die from the same Master Layouts 2 Die Set and cut out of Kraft Cardstock, running them through my P6. Using Liquid Glue, I adhere the two panels together. I then mount them onto a Barely There Cardstock card base using Liquid Glue.


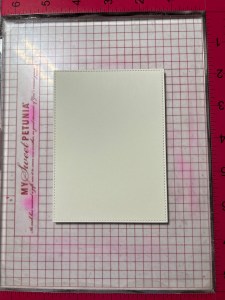
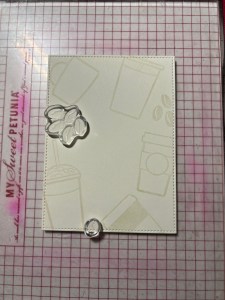
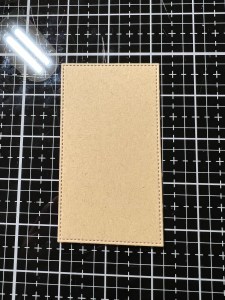
To create a base for my focal image, I take the smaller stitched rectangle from the same Master Layouts 2 Die Set and cut out of Kraft Cardstock, running them through my P6. I wanted to add a little interest to this panel so I place the Harvest Flourish Stencil over my panel and using a Sponge Dauber, I blend White Pigment Ink over the stencil and fade it out so that most of the design is in the center. To add some dimension to my card, I add Foam Squares to the back of the panel then mount it onto my card front, just off center. I then add Foam Squares onto the back of the colored image and mount it onto the center of my panel.


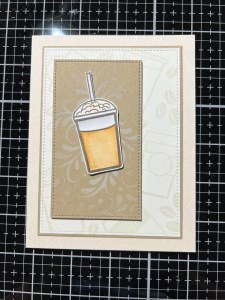
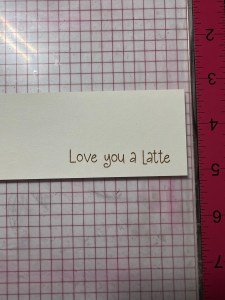
Next, I choose a sentiment from the same Daily Grind Stamp Set and stamp it onto Ivory Cardstock, using Warm Cocoa Ink. I then trim the sentiment down using my Guillotine Paper Trimmer and adhere it just below my focal image with Liquid Glue, allowing it to hang off the edge of the panel.


Using my Pick & Stick Tool, I add a few Dew Drops with Liquid Glue and this completes my card.
I hope you enjoyed today’s card. I really love the results I got with stamping the background using Whisper Ink. This color was the perfect shade to add subtle images without making the panel look too busy. This is the perfect stamp set for creating cards to give to the coffee loving people in our lives! It can be mixed and matched with so many other sets to fit any occasion. With so many different coffee lovers out there, this set has a coffee style for everyone! Don’t forget to check out the new release and the live at 7:00 PM CST if you are able to. If you miss Gina’s live, you can always watch it on replay over on Gina’s YouTube channel.
If this is your first time visiting my blog, welcome and I hope you return. If you are a returning visitor, thank you so much for your support!
If you would like to be notified by email each time I post a new project, there is an option to add your email (located at the top menu, or on the right side of my page) then hit the subscribe button. Should you have any questions or comments please leave them in the comments section. I’d love to hear from you and what you thought about today’s card.
Thank you for visiting and I hope you come back soon!
Happy Stamping and God Bless!!
Jeannie

Oh so cute!
LikeLike
Thank you so much, Joanne!!
LikeLike