
I want to start out by thanking everyone for the support and nice comments you all leave for me. I truly appreciate the support of this blog!! I enjoy card making and bringing my creations to you, this wouldn’t be possible without your support, so again, thank you!! *Affiliate links are used at no additional cost to you. When you purchase products through my links I receive a small commission from these sales, which helps me to purchase new products for the cards I share on my blog. Thank you so much for your support, it is greatly appreciated!! Don’t forget to check out my previous blog for MANY more card projects! You can find them HERE.
Here we are in October… can you even believe it!!? It’s time for another Gina K Designs release!! Gina’s October release goes live tonight, starting at 7:00 PM CST and boy oh boy does she have a lot of fun new stamp sets, dies, poly glaze and more in store for us!! You can find the new products HERE. Gina has her live presentation at 7:00 PM CST over on her YouTube channel and Facebook page where she will show all of the new products up close and will have many card examples to share… Gina always makes it so fun! I was sent the “Christmas Begins With Christ” stamp set to create with. This is a beautiful silhouette stamp set featuring the Nativity scene that also includes some beautiful scripture verses and greetings. I was short on time this month so I decided to go with the Oh Holy Night, tree image to create a simple image that I stepped up a bit using foiling, embossing, ink blending and different dies. I also did offset stamping with my focal image which helps the words stand out with a bit of a shadow. I’ve done offset stamping before using pigment inks and stenciling offset, but I think this may be the first time I did it with embossing and it was so much fun! All of the stamps, dies, cardstock, inks and embellishments I use are from Gina K Designs. Let’s get started!!!

I will be doing all of my work today on my Tim Holtz Glass Media Mat.
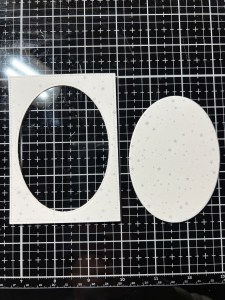
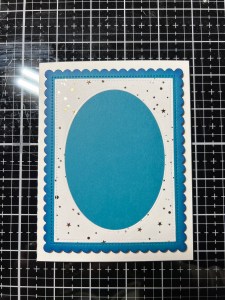
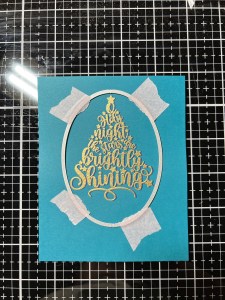
To start, I take the large rectangle die from the Master Layouts 5 Die Set and cut out of a panel of Flurries Poly Glaze, running them through my Platinum 6 Die Cut Machine. I then take the oval die from the Master Layouts 9 Die Set and center it over the rectangle piece then run them through my P6.


Next, I take my rectangle frame and place it into my Carrier Sheet then place a piece of Gold Foil over it (pretty side up) and run them through my Fuse Foiling Machine. I then wave my panel through the air for a few seconds to cool it down then remove the foil, to reveal the beautiful foiled design. ***Be sure when ordering a Fuse Foiling Machine that you choose the correct machine for your country so you get the correct plug for your outlet.


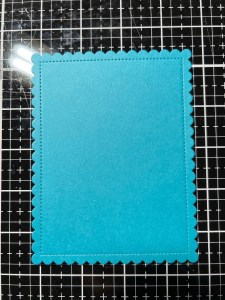
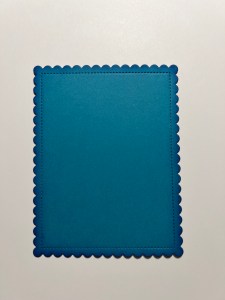
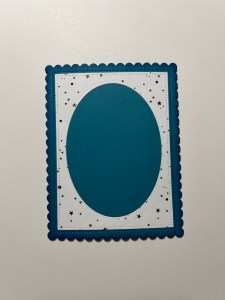
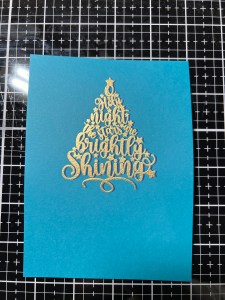
Do create a base for my frame, I take the scalloped rectangle die from the Master Layouts 4 Die Set and cut out of Tranquil Teal Cardstock, running them through my P6. To add some shading to the edges, I take my Blending Brush and blend Tranquil Teal Ink around all four sides of the cardstock. I then take my Mini Blending Brush to blend just the very edges of the scallop using Blue Denim Ink. Using Liquid Glue, I adhere my rectangle frame onto my scalloped panel. I then add Foam Tape to the back of the panel and mount it onto a White Cardstock card base.
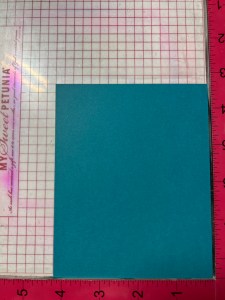
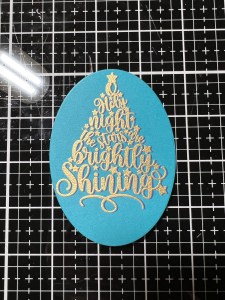
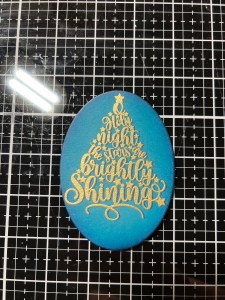
To create my focal image, I place a piece of Tranquil Teal Cardstock onto my Grip Mat that I keep in my MISIT Stamp Platform. I want to create an “offset” image so to achieve this, I place my panel into the corner of my MISTI, but pull it away from the right side about 1/16″. I then choose and image from the Christmas Begins With Christ Stamp Set and stamp it onto my panel using Blue Denim Ink. I stamp it a couple of times to get a nice, solid image. I clean off the stamp using my Tidy Towel but leave it adhered to the door of my MISTI, as I will be stamping this image again and want to keep it in the same position.


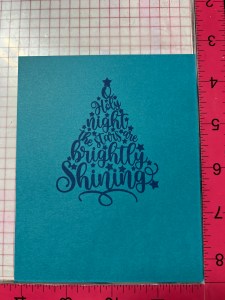
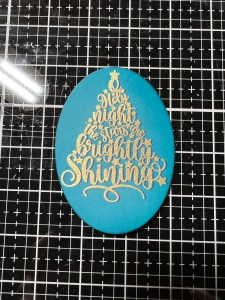
For my next step, the stamped image has to be completely dry, so I use my Heat It Tool to dry the ink that I just stamped until it is completely dry. *To test and see if the ink is dry, I sprinkle on some embossing powder over the image. If there is any powder sticking to the image, I remove it with a dry paintbrush and continue to heat the image then again, sprinkle on embossing powder. I repeat this process until no embossing powder sticks to the image. Now that my panel is completely dry, I place it back into my MISTI, this time placing it tightly into the corner. I then add Anti Static Powder over the image. I then ink up my stamp using Versamark Ink and stamp it onto my panel. The stamped image is now offset. Boy!… did that stamped image make my eyes bug out! I felt like I was looking at it without my glasses, LOL!! Next, I added Gold Embossing Powder over the image then heat set it using my Heat Tool. Here is a close up to better show the offset. I feel like this technique really helps the image to “pop” off the panel. After the embossing powder cools down, I take a soft cloth to gently buff away the anti static powder.
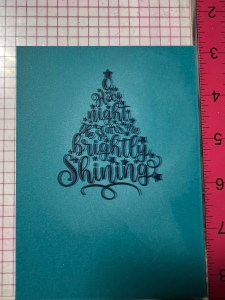

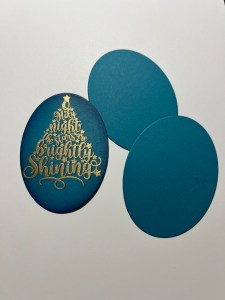
Next, I take the same large oval from the Master Layouts 9 Die Set and center it over my image and hold it in place using my Pixie Tape then run them through my P6. To add some shading to my focal image, I take my Blending Brush and blend Tranquil Teal Ink around the edges of the oval, fading the ink towards the image. I then blend Blue Denim Ink over the very edges of the oval, being careful not to completely cover the previous color. Adding shading, not only adds depth but it also adds a bit of a highlight to the image where the cardstock is un-inked, it kind of gives it a glow.
To add some dimension to my focal image, I use the same die to cut out of Tranquil Teal Cardstock two times. Using Liquid Glue, I stack and adhere the ovals together and set them aside.

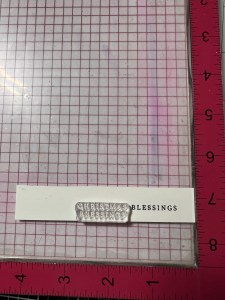
For my sentiment, I really like the “Christmas Blessings” stamp from the same Christmas Begins With Christ Stamp Set and thought it went so well with the focal image. However, I wanted a sentiment that was a longer strip, and not stacked. To achieve this orientation, I placed a strip of White Cardstock into my MISTI and placed the stamp onto it then picked it up with the door of my MISTI. I used a piece of Pixie Tape to place over the word “Christmas” then inked up the stamp using Amalgam Obsidian Black Ink. Before stamping my image, I remove the tape then I can stamp the image onto my cardstock.
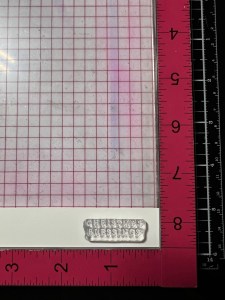

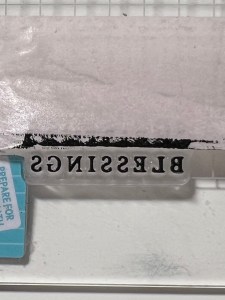
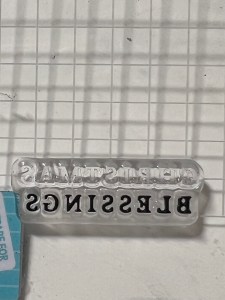
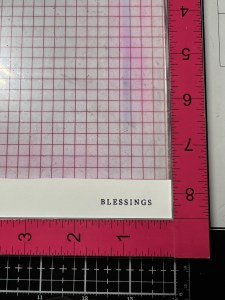
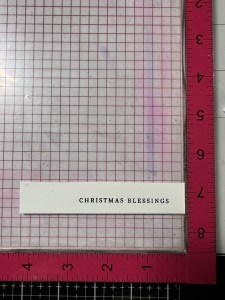
I clean off my stamp then line up the word “Christmas” just before my previous stamping. I repeat the process, this time I tape off the word “Blessings”, ink up the stamp then remove the tape before stamping onto the cardstock. I now have “Christmas Blessings” in a straight line orientation instead of it being stacked.

Using my Sentiment Strip Dies, I choose one that will fit my sentiment then run them through my P6. I cut two more out of White Cardstock. Using Liquid Glue I stack and adhere my sentiment over one of the plain die cuts. I then cut the other one into two small pieces and glue them onto the back and end of my sentiment strip. Remember, I stacked my focal image earlier, so I needed to make up the height difference with my sentiment. Using Liquid Glue I adhere my focal image into the oval opening, then glue the sentiment strip across my focal image with the right side hanging off.


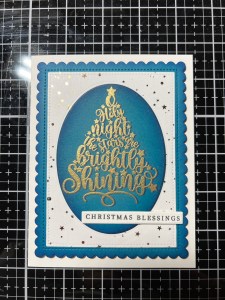
Using my Pick & Stick Tool I add a few Gold Pearls with Liquid Glue and this completes my card.
I hope you enjoyed today’s card and picked up some tips along the way. This was a fun watching this card come together, I had in mind that I wanted to use the worded tree image for my focal point but thought just plain embossing might be too flat? So I thought I would add a darker ink to offset a little, making the image stand out a bit more and loved the results!! I am really loving the Poly Glaze panels that Gina has come out with. I have many favorites, but my go-to seems to be the Flurries because it gives a soft background to so may different layouts! Then there are the Poly Glaze sentiments and greetings… Oh, My!!! Speaking of greetings… have you checked out the brand new incentive stamp set for this month?? Such beautiful fonts, and Gina also has them in Poly Glaze and the dies will work for both!! The stamp set is FREE with any order of $75.00 or more (before tax and any discounts). You do not have to add it to your order, it will automatically ship with your order. If you end up placing a second qualifying order during the month and would like an alternative set, be sure to write your request in the comment box of your order before placing. Free shipping is achieved when your order reaches $50.00 or more (before tax and any discounts). Gina is so generous with her free shipping and incentive sets! *Also, the Intri-Cut Die Cutting Machine and Fuse are both back in stock!!! If you can’t watch Gina’s live tonight, you can always catch the replay on her YouTube channel.
If this is your first time visiting my blog, welcome and I hope you return. If you are a returning visitor, thank you so much for your support!
If you would like to be notified by email each time I post a new project, there is an option to add your email (located at the top menu, or on the right side of my page) then hit the subscribe button. Should you have any questions or comments please leave them in the comments section. I’d love to hear from you and what you thought about today’s card.
Thank you for visiting and I hope you come back soon!
Happy Stamping and God Bless!!
Jeannie
