
I want to start out by thanking everyone for the support and nice comments you all leave for me. I truly appreciate the support of this blog!! I enjoy card making and bringing my creations to you, this wouldn’t be possible without your support, so again, thank you!! *Affiliate links are used at no additional cost to you. When you purchase products through my links I receive a small commission from these sales, which helps me to purchase new products for the cards I share on my blog. Thank you so much for your support, it is greatly appreciated!! Don’t forget to check out my previous blog for MANY more card projects! You can find them HERE.
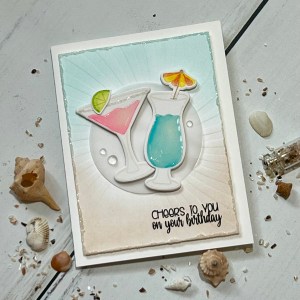
Today, Gina K Designs November release is live!! Gina has SO many new products, including a brand new kit as well as some pretty big surprises for us!! One of the big surprises is Gina’s Mini Intri-Cut Die Cutting Machine!! I haven’t purchased the full size Intri-Cut Die Cutting Machine yet, as I already have a machine (it is on my wish list)… but this mini??? I will be placing my order for it, tonight!!! Also included in this release, is a Guillotine Paper Trimmer, Multi-Purpose Scoring Board, Corner & Notch Punch as well as a Starter/Travel Tool Bundle!! You can see the full release HERE. ***With any order placed, you will receive a free Tidy Towel, no code needed it will be added to your order!! Gina has packed so much into this release for us, you can check out her live presentation where she shows everything up close starting at 7:00PM CST on her YouTube channel or her Facebook page. If you are unable to catch the live, you can always watch it on replay on her YouTube channel. For today’s card, I used the new Cheers stamp set, illustrated by Beth Silaika that is filled with all sorts of different drink glasses as well as many puny sentiments! This set is available as a stand alone stamp set or a stamp/die bundle. I chose to go with a tropical theme for my card and used the margarita and daiquiri glasses filled with fruity concoctions! To add a little extra fun to my card, I used glossy accents to create a realistic liquid for my drinks. I also added a thin line of glitter to the edge of my margarita glass to represent salt, and to add a little sparkle, I added the same glitter to edge of my dry embossed panel. All of the stamps, dies, cardstock (except the cardstock I water color on), inks, and stencil are from Gina K Designs. Let’s get started!!
I will be doing all of my work today on my Tim Holtz Glass Media Mat.
To start my card, I place a piece of Bristol Smooth Cardstock onto my Grip Mat that I keep in my MISTI Stamp Positioner then stamp images from the Cheers Stamp Bundle onto my panel using Whisper Ink. *The Grip Mat holds cardstock into place without the need for magnets for perfect stamping!


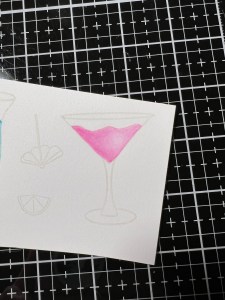
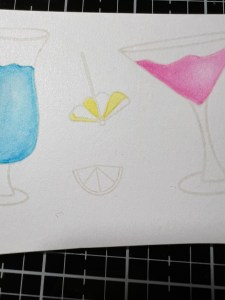
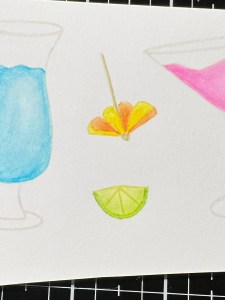
To color my images, I choose the ink cube colors I want to use and press them onto my Glass Mat and use this as my palette (I ended up not using the purple and replaced it with orange). I then take my Water Brush filled with clean water and gently squeeze the barrel to release some water into the bristles, then swirl the brush into a little bit of the Blue Raspberry Ink and apply it to the left portion of my image. I then take my Water Brush and blend the color out towards the right side, filling in all areas of the inside of the glass. *If the bristles become too dry to blend the ink, I gently press the barrel to release more water. For my next image, I clean off the bristles of my Water Brush onto a paper towel then swirl the brush into a little bit of Passionate Pink Ink and apply it to the left side of portion of the image and outline the rest of the area. I then blend the ink out towards the right side of the image. *I do try to leave a lighter, highlighted area of ink just off center to the right of both images.


Next, I add color my last two images. I use the same method as I did with my previous images using Wild Dandelion Ink and Tangerine Twist Ink for the umbrella image and I used Key Lime Ink and Lucky Clover Ink for the lime image.


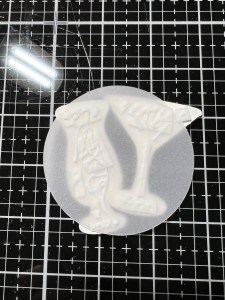
Now that my coloring is complete I take the coordination dies from the same Cheers Stamp Bundle and position them over the images, holding them down with tape. I then run them through my Platinum 6 Die Cut Machine. I also cut out and extra image of both glasses out of White Cardstock to give my images more stability. Using Liquid Glue, I stack and glue the images together. To add a little highlight to the glasses, I take my White Gel Pen and draw a couple of lines and dots.

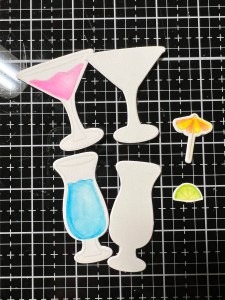

To add some interest and create a liquid look to my glasses, I trace and fill in the colored portion of my glass with Glossy Accents. After allowing the pieces to dry for a couple of hours, I take my Fine Tip Glue Bottle filled with Liquid Glue and apply a very thin line of glue to the front rim of the margarita glass then add Rock Candy Glitter over the glue. I set the piece aside to dry while I work on the panel of my card.


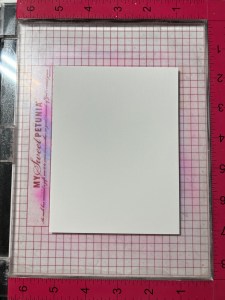
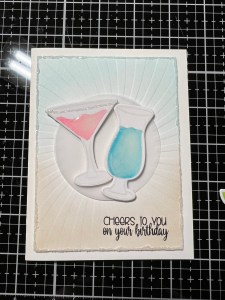
I now take a 3 3/4 x 5″ piece of White Cardstock and with my Blending Brush I blend a very light wash of Sea Glass Ink over the top and a little down the sides. I then blend a very light wash of Kraft Ink over the bottom portion of the panel and up the sides a bit, leaving the center white.


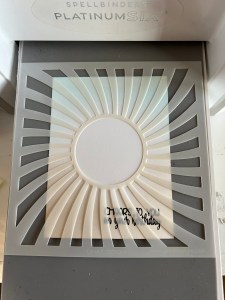
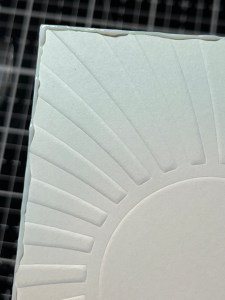
Next, I place the panel into my MISTI and place a sentiment from the same Cheers Stamp Bundle over the lower right corner of my panel. I then stamp the sentiment using Amalgam Obsidian Black Ink onto the panel. Once the ink is completely dry, I dry emboss my panel. I place the panel over an embossing mat then place my Swirled Sun Stencil over the panel, centered and ran them through my P6. **The sandwich order I use is the platform base A, platform top B, embossing mat E, cardstock panel, stencil and adapter plate D, then run them through.


To add some sparkle and interest to my embossed panel, I put some Liquid Glue onto a nonstick surface then dab my finger into the glue and run it down all four sides of the panel. I then sprinkle Rock Candy Glitter over the glue and set the panel aside to completely dry.


Once the glue has dried completely, I add Foam Tape to the back of the panel then adhere it to a White Cardstock card base.


To anchor the images onto my card front, I take the frame die from the Circle Shadow Shaker Die and cut it out of Vellum, running them through my P6 and use the inside piece. I then place add Foam Tape to the backs of my glasses and mount them onto the Vellum circle die cut piece. To adhere the Vellum onto my card front, I add Liquid Glue to the back of the Vellum, only where the glasses are. This helps to hide the glue so it doesn’t show through the vellum once mounted. I adhere the vellum onto my card front then use Liquid Glue to adhere the umbrella and lime images onto the glasses.


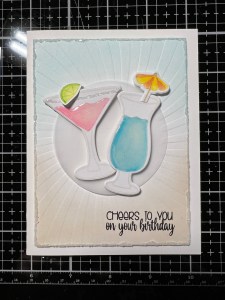
Using my Pick & Stick Tool, I add a few Dew Drops with Liquid Glue and this completes my card.

I hope you enjoyed today’s card and learned some tips along the way. I loved how the glossy accents made the colored ink of the glasses look like actual liquid, and the white glitter pulled the card together by adding a bit of sparkle, giving it a finished look. I hope you are able to check out Gina’s new release, there are SO many wonderful new sets and tools this month! Gina’s Black Friday sales will start today with her offering a generous discount, so grab those things you’ve had on your wish list and enjoy the savings!! Everyone have a blessed Thanksgiving!!
If this is your first time visiting my blog, welcome and I hope you return. If you are a returning visitor, thank you so much for your support!
If you would like to be notified by email each time I post a new project, there is an option to add your email (located at the top menu, or on the right side of my page) then hit the subscribe button. Should you have any questions or comments please leave them in the comments section. I’d love to hear from you and what you thought about today’s card.
Thank you for visiting and I hope you come back soon!
Happy Stamping and God Bless!!
Jeannie
