
I want to start out by thanking everyone for the support and nice comments you all leave for me. I truly appreciate the support of this blog!! I enjoy card making and bringing my creations to you, this wouldn’t be possible without your support, so again, thank you!! *Affiliate links are used at no additional cost to you. When you purchase products through my links I receive a small commission from these sales, which helps me to purchase new products for the cards I share on my blog. Thank you so much for your support, it is greatly appreciated!! Don’t forget to check out my previous blog for MANY more card projects! You can find them HERE.
Gina K Designs January release is now live, the new products can be found HERE. Gina’s live presentation starts at 7:00PM CST and can be viewed on her YouTube channel or Facebook page. She will be showing all of the new products up close, and there will also be a brand new kit!! If you are unable to catch the live, you can watch it on replay over on her YouTube channel. Today, I have a card made with two new sets from the January release. The first set is called, Say It Large, illustrated by Debrah Warner. The second set is called, Pretty Packages 2, illustrated by Melanie Muenchinger that is similar to her first Pretty Packages stamp set from a previous release. Though Pretty Packages 1 & 2 are similar, they each have their own elements and coordinating dies. I wanted to add some foiling to my gift bag image using a Poly Glaze panel… I will show you how I achieved changing the color of my Poly Glaze to coordinate with my card base! All of the stamps, dies, inks and cardstock is from Gina K Designs. Let’s get started!!

I will be doing all of my work today on my Tim Holtz Glass Mat.
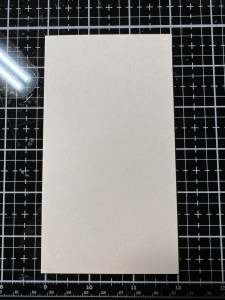
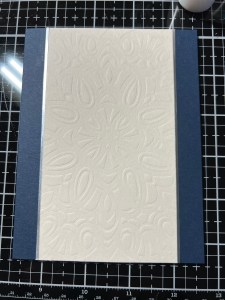
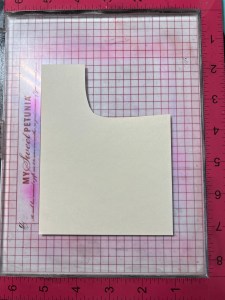
To start my card, I will be working on the background first. Taking a piece of Barely There Cardstock, I trim it down to 3″ x 5 1/2″ using my Guillotine Trimmer. I want to add some texture to this panel using a stencil to dry emboss. To do this, I will be using my Intri-Cut Die Cut Machine… (YES!!! I finally bought myself the Intri-Cut!! There was nothing wrong with my Platinum 6 but I’ve been hearing how much everyone loves their Intri-Cut so I decided to get one and keep my P6 for a backup. Let me tell you, I LOVE the Intri-Cut!! It is so smooth and cuts so nice. If for some reason there is a problem with a detailed die not cutting all the way through, you can turn a knob and adjust the pressure. I also love that there is only a base and a cutting plate for die cutting and using embossing folders, it really does take out the guesswork of sandwich order, especially for those thick 3D embossing folders. Another great feature is the suction cups on the bottom of the machine that prevents it from sliding around or moving while cranking the handle. I have a laminate desktop and it suctions great to it. I cannot say enough positive things.. Ok! Back to the card!!) To dry emboss a stencil, I place my Silicone Mat onto the platform, next, my cardstock piece, then the Square Mandala Stencil and finish off with the cutting mat on top then run it all through my Intri-Cut. I now have a nice textured design on my panel. *This particular stencil does have a center to it’s design so I be sure to center it over my panel before running through.


Using Liquid Glue, I adhere my embossed panel to the center of an In The Navy card base. To add a finished edge to my embossed panel, I use my Guillotine Trimmer and cut very thin strips of Matte Silver Cardstock. To adhere these strips, I take my Fine Tip Bottle filled with Liquid Glue and lay down a very thin line of glue where my embossed panel meets the card base. I then lay the thin silver strip over the glue and press it into place. I also repeat this process for the other side of the panel.


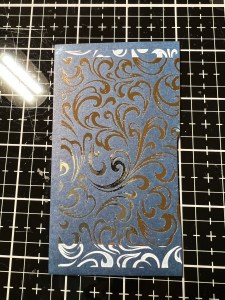
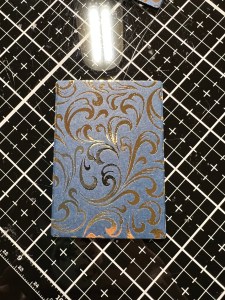
Now for the fun part! I want my gift bag image to have a shiny foiled design so I grab a piece of Vintage Flourish Poly Glaze. I don’t want a stark white gift bag, I want a dark, elegant looking gift bag and I want it to coordinate with my card base. To coordinate my color, I take my In The Navy Ink Pad and drag it directly onto the poly glaze piece, pressing down and gently twisting it a bit to lay down some dark color. I then take a soft dry cloth and buff any ink off that may be laying on the poly glaze. I now have a poly glaze design with a coordinating background color! Next, it’s time to foil, I turn on my Fuse Foiling Machine and set it to heat level 3 and allow it to preheat while I get my piece ready to foil. *The machine is ready when it beeps and the blinking red light turns to a solid green. I cut a piece of Champagne Foil that is just slightly bigger than the area I want to foil. I place my inked poly glaze piece into my Carrier Sheet and place the foil over it, pretty side up. I then close the Carrier Sheet and run it through my Fuse, folded edge first. I give the piece several seconds to cool down then pull back the foil piece to reveal beautiful shine!! Next, I take the rectangle die from the Pretty Packages 2 Stamp & Die Bundle and cut out of my foil piece, running them through my Intri-Cut. I also use the same die to cut out of In The Navy Cardstock two times. Using Liquid Glue I stack and glue the pieces together with the foiled piece on top, this gives the foiled piece some nice stability.


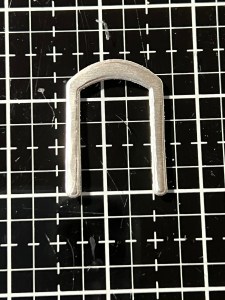
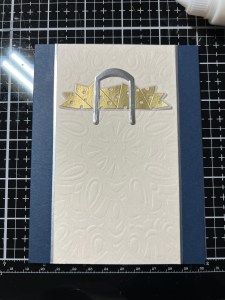
Next, I place a piece of Vellum onto my Grip Mat that I have in my MISTI Stamp Positioner and place one of the tissue paper stamps from the Pretty Packages 2 Stamp & Die Bundle over it then pick it up with the door of my MISTI. I dust the Vellum using my Anti Static Bag then stamp the image using Embossing Ink onto the Vellum. I then add Gold Embossing Powder and use my Heat Tool to heat set the image. Using the coordinating die from the same Pretty Packages 2 Stamp & Die Bundle I cut out my image, running them through my Intri-Cut. For the handle of my gift bag, I take the hand die from the Pretty Packages 2 Stamp & Die Bundle and cut out of Matte Silver Cardstock, running them through my Intri-Cut. Using Liquid Glue, I adhere the handle piece onto my Vellum piece and set it aside to dry while I work on my greeting.


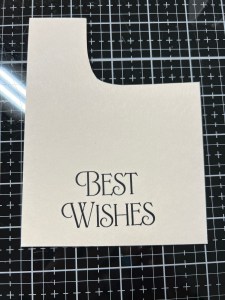
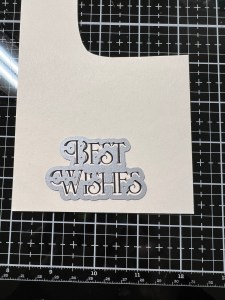
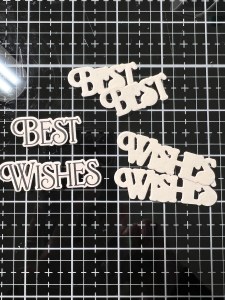
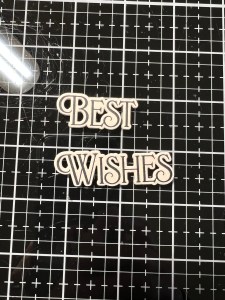
To coordinate with my embossed panel, I take a piece of Barely There Cardstock and place it onto the Grip Mat in my MISTI. Using a greeting from the Say It Large Stamp & Die Bundle, I stamp it onto my cardstock using Amalgam Obsidian Black Ink. After giving it a few minutes to dry, I take the coordinating die from the same bundle and cut out my greeting, running them through my Intri-Cut. I also cut out two additional image out of the same cardstock. Using Liquid Glue, I stack and glue the pieces together. *One thing I noticed about this stamp and die bundle is, the dies cut the greetings out individually so you get a nice tight edge around all of the words, eliminating the open area between words. I love this feature! This is also great if you want to arrange the greetings horizontally instead of stacked.
Now it’s time to assemble all of the pieces. I add Liquid Glue to the back of the handle and place small dots of glue behind the embossing areas of the tissue paper image then adhere it to my card front. I then add Liquid Glue to the back of the foiled gift bag piece and adhere it just over the bottom portion of the tissue paper image. Finally, I add Liquid Glue to the back of the greeting pieces and adhere them over the gift bag.

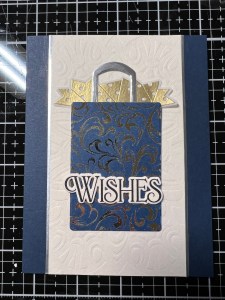

Using my Pick & Stick Tool, I add Gold & Silver Pearls with Liquid Glue and this completes my card.


I hope you enjoyed today’s card and picked up a few tips. Changing the color of the poly glaze background is so fun and allows you to color coordinate your images for any occasion. The best part is, it doesn’t affect the foiling processes! With SO many different poly glaze designs to choose from, the possibilities are endless! I went with a more elegant look that would be great for a bridal shower, wedding or anniversary card. Soft colors would be perfect for a baby card or bright fun colors for a birthday celebration! Don’t forget to check out the January release, there are so many beautiful stamps, dies and other goodies… including a brand new kit that has a free gift included… Gina is always so generous to us!!
If this is your first time visiting my blog, welcome and I hope you return. If you are a returning visitor, thank you so much for your support!
If you would like to be notified by email each time I post a new project, there is an option to add your email (located at the top menu, or on the right side of my page) then hit the subscribe button. Should you have any questions or comments please leave them in the comments section. I’d love to hear from you and what you thought about today’s card.
Thank you for visiting and I hope you come back soon!
Happy Stamping and God Bless!!
Jeannie
