
I want to start out by thanking everyone for the support and nice comments you all leave for me. I truly appreciate the support of this blog!! I enjoy card making and bringing my creations to you, this wouldn’t be possible without your support, so again, thank you!! *Affiliate links are used at no additional cost to you. When you purchase products through my links I receive a small commission from these sales, which helps me to purchase new products for the cards I share on my blog. Thank you so much for your support, it is greatly appreciated!! Don’t forget to check out my previous blog for MANY more card projects! You can find them HERE.
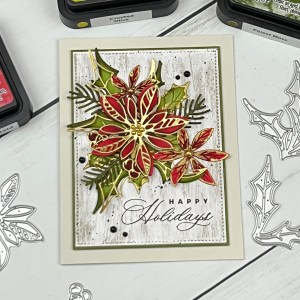
Welcome to my Christmas In July blog post! With some people liking to get a head start on their holiday cards, I thought I would post one of my favorite Christmas cards in hopes of bringing some inspiration to you. I love the look of vintage Christmas and the Seasonal Sketch die set is the perfect set to achieve this look! To fill in my arrangement, I used the Holiday Blooms die set which includes many smaller dies that are perfect to create arrangements on their own or use as filler pieces. I gave the background a whitewashed look using inexpensive acrylic paint and a sponge dauber… such a fun look! I have also included a tag version of this layout at the end of the blog. These are versatile die sets that can be used on any size card or tag. I hope you enjoy today’s post and it inspires you to get a jump start on your holiday cards! Let’s get started!!
I will be doing all of my work today on my Glass Mat.
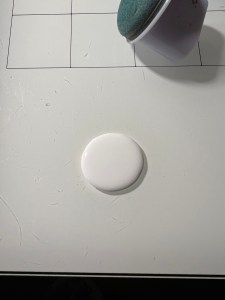
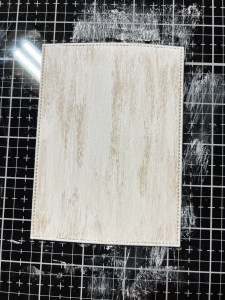
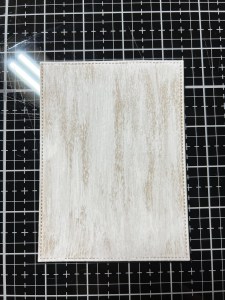
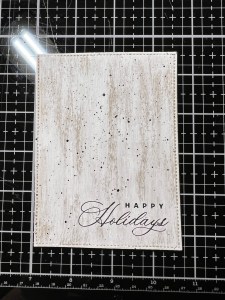
To create a whitewashed panel, I take my largest rectangle stitched die from the Master Layouts 2 Die Set and cut out of Kraft Cardstock, running them through my Intri-Cut Die Cut Machine. I then add some white acrylic paint onto my Glass Mat, then tap my Jumbo Sponge Dauber into the paint. I then swipe the dauber from top to bottom onto the panel. To avoid round marks from the dauber, I start my swiping on the glass mat and not directly on the panel. I continue adding paint to my dauber, applying it to the panel in a swiping motion until I’m happy with the look. I do like to leave a bit of the cardstock showing through for that whitewashed look. Now, I set the panel aside to dry while I work on the other elements. *I use the cheap .99 cent kind of acrylic paint that can be found at Walmart.


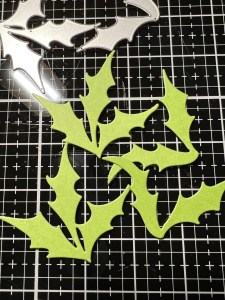
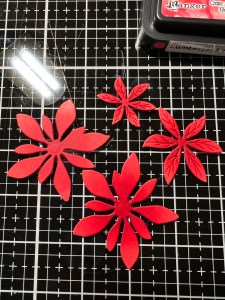
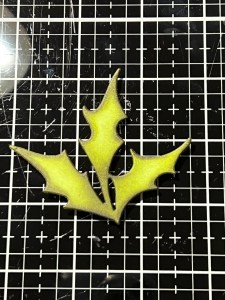
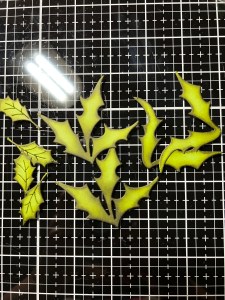
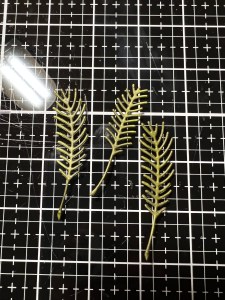
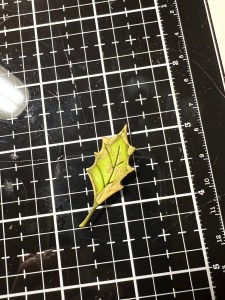
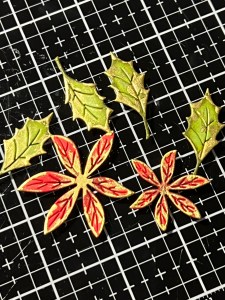
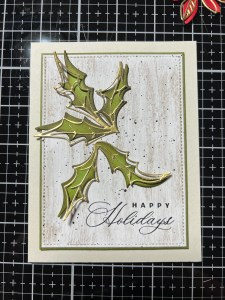
Taking my Seasonal Sketch Die Set, I take the poinsettia and berry dies and cut out of Christmas Red Cardstock. From the same die set, I take the leaves dies and cut out of Grass Green Cardstock, and cut the outline dies from Matte Gold Cardstock. From the Holiday Blooms Die Set, I cut the small poinsettias from Christmas Red Cardstock, the holly leaf (three times) from Grass Green Cardstock and the pine sprigs from Fresh Asparagus Cardstock, running them all through my Intri-Cut.


Now, I want to add some shading to my die cut pieces. For the poinsettias, I use my Mini Blending Brush to blend Lumberjack Plaid Ink over the center, fading the ink out towards the end of the petals. To deepen the centers, I blend Aged Mahogany Ink and fade out, being careful not to cover all of the previous color. I do the same with the berries, making them a bit darker.

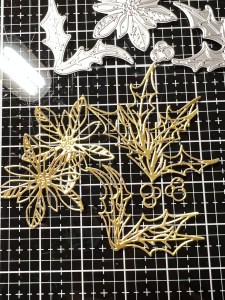
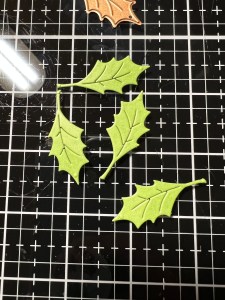
For the leaves, I use my Mini Blending Brush to blend Crushed Olive Ink around the outside of each leaf, fading the ink towards the center. I then blend Forest Moss Ink around the very edges, being careful not to fully cover the previous color. Using Liquid Glue, I adhere the gold outline die cuts over my blended pieces, a bit offset. For the pine sprig, I blend Forest Moss Ink.
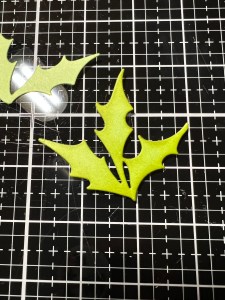

To add gold accents to the smaller images, I drop some Gilded Foundry Wax onto my Glass Mat and use my finger to pick it up and add it to the die cut pieces. I then take my Heat Tool to heat the wax until it is melted and shiny. I love adding this to add a rustic looking shine.

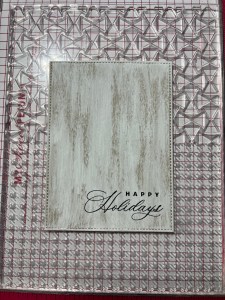
Now that my pieces are completed, I place my background panel into my MISTI Stamp Positioner and stamp a greeting from the Graceful Holiday Greetings Stamp Set onto the lower right portion, using Versafine Claire Nocturn Ink.
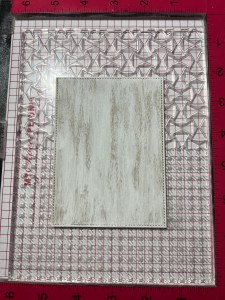
Next, I take the largest rectangle die from the Master Layouts 2 Die Set and cut out of Fresh Asparagus Cardstock, running them through my Intri-Cut. Using Liquid Glue, I adhere my two panels together. To give my panel a little dimension and separation from the card base, I cut two panels using the largest stitched rectangle die from the same Master Layouts 2 Die Set then stack and glue them to the back of my panel and finally adhere them onto a Whisper Cardstock card base, which is a piece of cardstock, cut to 5 1/2″ x 8 1/2″, then scored at 4 1/4″.


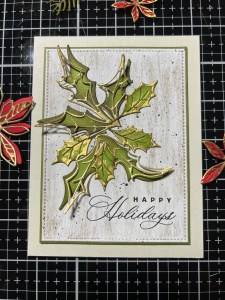
Now it’s time to start assembling my die cut pieces. I start by using Liquid Glue to first glue down the large leaves, followed by the holly then pine sprigs. Next, I glue in place the small poinsettias. For the large poinsettia, I add a Foam Square to the center and adhere it down in the center of the greenery and finally, I tuck the berries and glue them down.
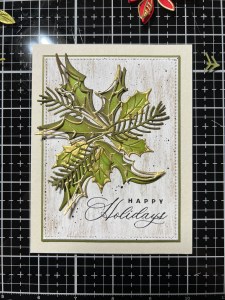
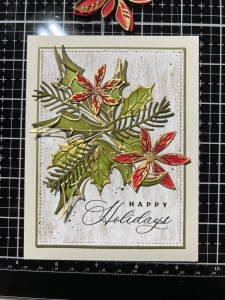

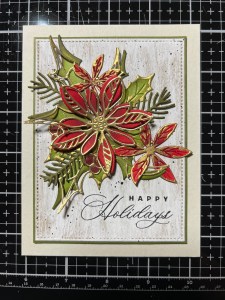
To finish off my card, I use my Pick & Stick Tool to place Gold Pearls to the center of the poinsettias then scatter some Black Pearls using Liquid Glue and this completes my card. I’ve also included a tag version of this layout using a different color combo and greeting.

I hope you enjoyed today’s card and it inspired some ideas for your holiday cards. I love using these dies with the whitewash technique for a vintage feel. Adding foundry wax I feel, really compliments and completes the look. While I used the whitewash on kraft, any color of cardstock can be used and looks great, it is such a fun technique! Do you like to mass produce one design for your holiday cards, or do you make many different designs or layouts? I mostly mass produce but change up the colors. I do however, like to make more detailed and involved cards for a handful of friends and family. While I enjoy making cards for all occasions, my favorite are baby and Christmas cards!
If this is your first time visiting my blog, welcome and I hope you return. If you are a returning visitor, thank you so much for your support!
If you would like to be notified by email each time I post a new project, there is an option to add your email (located at the top menu, or on the right side of my page) then hit the subscribe button. Should you have any questions or comments please leave them in the comments section. I’d love to hear from you and what you thought about today’s card.
Thank you for visiting and I hope you come back soon!
Happy Stamping and God Bless!!
Jeannie
