
I want to start out by thanking everyone for the support and nice comments you all leave for me. I truly appreciate the support of this blog!! I enjoy card making and bringing my creations to you, this wouldn’t be possible without your support, so again, thank you!! *Affiliate links are used at no additional cost to you. When you purchase products through my links I receive a small commission from these sales, which helps me to purchase new products for the cards I share on my blog. Thank you so much for your support, it is greatly appreciated!! Don’t forget to check out my previous blog for MANY more card projects! You can find them HERE.
Gina’s October 2025 release is now available! New release products can be found HERE. If you missed out on last month’s kit, all of those contents will now be available individually for sale. Don’t forget to check out Gina’s live on her YouTube channel or Facebook page, where she will showcase all of the new products up close… if you miss the live, you can always catch the replay on her YouTube channel. For today’s card, I will be using the Just Because I Love You stamp set, illustrated by Hannah Drapinski on today’s card, for some simple watercoloring. This set contains a huge stemmed floral, along with a couple of other floral blooms, leaves, greetings and a few inside sentiments. Also available for purchase are coordinating dies. All of the cardstock (except watercolor cardstock), ink, dies and embellishments are from Gina K Designs. Let’s get started!!
***If you are interested in any of the products I use on today’s card, I have them highlighted in blue throughout the tutorial instructions. By clicking on them, it takes you directly to the product on the retailer’s website.

I will be doing all of my work today on my Glass Media Mat.
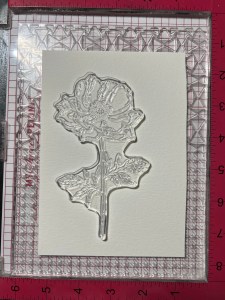
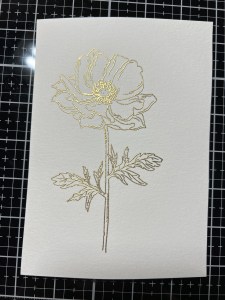
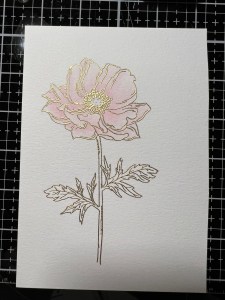
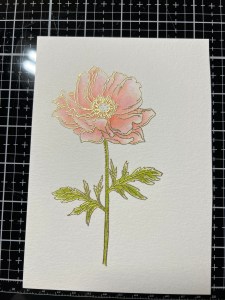
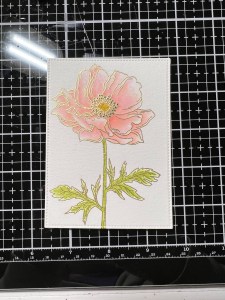
To start, I place a piece of Watercolor Cardstock onto a Grip Mat that I keep in my MISTI Stamp Positioner and choose the large flower from the Just Because I Love You Stamp Set. I prep the cardstock with my Anti Static Powder and stamp the image using Versamark Ink. I then add Detailed Gold Embossing Powder and heat set it with my Heat Tool.

Next, I choose some ink cube colors that I think I may want to use and press them onto my Glass Media Mat, I will use this as my palette. Using a Water Brush, I dampen the petal just a bit that I’m going to add color to, then pick up Light Carnation Ink and add it to the base of my first petal then blend the color out, towards the end of the petal. I repeat this process for the remainder petals. ***Before adding my first layer of color, I do like to dampen the area I’m going to add ink to. This helps the color to blend smoother without harsh lines. I do this for the first layer of color only.
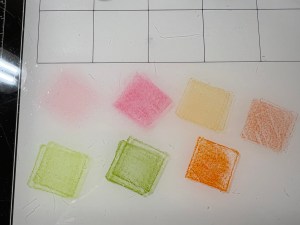
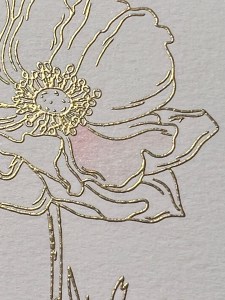
To add a layer of darker color, I use my Water Brush and pick up Medium Carnation Ink and again, add it to the base of the petal then blend the color out, but not fully covering the previous color. I also try to keep the color a bit darker where petals fold or overlap. I continue adding color the remaining petals using the same process.
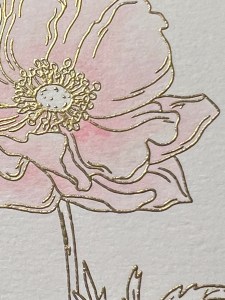
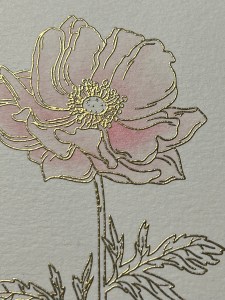
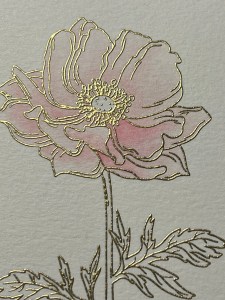
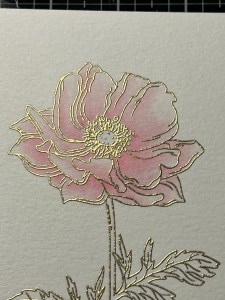
To break up the pink tones a bit and to add some subtle color variation, I pick up Sweet Mango Ink and add it to the base of the petal and blend it out a bit using my Water Brush. I continue adding this color to some of the petals, being careful not to entirely cover up the pink color.
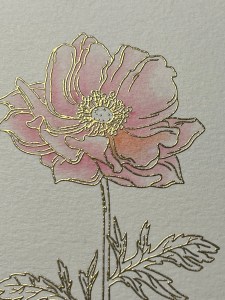
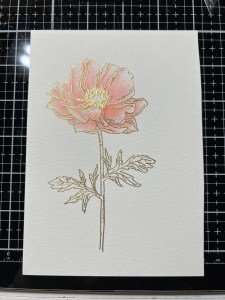
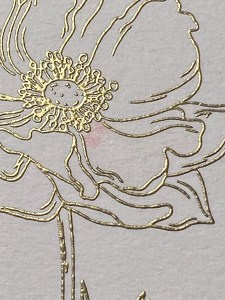
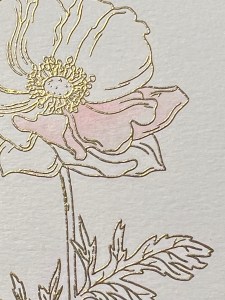
For the stem and leaves, I use my Water Brush to add Jelly Bean Green Ink, I then add a layer of Fresh Asparagus Ink being careful not to completely cover my previous color. For the center of the flower, I add Sweet Corn Ink then with the tip of my Water Brush, I dot Prickly Pear Ink and finally, Honey Mustard Ink. For the stamen, I take a fine tip black marker to fill in the ends.


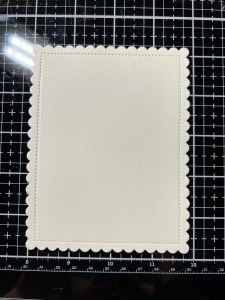
Now that my coloring is finished, I take the stitched rectangle die from my Master Layouts 5 Die Set and position it over my image then run them through my Intri-Cut Die Cut Machine. To break up the background a bit, I use a small paintbrush and lightly spatter Black Distress Paint over my panel.

Using the scallop die from my Master Layouts 4 Die Set, I cut out of Whisper Cardstock, running them through my Intri-Cut. Once my spatters have completely dried, I use Liquid Glue to adhere my panel onto the scalloped panel. I then add Foam Tape onto the back and mount it onto a Innocent Pink Cardstock card base.

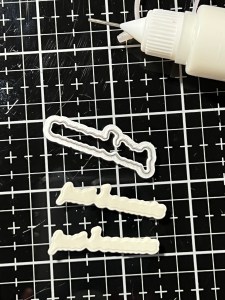
Taking a greeting from the Just Because I Love You Stamp Set, I stamp it onto Whisper Cardstock using Amalgam Black Obsidian Ink then cut it out using the coordinating die from the Just Because I Love You Die Set, running them through my Intri-Cut. I also cut out of Whisper Cardstock two times then stack and glue them together for some dimension, with the greeting on top, using Liquid Glue.

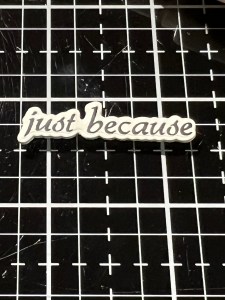
Finally, I mount the greeting onto the front of my card. Using my Pick & Stick Tool, I add Dew Drops with Liquid Glue and this completes my card.
I hope you enjoyed today’s card! Watercoloring can be as simple or complex as you want it to be. Building up layers using the same color, is a great way to add depth and different shades of the same color when you are limited on color choices. If you have a good variety of colors to choose from, you can really up your watercoloring by adding contrast shades. Some crafters are intimidated with watercoloring, however, anyone with interest should at least give it a try as it’s much easier than it looks! Be sure to check out Gina’s replay on her YouTube channel if you are unable to tune in live… there, she will showcase all of the new products up close, talk with some of the illustrators and always has so many beautiful card samples!!
If this is your first time visiting my blog, welcome and I hope you return. If you are a returning visitor, thank you so much for your support!
If you would like to be notified by email each time I post a new project, there is an option to add your email (located at the top menu, or on the right side of my page) then hit the subscribe button. Should you have any questions or comments please leave them in the comments section. I’d love to hear from you and what you thought about today’s card.
Thank you for visiting and I hope you come back soon!
Happy Stamping and God Bless!!
Jeannie
