I want to start out by thanking everyone for the support and nice comments you all leave for me. I truly appreciate the support of this blog!! I enjoy card making and bringing my creations to you, this wouldn’t be possible without your support, so again, thank you!! *Affiliate links are used at no additional cost to you. When you purchase products through my links I receive a small commission from these sales, which helps me to purchase new products for the cards I share on my blog. Thank you so much for your support, it is greatly appreciated!! Don’t forget to check out my previous blog for MANY more card projects! You can find them HERE.
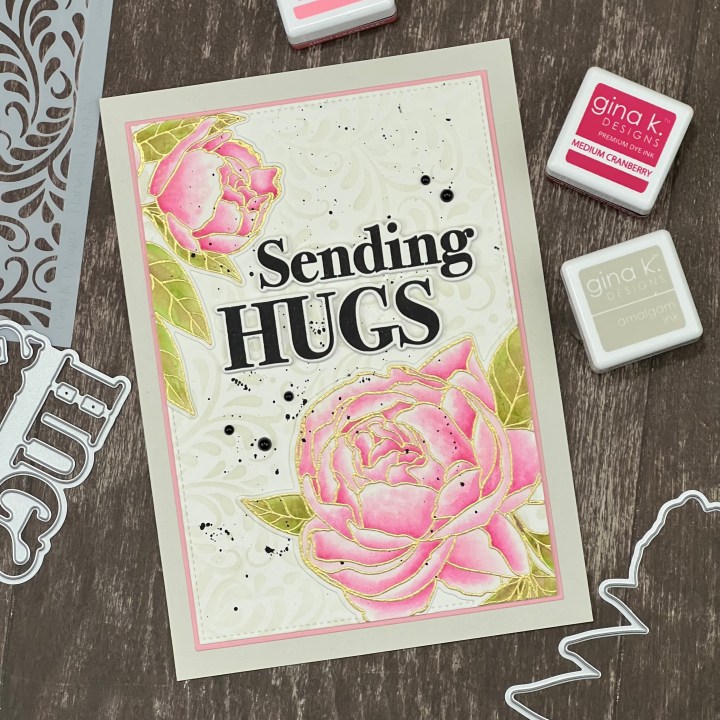
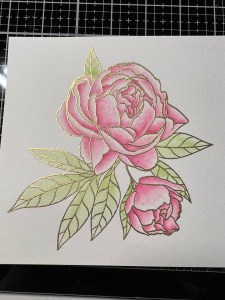
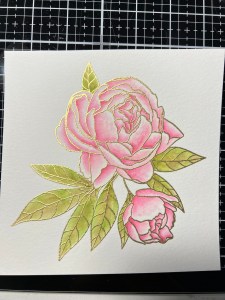
Welcome to Gina K Designs February release! All new products are now available at Gina K Designs, and can also be found HERE. Along with the this month’s release, you can now purchase the contents from the past, Twelve Days Of Christmas Box, individually! If you love Gina’s blending brushes, there is a brand new brush caddy that will hold all three size blending brushes all together… the Brush Bucket! This holder can be purchased by itself, or as a kit, which includes the caddy, lazy susan and all three sizes of brushes! Be sure to check it out, along with all of the other new product during Gina’s live at 7:00 PM CST over on her YouTube channel. Today, I have a card created with the brand new Precious Peony stamp set and die set, which is illustrated by Hannah Drapinksi. I love Hannah’s creations and this peony image is huge!! So big, that I decided to create a 5 x 7 card base to showcase this set. For some easy coloring, I chose to use Gina’s dye inks to watercolor my images. My tutorial below shows steps using the new Cranberry trio ink colors. These colors are a deeper, rich color but when watercolored the colors really soften in color hue. To darken the color, all you need to do is add more layers! I also made a card using Soft Stone for the first layer of ink, then added Edible Eggplant ink… this card is shown in my final photos, below. All of the stamps, dies, stencils, inks and cardstock I use are from Gina K Designs. Let’s get started!!

I will be doing all of my work today, on my Tim Holtz Glass Mat.
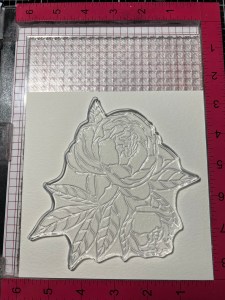
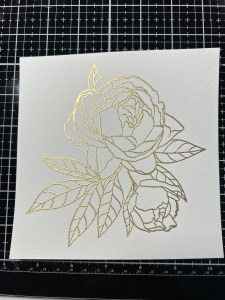
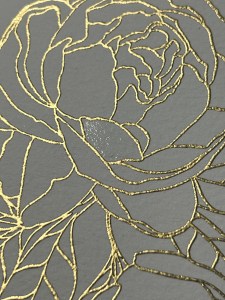
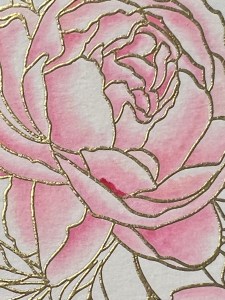
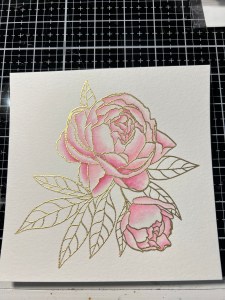
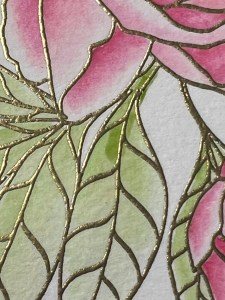
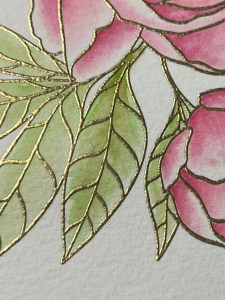
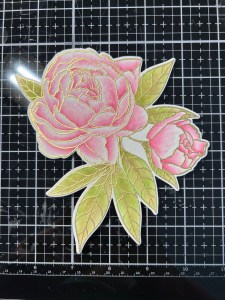
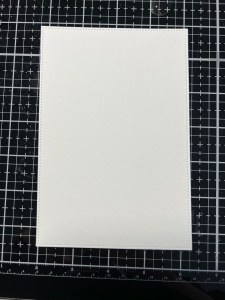
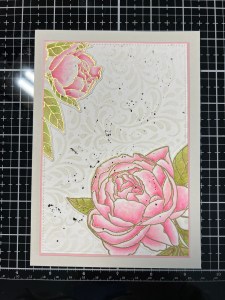
To start, I place a piece of Watercolor Cardstock into my MISTI Stamp Positioner. Next, I prep the panel using my Embossing Magic then stamp my image from the Precious Peonies Stamp Set using Versamark Ink. I stamp this image a couple of times to get a crisp result onto the textured cardstock. I add Gold Detail Embossing Powder then heat set with my Heat Tool.
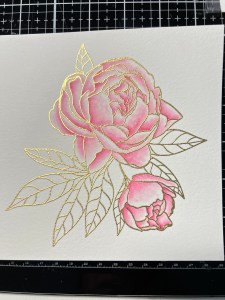
I press some ink cube colors onto my Glass Mat that I think I may want to use for my watercoloring, I will be my palette. Taking my Water Brush filled with clean water, I wet a petal that I want to paint first. I then pick up some Light Cranberry Ink with my Water Brush and add it to the base of the petal. I wipe my brush onto a clean paper towel to remove the color then go back with the clean brush to blend and fade the ink out toward the end of the petal… I like to keep the edges of the petals white for more contrast in the finished results. I then repeat this process for all remaining petals for this flower as well as the smaller one.
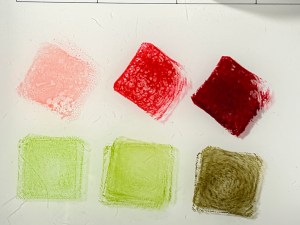
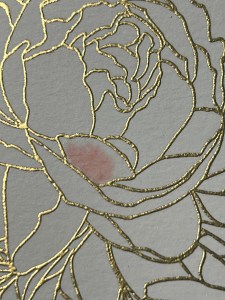
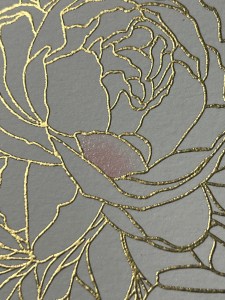
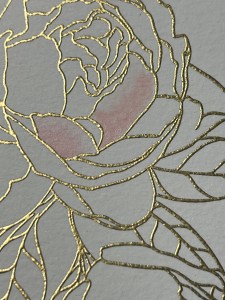
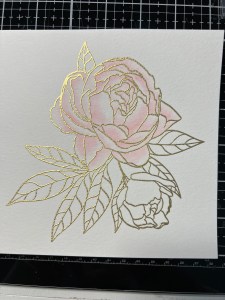
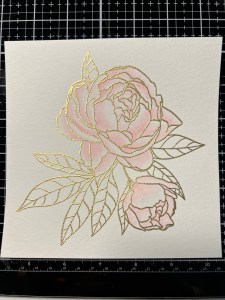
To add more depth to my flowers, I add a little Medium Cranberry Ink to the base of my petal then use my Water Brush to blend the color out, being carful to not completely cover up the previous color. I continue to do this for all remaining petals, including the smaller bloom.
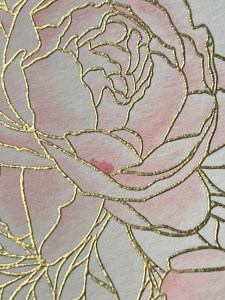
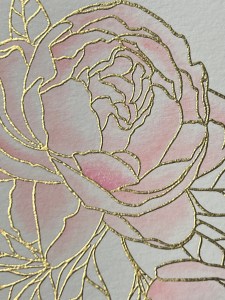
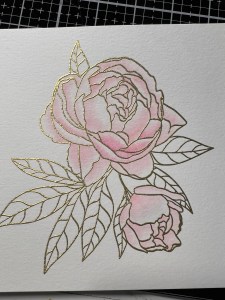
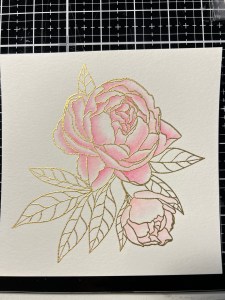
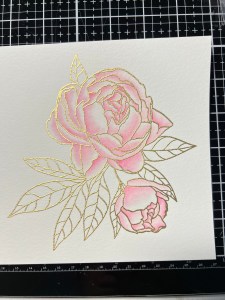
To add further depth, I add a small amount of Dark Cranberry Ink to the base of the petal then blend the color out just a bit, being careful not to completely cover up the previous color. I concentrate this darkest color to just the base of each color and also the areas where petals fold or overlap. I repeat this step with all remaining petals, including the smaller bloom
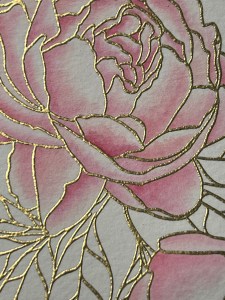

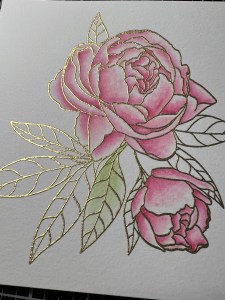
For the leaves, I add a light wash of Jelly Bean Green Ink. I then add Fresh Asparagus Ink to the base of the leaves and blend the color out, keeping this color more towards the center and veins of the leaves. I also add just a little bit of Dark Sage Ink along the veins of the leaves and blend the color out.


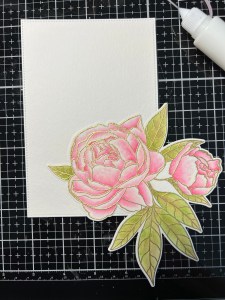
Now that my coloring is finished, I take the coordinating die from the Precious Peony Die Set and cut my image out, running them through my Inti-Cut Die Cut Machine. Next, I take the large stitched die from Master Layouts 8 Die Set and cut out of the same Watercolor Cardstock, running them through my Intri-Cut.
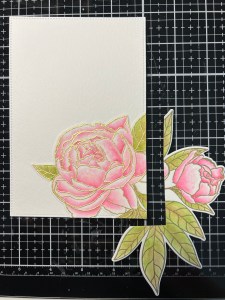
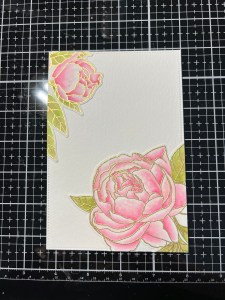
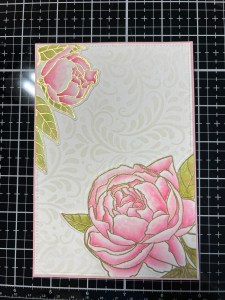
Using Liquid Glue, I adhere the large floral image onto the lower right corner of my panel. I then take a pair of scissors and cut along the edge of my panel, preserving the smaller floral. Next, I add Liquid Glue to the back of the smaller floral image and adhere to the top left corner of my panel. Using my scissors, I trim away all of the overhang.
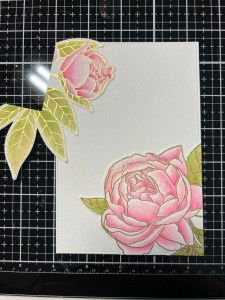
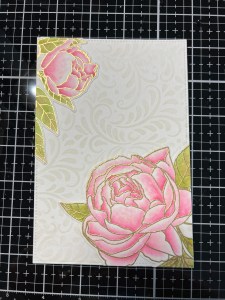
To break up the stark whiteness of my background, I place my Harvest Flourish Stencil over the panel and blend Whisper Ink, using my Blending Brush. *I only blend over the background, not the florals.
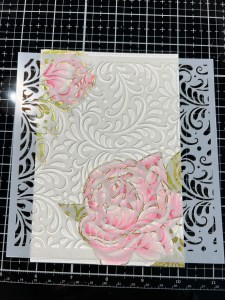
I now take the largest rectangle die from the same Master Layouts 8 Die Set and cut out of Innocent Pink Cardstock, running them through my Intri-Cut. Using Liquid Glue, I adhere my panels together.
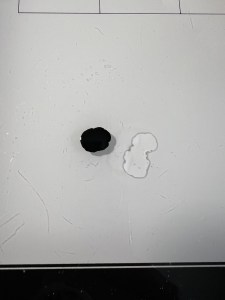
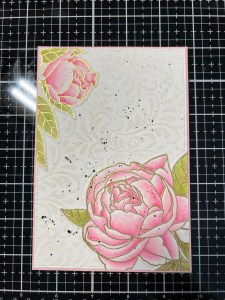
To add some interest and contrast to my panel, I add a small drop of Black Distress Paint onto my Glass Mat and a small drop of water to thin it out just a bit. I then take a small paintbrush to pick up the paint, then splatter it over my panel, then set it aside to dry.
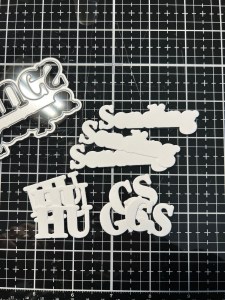
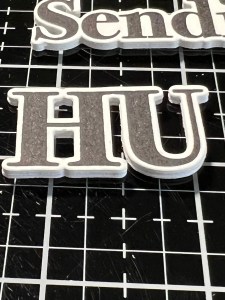
To create a greeting for my card, I place a piece of Watercolor Cardstock into my MISTI and stamp a greeting from the Say It Large Stamp Set using Amalgam Obsidian Black Ink. Once the ink has dried, I cut my greeting out using the coordinating Say It Large Die Set, running them through my Intri-Cut. I also use the same die to cut out of some scrap cardstock, three times. Using Liquid Glue, I stack the die cut pieces together, and add the stamped pieces on top. *By stacking these pieces together, it adds dimension to my greeting, helping it to stand out more.

Now that the splatters are dry, I adhere my panel onto a 5 x 7 Whisper Cardstock card base with Liquid Glue. *For the base, I cut a sheet to be 10 x 7 and scored it at 5″. Using Liquid Glue, I adhere my greeting pieces between the flowers.
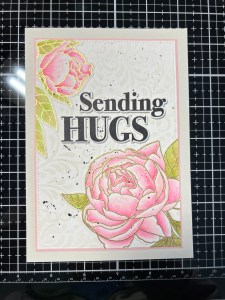
Taking my Pick & Stick Tool, I add some Black Pearls using Liquid Glue and this completes my card. I have also posted a card with a different color variation. This one was embossed in Detail Silver Embossing Powder and watercolored using Soft Stone Ink for the base layer, then I added Edible Eggplant Ink for more depth and coloration. For the leaves, I used Soft Stone Ink and Moonlit Fog Ink. I then mounted the panel onto a Slate Cardstock layer then adhered them to a Moonlit Fog Cardstock card base. The greeting was stamped in Slate Ink.
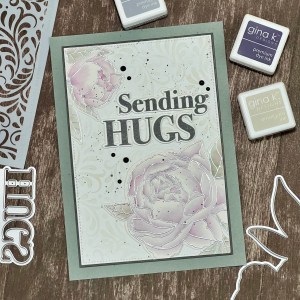
I hope you enjoyed today’s card. I love how both cards turned out, but I think I like the muted colors a little more as it’s a bit unexpected and gives such a soft look. Which card is your favorite?? I love to color floral images, but they are not only for coloring. This set would also look great stamped tone on tone, emboss resist or even stamped in colored ink over white cardstock and mounted onto a coordinating card base for a monochromatic look. Don’t forget to take a look at the rest of the new release as well as Gina’s live. If you are unable to catch the live at 7:00, the replay is always available on Gina’s YouTube Channel.
If you would like to be notified by email each time I post a new project, there is an option to add your email (located at the top menu, or on the right side of my page) then hit the subscribe button. Should you have any questions or comments please leave them in the comments section. I’d love to hear from you and what you thought about today’s card.
Thank you for visiting and I hope you come back soon!
Happy Stamping and God Bless!!
Jeannie

Absolutely stunning! Your creations are gorgeous and your instructions are always spot on. I never have any questions when I read them. Thank you for sharing your creativity with me.
LikeLike
Thank you for your kind words, Denise! I’m happy you find my instructions helpful. Thank you for visiting my blog!!
LikeLike