I want to start out by thanking everyone for the support and nice comments you all leave for me. I truly appreciate the support of this blog!! I enjoy card making and bringing my creations to you, this wouldn’t be possible without your support, so again, thank you!! *Affiliate links are used at no additional cost to you. When you purchase products through my links I receive a small commission from these sales, which helps me to purchase new products for the cards I share on my blog. Thank you so much for your support, it is greatly appreciated!! Don’t forget to check out my previous blog for many more card projects! You can find them HERE.
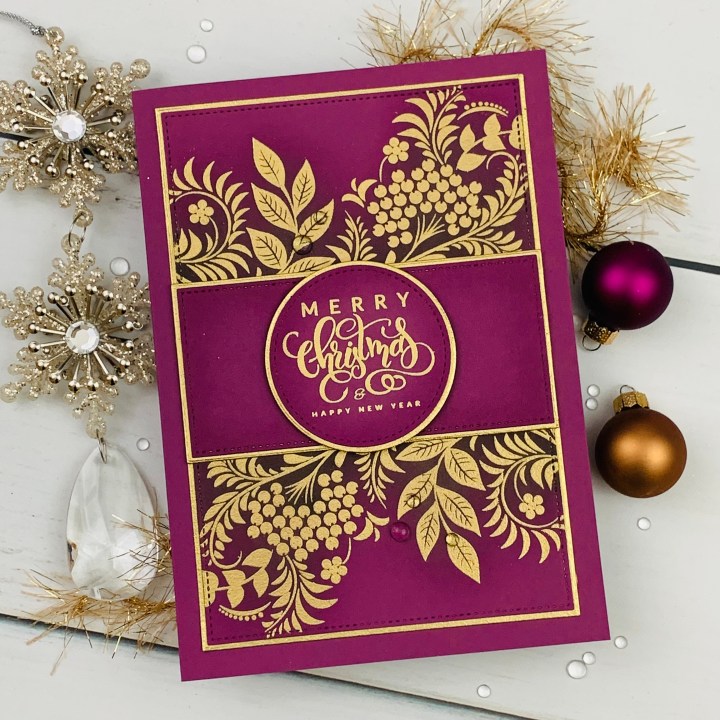
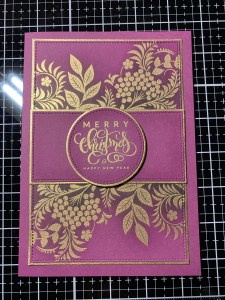
Today I have made a card using the very popular (and back in stock!!) Holiday Tapestry stamp set from Gina K. Designs. This stamp set has been so popular it sold out right away but is now back in stock. If you have been waiting for this set, now is your chance to pick it up before it sells out again. I’ve used this set not only for several Christmas cards but also for an elegant wedding card which can be found on my previous blog or you can check it out HERE. While you are there you can type “Holiday Tapestry” into the search bar to see more examples using this set. This set is so versatile, it can be used year round and looks stunning on tags. The solid images look so elegant embossed with metallic powders making it a great set to create a simple card. I used it today on a 5 x 7 card along with a couple of the Master Layouts die sets and some ink blending for a quick and easy, yet elegant card. All of the inks, cardstock, stamps and dies used on today’s card are from Gina K. Designs. Let’s get started!!

I will be doing all of my work today on my Tim Holtz Glass Media Mat.
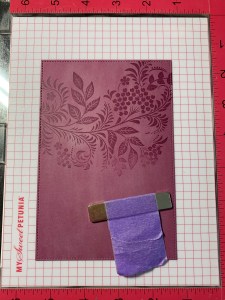
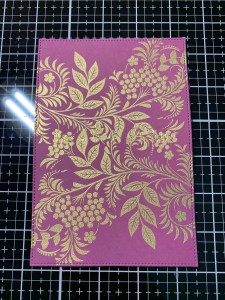
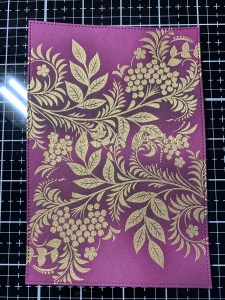
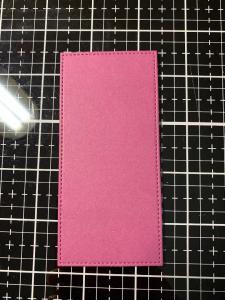
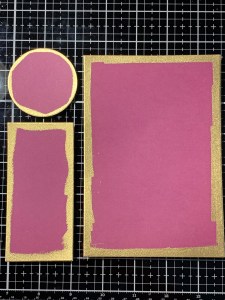
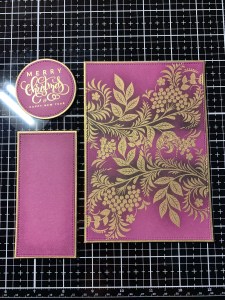
To start, I take the large stitched rectangle die from the Master Layouts 8 Die Set and cut out of Plum Punch Cardstock, running them through my Big Shot Die Cut Machine. Next, I place the panel into my MISTI Stamp Positioner and prep it with my Anti Static Powder Tool then place an image from the Holiday Tapestry Stamp Set over the top portion of my panel. I make note of where I place the panel (as I want this image to be stamped in the same area of both ends), in this case it is at the 5 1/2 and 1 1/2 inch marks. I then pick up the stamp with the door of my MISTI and ink it up with Versamark Ink and stamp it onto my panel. To get good ink coverage, I stamp the image three times then add Gold Embossing Powder and heat set it with my Heat Tool.


I now turn the panel around so that the opposite end can be stamped. I again ink up the image using Versamark Ink and stamp it onto the panel three times for good ink coverage. I then add Gold Embossing Powder and heat set it with my Heat Tool. Both embossed images are now stamped evenly at both ends. Using a Swiffer Cloth I gently buff away the anti static powder from the panel. *It’s ok that the images overlap at the center of the panel as this area will be covered up later.

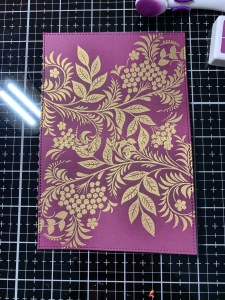
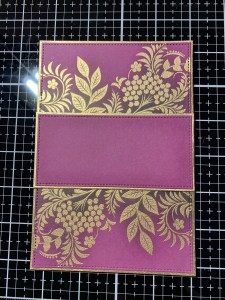
Using my Mini Blending Brushes I first blend Plum Punch Ink over and around the image on both ends. I used the same color if ink as the cardstock as it helps to add some definition, creating a bit of a shadow under the image. Next, I blend Edible Eggplant Ink over the same areas, but I do not go as far out as I did with the previous color. To deepen the color and contrast I blend Black Onyx Ink to just the areas that will be coming out behind my later placed center panel. To finish, I use the ink that is left on my Mini Blending Brushes and go back through the colors to soften the blends. Using a dry, soft cloth I gently buff over the embossed areas to remove any ink that may be sitting on top of it. *I like using the mini blending brushes so I have more control over how much ink is applied to the smaller areas.

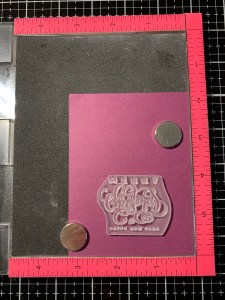
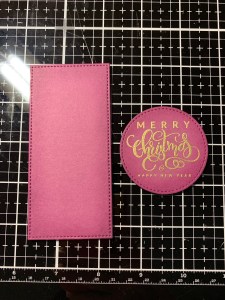
Now that my panel is finished, I work on the other elements of the card. I place a piece of Plum Punch Cardstock into my MISTI and prep it with my Anti Static Powder Bag. I then choose a greeting from the Holiday Tapestry Stamp Set and stamp it using Versamark Ink onto the cardstock, add Gold Embossing Powder then heat set it with my Heat Tool. Choosing a circle die from the Master Layouts 3 Die Set I cut the greeting out, running them through my Big Shot.
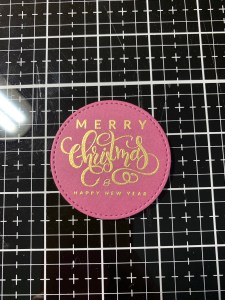
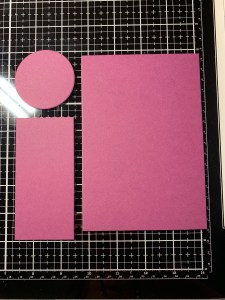
Next, I take the small stitched rectangle die from the Master Layouts 8 Die Set and cut out of Plum Punch Cardstock, running them through my Big Shot. To add a little shading, I blend Plum Punch Ink around the edges of the small rectangle die cut and my greeting.
For my layering pieces, I take the coordinating layering circle die from the Master Layouts 3 Die Set along with the large and small rectangle layering dies from the Master Layouts 8 Die Set and cut out of Plum Punch Cardstock, running them all through my Big Shot. I want my layered pieces to be gold but only the edges will be showing, so as to not waste my metallic cardstock I will create my own. I press the edge of my Versamark Ink Pad onto the edges of my layering pieces then add Gold Embossing Powder and heat set with my Heat Tool. *This is a great technique to use when you don’t have any metallic cardstock on hand and also matches the embossed images perfectly!
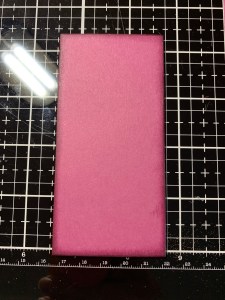

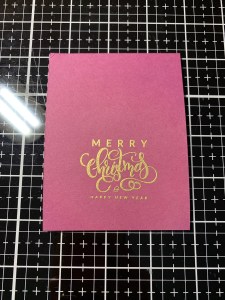
Using Liquid Glue I adhere my greeting, small stitched rectangle and my embossed panel onto the gold edged layering pieces. I then add Liquid Glue to the back of my small rectangle piece and mount it onto the center of my embossed panel. To give my greeting a little dimension I add Foam Squares to the back and mount it over the small rectangle.

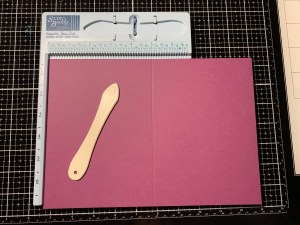
Next, I place a 7″ x 10″ piece of Plum Punch Cardstock into my Scor Buddy and score it at 5″ creating a side folding 5 x7 card base. I add Liquid Glue to the back of the card front then mount it onto my card base.
To finish I use my Jewel Picker to add some Dew Drops with Liquid Glue and this completes my card.

I love, love, LOVE the simple elegance of this card! This stamp set is one of my very favorite sets from Gina K. Designs, not only are the images so beautiful but I love the look of the greetings as well! There are a couple of stamps that work great on tags and if you are a fan of Gina’s Wreath Builder, there are also many small images that work great for that as well. This was a very well thought out set that can be used for so much!! Ok… I “think” I am done blogging Christmas cards for the year, LOL!!
If this is your first time visiting my blog, welcome and I hope you return. If you are a returning visitor, thank you so much for your support!
If you would like to be notified by email each time I post a new project, there is an option to add your email (located on the right side of my page) then hit the subscribe button. Should you have any questions or comments please leave them in the comments section. I’d love to hear from you and what you thought about today’s card.
Thank you for visiting and I hope you come back soon!
Happy Stamping and God Bless!!
Jeannie

Love this set also it can be used for any occasion. Thanks for sharing your cards, it’s gorgeous and when I think about it I think it was a card you had done last year that got me started on my Gina K journey and now I watch her every week and I’m very poor buying her products 🤣🤣 but I love them. I had stopped stamping as I have a slight hand tremor but buying a stamping platform helped that and you and Gina K got me hooked again ❤️❤️ Hope you have a wonderful time over the Christmas period with your family 😊
LikeLike
Thank you so much for your kind words Jacqueline!! It makes my heart happy to hear you are following Gina!! Gina and Tom have done so much for the stamping industry over these last couple of years, keeping us all going!! She is such a bright spot in the stamping world! I am so happy that you are back to stamping, isn’t it just such a great outlet for the soul? A stamping platform is one of the best things to ever happen to us creators, for sure! Thank you for stopping by my blog and commenting, I pray you have a blessed, wonderful Christmas with family and friends!! Hugs!!
LikeLike
Great colors and design!
LikeLike
Thank you so much Coco!!
LikeLike
OMG!! this is gorgeous, I love how you used the gold almost looks like another layer of cardstock. I have this stamp set plan on using it for next years Christmas cards. Always a year behind. LOL
LikeLike
Thank you so much Nancy!! I hear you about being behind! Enjoy using this set to make next year’s cards… so fun!!
LikeLike
So stunning! Love the color combination
LikeLike
Thank you so much Kathy!!
LikeLike
Beautiful card-I would have never thought to use that color. Thanks for sharing your talent.
LikeLike
Thank you so much Cheryl!! Tranquil Teal is another gorgeous color to use with this technique!
LikeLike
Your cards are beautiful! I’m so glad I found you. I tried to add the gold embossing on the edge of a card in order to create that same boarder, and I can’t get it even looking. Some areas looked sparse. I went over it again, and it look awful. I had to scrap the card. Any ideas? Or suggestions? You make it look so easy! lol
LikeLike
Thank you so much Janet, I’m happy you found me!! Hmm, when I added the gold embossed edging it was for a layered piece, one that would be covered with another panel so the uneven/splotchy areas wouldn’t be seen, only the even border going around. I hope this makes sense? I do show detailed pictures of my process in my blog. If you are only wanting to add even embossed edges to a single panel, without any layers you could take some low tack tape or painters tape (just be sure to stick the painters tape to your clothing or skin a few times to remove some of the stick so it doesn’t tear your cardstock when removing) and tape off all four sides of your panel leaving just a thin edge that you want to emboss. Then take your Versamark Ink pad and ink up the exposed thin edges, remove the tape then add embossing powder and heat set. =)
LikeLike
Love the bold richness of this card! Stunning Jeannie!
LikeLike
Thank you so much Jess!!
LikeLike
Absolutely gorgeous.
LikeLike
Thank you so much Carol!!
LikeLike
Hello. I am new to your blog and very much like your cards. I am wondering if you use one product exclusively or if you use many different brands? Also, I often see Gina K ink colors; is that always your preference when using dye inks? If so, is there a reason? I used to sell Close To My Heart but stopped several years ago. I am looking to boost my ink stash and cardstock as well and I am asking around for info on the subject so I can make an informed decision.
LikeLike
Hello Cathy, I’m so glad you found my blog and thank you for your kind words! I use many different brands and company products when creating my cards. I have regular distress and oxide inks as well the full line of Gina K. Designs inks. I love and cannot recommend enough Gina’s inks if you are looking for a good dye ink collection. What I like most about Gina’s ink is the price, great color selection and how well her inks blend and dry back to a nice smooth look. Each of Gina’s inks also have a coordinating cardstock color, except for just a few colors and her cardstock is a nice heavier weight which is great for card bases. While I like other cardstock brands as well, Gina’s is the one I use and reach for the most. I could go on and on about the quality and value of Gina’s products, one of my favorite companies out there!! I hope you find this information helpful, I know there are a lot of great inks out there to choose from!
LikeLike
Such a beautiful card! And wonderful, easy to follow instructions!
LikeLike
Thank you so much for your kind words, Janice!!
LikeLike