
I want to start out by thanking everyone for the support and nice comments you all leave for me. I truly appreciate the support of this blog!! I enjoy card making and bringing my creations to you, this wouldn’t be possible without your support, so again, thank you!! *Affiliate links are used at no additional cost to you. When you purchase products through my links I receive a small commission from these sales, which helps me to purchase new products for the cards I share on my blog. Thank you so much for your support, it is greatly appreciated!! Don’t forget to check out my previous blog for MANY more card projects! You can find them HERE.
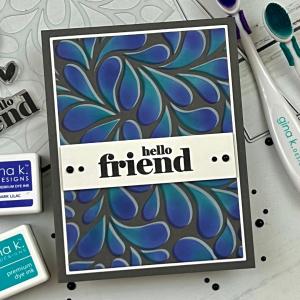
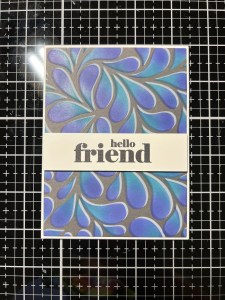
Today I have a fun technique that I call Offset Shadow Stenciling! This technique is done on colored cardstock and uses white pigment ink to create a shadow when colored ink is applied offset using a stencil. With so many different stencil designs available, the possibilities are endless!! Using white pigment ink over colored cardstock, allows a base to be created for colored ink to show up beautifully. Shifting the stencil a bit before applying the colored ink will create a shadow or highlight to show up which makes the design appear to pop off the cardstock! This is a quick and easy way to create beautiful backgrounds for any card. All of my inks, cardstock and most of the supplies are from Gina K. Designs. Let’s get started!!
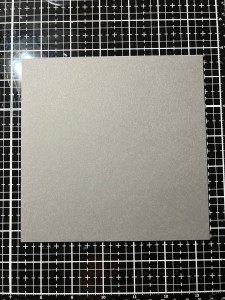
I will be doing all of my work today on my Tim Holtz Glass Media Mat.
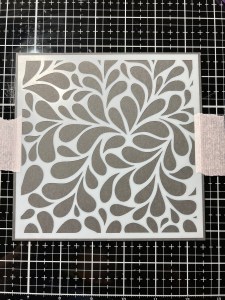
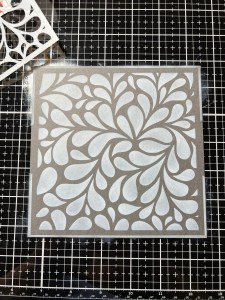
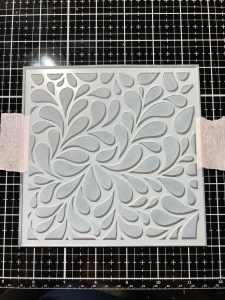
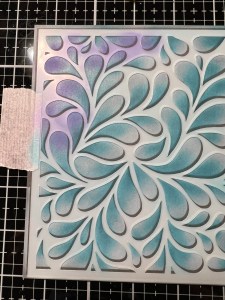
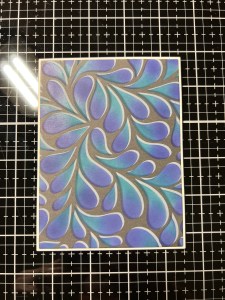
To start, I cut a 6″ x 6″ panel out of Slate Cardstock using my Guillotine Paper Trimmer. I then take the Water Droplets Stencil and adhere it over my panel using Pixie Tape. Using my Blending Brush, I blend White Pigment Ink a bit heavy over the entire panel. I remove the stencil and clean it with warm soapy water. I then use my Heat It Tool to completely dry the panel before moving onto the next step. *I have one blending brush dedicated to white pigment ink only. You do not want to cross contaminate your die inks with pigment ink.
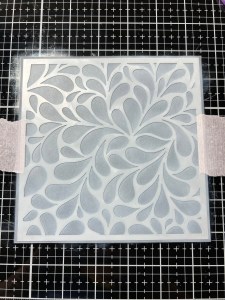
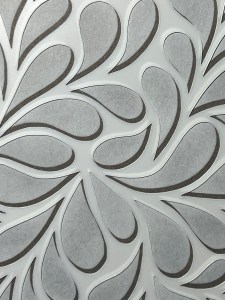
Now that the pigment ink is completely dry, I place the same clean stencil over my panel and shift it over and down just a little. You can see in the photos that there are areas of the un-inked cardstock showing around the white areas of the design. I again, adhere down using Pixie Tape.
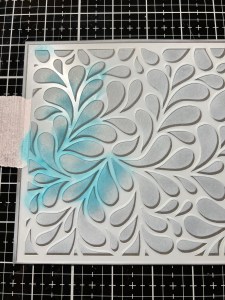
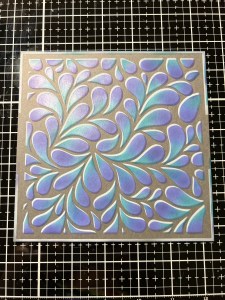
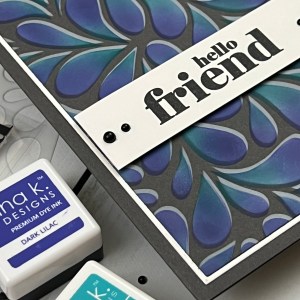
Using my Mini Blending Brush, I blend Blue Lagoon Ink over the points of the design, leaving the tops of the water droplets un-inked for now. I continue until all of the droplets have color. Before adding the next color, I take a soft cloth and rub over the stencil to remove most of the ink that is sitting on the stencil. Next, I take another Mini Blending Brush and blend Dark Lilac Ink over the tops of all the droplets, blending the ink down into the previous color a bit. I continue with this color until all droplets have been inked. Now that my ink blending is complete, I remove the stencil to reveal my offset design!


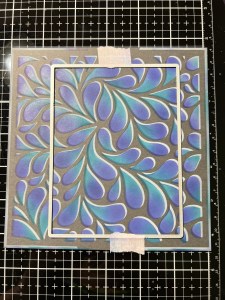
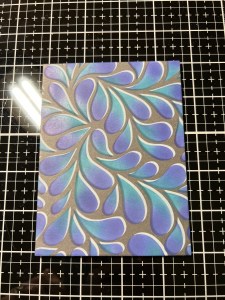
Taking the second largest rectangle die from the Master Layouts 1 Die Set, I choose an area of the panel I like and secure the die onto the panel using Pixie Tape and run them through my Platinum 6 Die Cutting Machine. Next, I take the largest rectangle die from the same Master Layouts 1 Die Set and cut out of White Cardstock, running them through my P6. Using Liquid Glue, I adhere the two panels together.
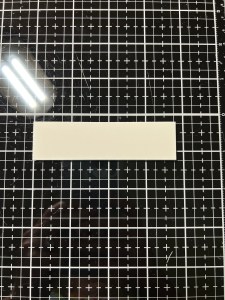
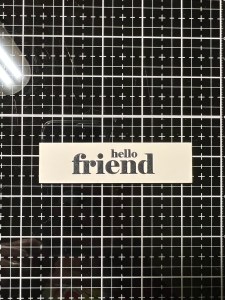
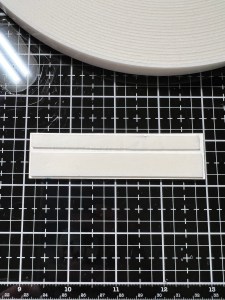
Taking a 1″ strip of White Cardstock, I cut the ends off using the same second largest rectangle die that I used to cut out my inked panel and run them through my P6. I now have a strip with the same width of my inked panel. A paper trimmer could also be used to cut down this strip, however, I like the finished beveled edges that the die gives.

Next, I place the strip into my MISTI Stamp Platform and center a greeting from the Painted Blossoms Stamp Set then stamp it using Amalgam Obsidian Black Ink.
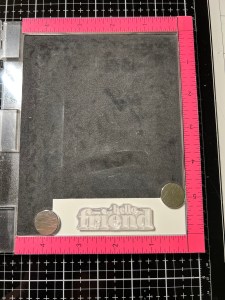
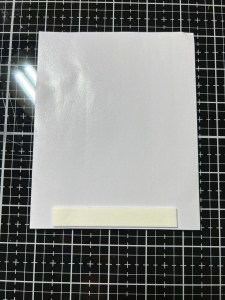
To add some dimension to my strip I use Foam Tape and add it to the back. I wanted the Foam Tape to cover the entire strip so I needed to cut one of the strips in half. A good way for easy cutting of foam tape, is to place the strip onto a piece of scrap release paper. The tape will stick to the release paper and not your scissors! After cutting the strip in half it easily removes from the release paper and can be placed onto the strip.
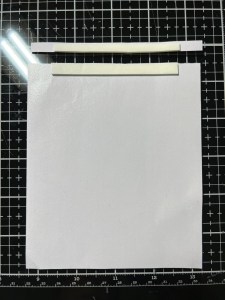
To help with the placement of my strip, I add some Liquid Glue over the Foam Tape. The glue adds some wiggle time to the tape allowing me time to get it into the right position. To help assure my greeting is straight, I place my T-Square Ruler across my panel and press the greeting strip into place.


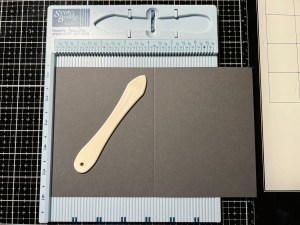
Next, I place a 5 1/2″ x 8 1/2″ piece of Slate Cardstock into my Scor Buddy and score it at 4 1/4″ creating a side folding card base. Using Liquid Glue I adhere my panel onto the card base.
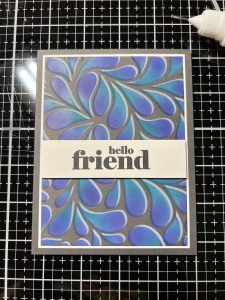
Using my Pick & Stick Tool I add some Black Pearls with Liquid Glue and this completes my card.

I hope you enjoyed today’s card and picked up some tips along the way. Applying white pigment ink onto colored cardstock is a great way to use colored dye ink on dark colored cardstock. Shifting the stencil before adding colored ink allows highlights and shadows to the image adding interest to the design and really makes it pop! If you’ve never tried this technique, I encourage you to give it a try! This technique also looks great on Kraft colored cardstock and gives beautiful results for any occasion!
If this is your first time visiting my blog, welcome and I hope you return. If you are a returning visitor, thank you so much for your support!
If you would like to be notified by email each time I post a new project, there is an option to add your email (located at the top menu, or on the right side of my page) then hit the subscribe button. Should you have any questions or comments please leave them in the comments section. I’d love to hear from you and what you thought about today’s card.
Thank you for visiting and I hope you come back soon!
Happy Stamping and God Bless!!
Jeannie

Beautiful technique
LikeLike
Thank you Kate!!
LikeLike
Love this so pretty
LikeLike
Thank you Nancy!!
LikeLike
I really like this card! Great instructions too!
LikeLike
Thank you so much, Libby for your kind words and for visiting my blog!!
LikeLike