I want to start out by thanking everyone for the support and nice comments you all leave for me. I truly appreciate the support of this blog!! I enjoy card making and bringing my creations to you, this wouldn’t be possible without your support, so again, thank you!! *Affiliate links are used at no additional cost to you. When you purchase products through my links I receive a small commission from these sales, which helps me to purchase new products for the cards I share on my blog. Thank you so much for your support, it is greatly appreciated!! Don’t forget to check out my previous blog for MANY more card projects! You can find them HERE.
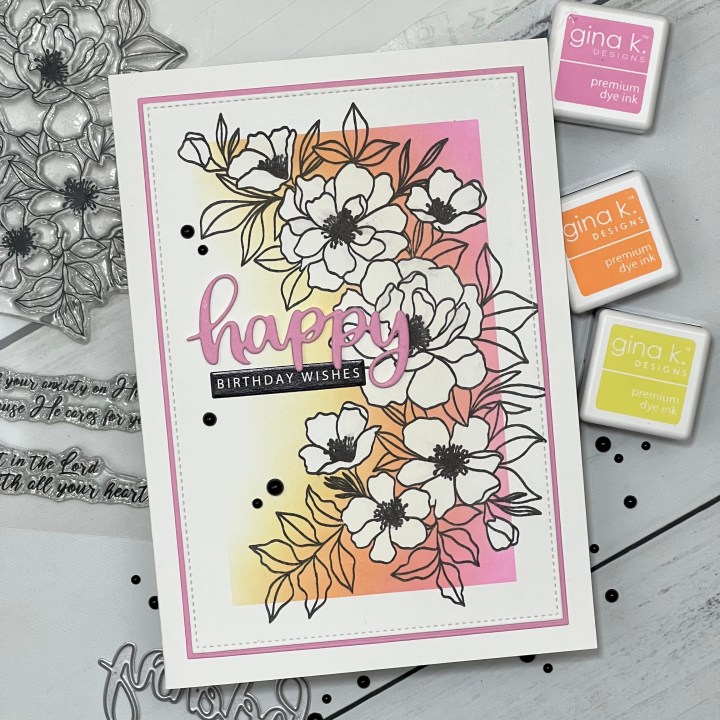
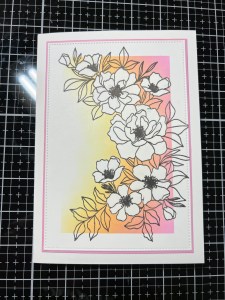
Today, I have a card that uses the bleaching technique! Bleaching is a fun technique that uses the smallest amount of bleach to paint onto stamped images resulting in the removal of, in this case, blended ink. I chose a stamp with larger images for today’s card and love the results! You can bleach as little or as much of an image as you want, with this card I chose to bleach only the flowers and allow my ink blend to show through the rest of the details. ***Remember, when using bleach to work in a well ventilated area*** Bleaching works great for both small and large areas. For better control of the bleach, I like to use a very small paintbrush and a small amount of bleach, a little goes a long way! All of the stamps, dies, inks and cardstock I use today, are from Gina K. Designs. Let’s get started!!

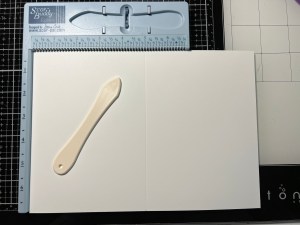
I will be doing all of my work today on my Tim Holtz Glass Media Mat.
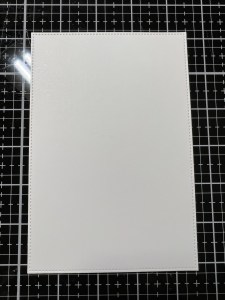
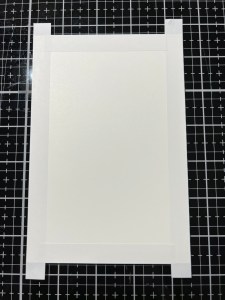
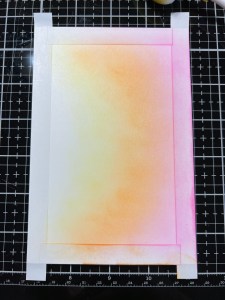
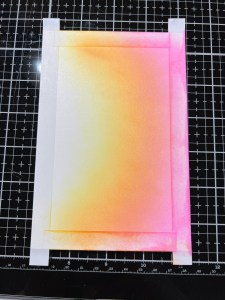
To start, I take the large stitched rectangle die from the Master Layouts 8 Die Set and cut out of White Cardstock, running them through my Platinum 6 Die Cut Machine. To create a border on my panel where I don’t want any ink, I use Masking Magic Strips and take the 1/2″ width strips and adhere them up to the very edges all four sides.
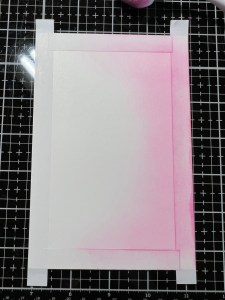
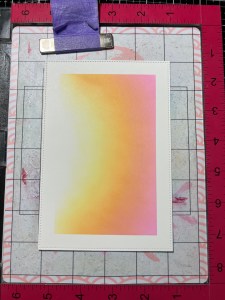
Now it’s time to add some ink. Using my Blending Brushes, I start by blending Bubblegum Pink Ink onto the left side of the panel, fading the blend around the top and bottom. Next, I blend Sweet Mango Ink further to the left and blend it back into the previous color a bit. I then blend Lemon Drop Ink, fading towards the left side of the panel and back into the previous color. To finish, I go back through each of the colors and blend them into each other to create a seamless blend. *The ink may look a little splotchy right now, but will dry to a soft blend. Now that my ink blending is finished, I carefully remove the masking strips and I now have a framed ink blend with the ink fading into white on the left side.


I now place the panel into my MISTI Stamp Positioner, and onto my Sticky Mat to hold it into place for my stamping. I take the large floral image from the The Lord Is My Shepherd Stamp Set and center it over my ink blend, allowing it to hang over the edge of my panel. I pick up the image with the door of my MISTI and ink it with Amalgam Obsidian Black Ink then stamp it onto my panel. To get a dark crisp image, I re-ink it and stamp it three times onto the panel. My stamping is complete and I can now remove my panel from the sticky mat. To remove the cardstock, you want to bend (bow) the sticky mat away from the cardstock. I like to bend (bow) the sticky mat side to side then top to bottom to release the panel. Do NOT try pulling the cardstock up from the sticky mat as you will tear it.
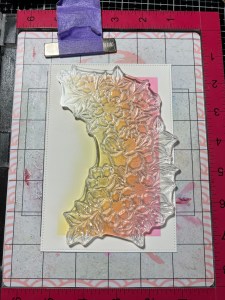
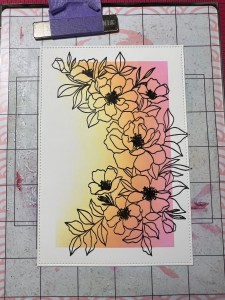
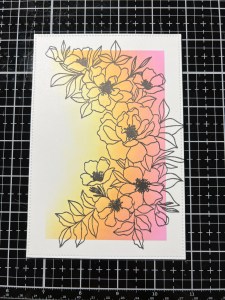
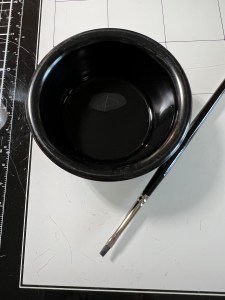
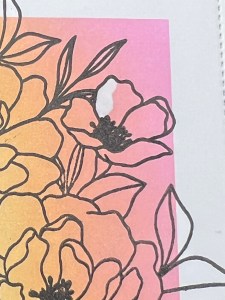
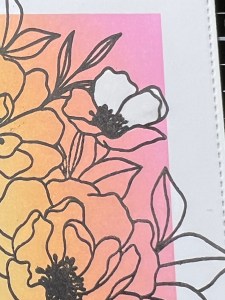
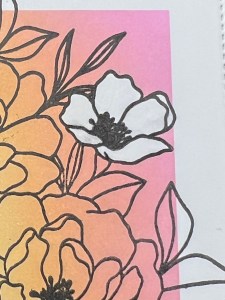
Now it’s time for the fun part! After allowing the black ink to dry completely, I add a small amount of bleach to a dish and use a very small paintbrush to add some bleach to my first petal. I continue adding small amounts of bleach to my brush and paint in all of the petals of each flower until all flowers are white. I leave all of the leaves in the image unbleached, allowing the ink blend to show through. *I don’t think all of the black ink was completely dry when I added the bleach, as some of the centers bled just a bit when coming into contact with the bleach. In hindsight, I should have dabbed the bleach around the centers of the flowers instead of using brushstrokes, this may have prevented the ink bleed. Instead of starting over, I continued on and learned from my mistake for next time.

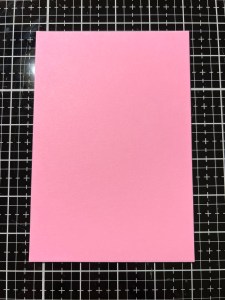
Next, I take the largest rectangle die (layering die) from the Master Layouts 8 Die Set and cut out of Bubblegum Pink Cardstock, running them through my P6. Using Liquid Glue I adhere the two panels together. I then place a 7″ x 10″ piece of White Cardstock into my Scor Buddy and score it at 5″, creating a 5″ x 7″ card base. I then center and mount my panels onto the card base using Liquid Glue.
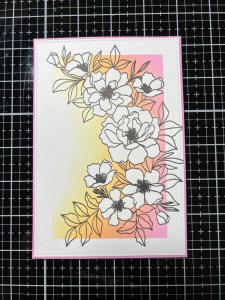
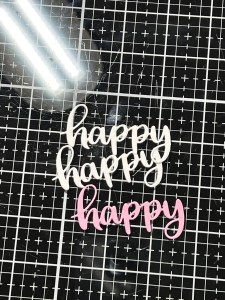
For my greeting, I take the word die from the Happy And Shadow Die Set and cut out of Bubblegum Pink Cardstock once and two times out of White Cardstock, running them through my P6. Using Liquid Glue I stack the die cuts together with the pink on top then glue them onto the card front.
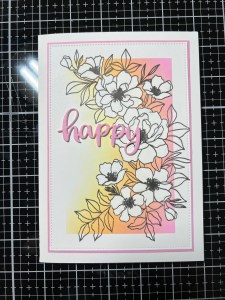
Next, I choose a sentiment from the Mixed Messages Sentiment Sheets and take a die from the Sentiment Strips Die Set to cut it out, running them through my P6. I add some Liquid Glue to the back of the sentiment and mount it onto my card front, tucking it under the happy die cut.

To finish, I use my Pick & Stick Tool to add some Black Pearls with Liquid Glue and this completes my card.
I hope you enjoyed today’s card and learned how easy bleaching really is! I have bleached smaller images in the past and wanted to try it out on large images and I love the results! Today I bleached over an ink blend and achieved white results because I used white cardstock, but did you know that you can also bleach colored cardstock?! It too gives beautiful results and depending on the color of cardstock you get some different shades from the bleaching technique. It’s fun to experiment with the different cardstocks to see what results you get!
If this is your first time visiting my blog, welcome and I hope you return. If you are a returning visitor, thank you so much for your support!
If you would like to be notified by email each time I post a new project, there is an option to add your email (located at the top menu, or on the right side of my page) then hit the subscribe button. Should you have any questions or comments please leave them in the comments section. I’d love to hear from you and what you thought about today’s card.
Thank you for visiting and I hope you come back soon!
Happy Stamping and God Bless!!
Jeannie

This card is GORGEOUS!! I love that technique!! At first I thought you masked that flower. I need to try this!!
LikeLike
Thank you so much for your kind words!! Enjoy, it’s a fun technique!
LikeLike