I want to start out by thanking everyone for the support and nice comments you all leave for me. I truly appreciate the support of this blog!! I enjoy card making and bringing my creations to you, this wouldn’t be possible without your support, so again, thank you!! *Affiliate links are used at no additional cost to you. When you purchase products through my links I receive a small commission from these sales, which helps me to purchase new products for the cards I share on my blog. Thank you so much for your support, it is greatly appreciated!! Don’t forget to check out my previous blog for MANY more card projects! You can find them HERE.
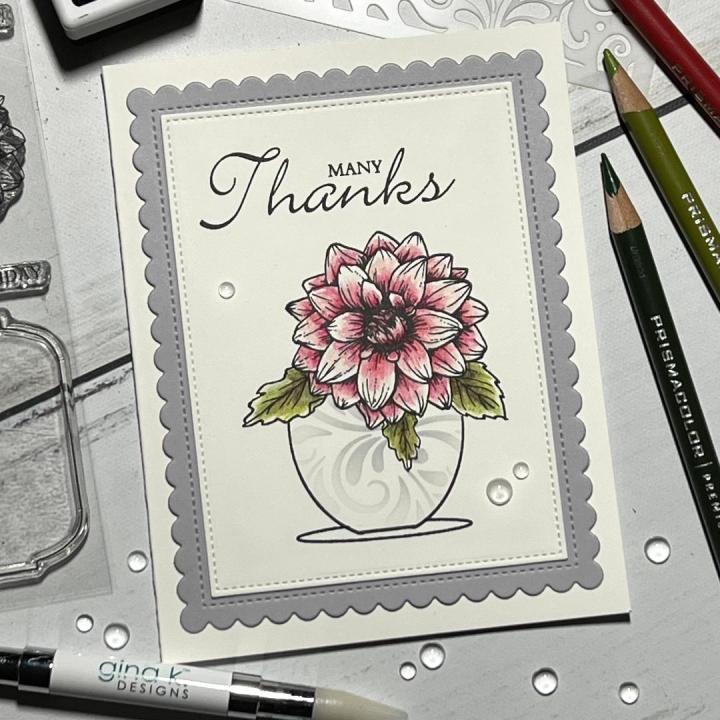
Tonight is the brand new January release over at Gina K. Designs! New products can be found HERE, including a new kit! Don’t forget to check out Gina’s live over on her YouTube channel and Facebook page where she will be showcasing all of her new products up close with lots of card examples using the new sets. Remember, if you miss the live, you can watch it on replay on her YouTube channel. Today I will be using the brand new Fresh Flowers 2 stamp set, illustrated by Melanie Muenchinger to create my card. I will be masking and coloring my images using colored pencils and Gamsol. This set also coordinates with the previously released Fresh Flowers, also available at Gina K. Designs. To showcase my design, I layered my panels using Master Layouts 4 and Master Layouts 5. Let’s get started!!

I will be doing all of my work today on my Tim Holtz Glass Media Mat.
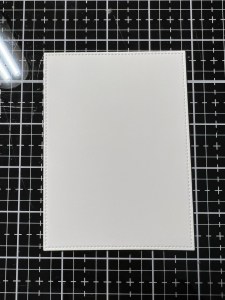
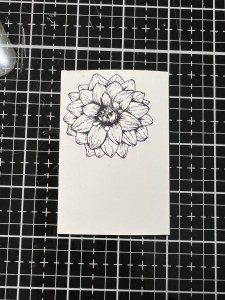
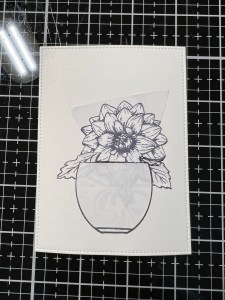
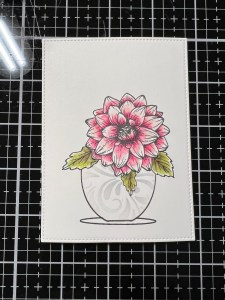
To start, I take the large rectangle from the Master Layouts 5 Die Set and cut out of White Cardstock, running them through my Platinum 6 Die Cut Machine. I then place the panel into my MISTI Stamp Positioner and lay out a couple of images from the Fresh Flowers 2 Stamp Set onto the panel. I’m using one of the vase images to determine my flower placement. Once I’m satisfied with the layout, I remove the vase and pick up the flower image with the door of my MISTI then stamp it onto my panel using Amalgam Obsidian Black Ink.
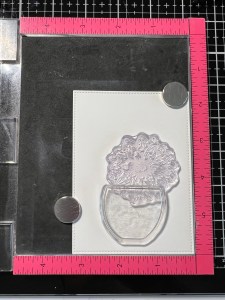
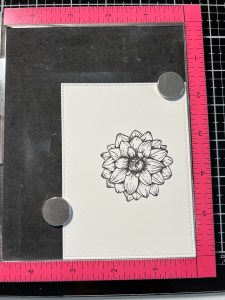
Next, I stamp the same floral image onto a piece of Masking Magic then fussy cut it out using my Micro Tip Scissors, remove the backing then place it over my stamped image. ***Throughout my stamping process, I be sure to dry each stamped image using my Heat It Tool before moving onto the next step. This ensures that the ink is dry and does not smear.

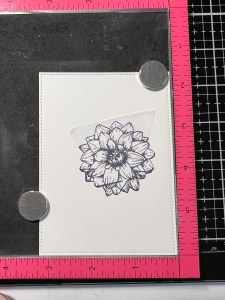
Next, I lay out the vase to figure out the placement of my leaves, (all from the same Fresh Flowers 2 Stamp Set) once I am satisfied with the layout, I pick up the leaves with the door of my MISTI and remove the vase. I then stamp the leaves over my masked flower using Amalgam Obsidian Black Ink. *I again dry the ink before moving on.


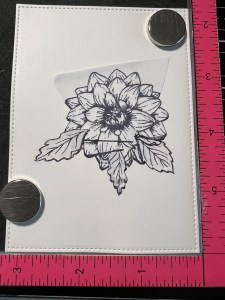
To mask off the leaves, I stamp each one onto a piece of Masking Magic then fussy cut them out. I remove the backing then adhere them over each leaf. Now I can line up the vase image over my masked images and stamp them using Amalgam Obsidian Black Ink.
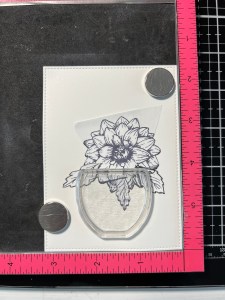
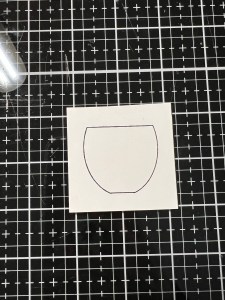
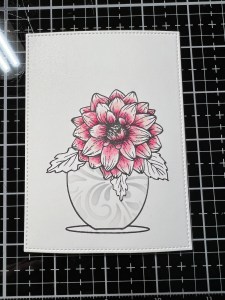
I want my vase to have a design, to do this I stamp the vase image onto a piece of Masking Magic the take my Craft Knife to cut the image out. I then place the negative portion of my mask and lay it over my stamped image so that only the inside of the vase is exposed.


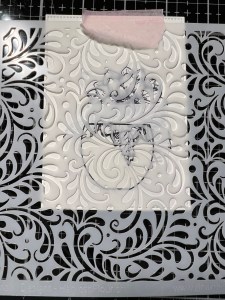
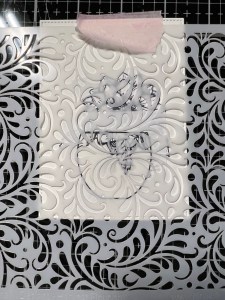
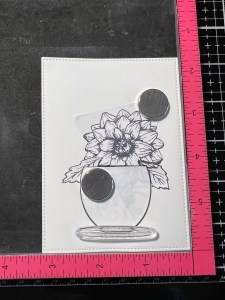
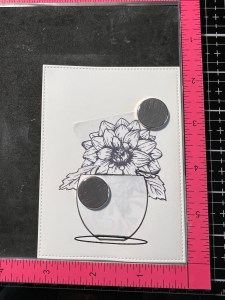
Taking my Harvest Flourish Stencil, I place it over the exposed portion of my vase and adhere it down using Pixie Tape. Using my Mini Blending Brush, I blend Whisper Ink over the vase. To add a little color variation, I blend Soft Stone Ink to the center of the design. Now that the ink blending is done, I remove the stencil to expose the beautiful design.


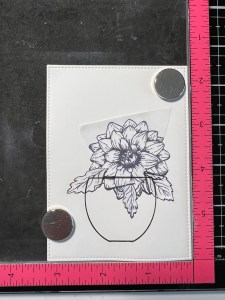
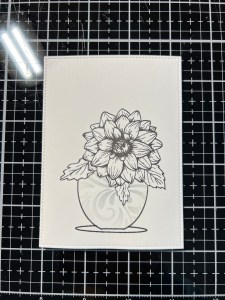
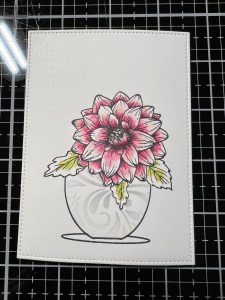
Finally, it’s time to stamp the saucer for the vase. I cover the vase using the solid mask and line up the saucer image then stamp it using Amalgam Obsidian Black Ink. Now that my stamping is all done, I carefully remove all of the masks. ***A tip about masking is to always first mask the image you want to be in the forefront and build from there. I wanted my flower in the front, with my leaves to appear coming from behind the petals but hanging over the vase, therefore, I first masked the flower, then the leaves… then the vase to make it look like it was sitting on the saucer.
Now it’s time to color my flower using my Prismacolor Pencils and Gamsol. I start by adding Light Peach – PC927 to each petal but not all the way to the tips. I then add Carmine Red – 926 to the base of each petal. Now I take my Blending Stump that I have dipped into Gamsol and in a small circular motion, I blend the color out towards the tips of each petal. I wanted a bit more contrast, so I add Magenta – PC930 to the very base of each petal, and again blend it out using my Blending Stump dipped in Gamsol.

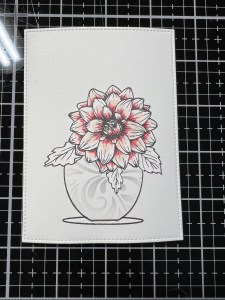

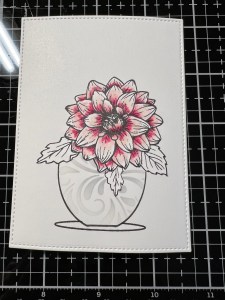
For the leaves, I add Lime Peel – PC1005 to the centers then blend out with my Blending Stumps and Gamsol. For some contrast, I add Olive Green – PC911 and blend it out. Wanting a little more variation in color, I add Dark Umber – PC947 to finish my coloring, and blend it out.
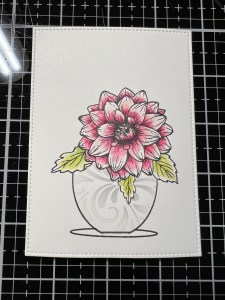
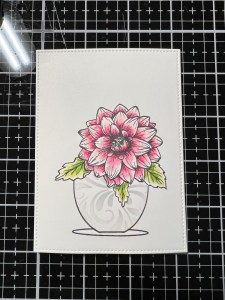
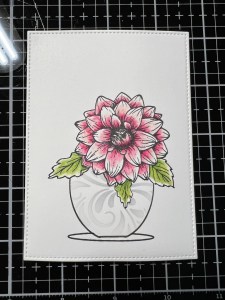
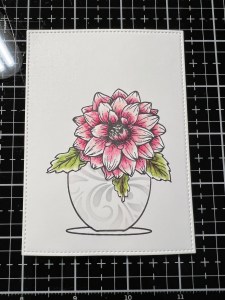
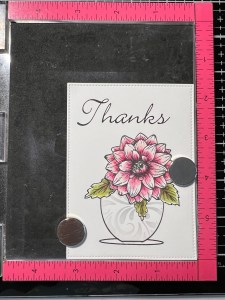
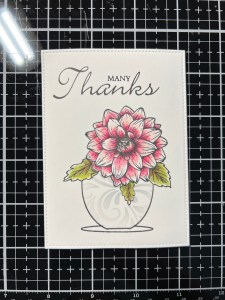
Choosing a greeting from the same Fresh Flowers 2 Stamp Set, I position it above my colored image, off center a bit and stamp it with Amalgam Obsidian Black Ink using my MISTI. I then stamp a small sentiment from the set, just above my greeting.

Taking the large scalloped die from the Master Layouts 4 Die Set, I cut out of Soft Stone Cardstock, running them through my P6. I then adhere the two panels together and onto a White Cardstock card base, using Liquid Glue.
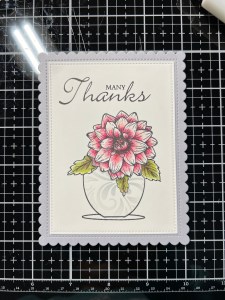

Using my Pick & Stick Tool I add a few Dew Drops with Liquid Glue and this completes my card.
I hope you enjoyed today’s card and picked up a few tips along the way. I love how this card turned out, it’s a simple layout but perfect for so many occasions. Masking takes a little time but it is so fun and worth the results! Don’t forget, you can catch the new release on replay (on YouTube) if you are unable to watch it live. Also included in this release, Gina has also brought back her background stamps in polymer as well as a brand new kit!! For lots more inspiration, you can head over to Gina’s Facebook page, “Gina K Designs & StampTV Friends” and click on the Albums tab.
If this is your first time visiting my blog, welcome and I hope you return. If you are a returning visitor, thank you so much for your support!
If you would like to be notified by email each time I post a new project, there is an option to add your email (located at the top menu, or on the right side of my page) then hit the subscribe button. Should you have any questions or comments please leave them in the comments section. I’d love to hear from you and what you thought about today’s card.
Thank you for visiting and I hope you come back soon!
Happy Stamping and God Bless!!
Jeannie

That is beautiful!
LikeLike
Thank you so much Joanne!
LikeLike
Your card is just lovely!!! I was reading the blog and you stated you used Gina K’s Master Layout 4 & 5. I see how you used ML #4, but where did you use ML #5 at? Thank you for your help.
LikeLike
Hello Janet, thank you so much for your kind words! I used ML5 in the very beginning to cut out the panel where I did my stamping and masking. I used the largest stitched rectangle from the set. I hope this helps. 🙂
LikeLike
Your card is just lovely. How did you use Gina’s Master Layout 5 on this card? I was trying to figure it out, but I think I missed something.
LikeLike
See my previous comment 😊
LikeLike