I want to start out by thanking everyone for the support and nice comments you all leave for me. I truly appreciate the support of this blog!! I enjoy card making and bringing my creations to you, this wouldn’t be possible without your support, so again, thank you!! *Affiliate links are used at no additional cost to you. When you purchase products through my links I receive a small commission from these sales, which helps me to purchase new products for the cards I share on my blog. Thank you so much for your support, it is greatly appreciated!! Don’t forget to check out my previous blog for MANY more card projects! You can find them HERE.
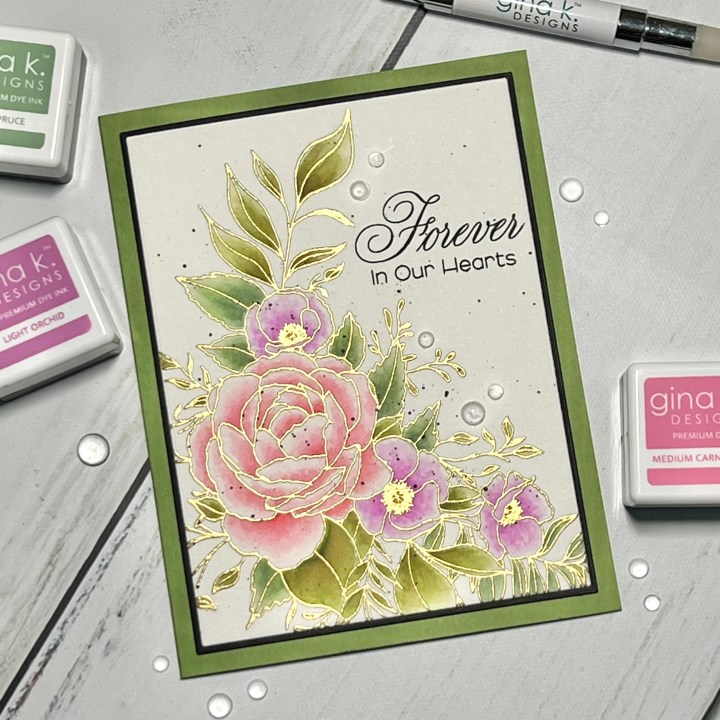
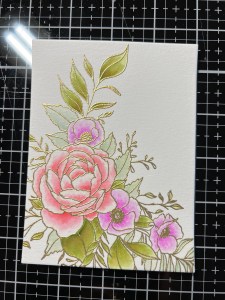
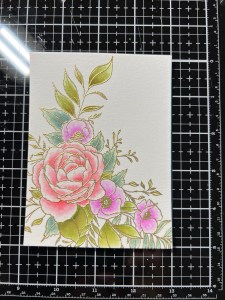
Today I have for you a watercolored card using the beautiful stamp set called Poppies & Peonies from Gina K. Designs recent release. This stamp set features a large floral and also several greetings for various occasions. I also use a greeting from the With Sympathy stamp set that has so many beautiful greetings and sentiments for those times when words are hard to come by. This set also has some solid foliage images to accent your cards. For my watercoloring, I use Gina’s dye inks and a water brush… there is no need to invest in expensive watercolors when you want to do simple watercoloring. Using watercolor cardstock makes a world of difference vs regular cardstock, as it allows the colors to blend and soak into the cardstock without pilling. I love to do my watercoloring within an embossed image to help contain the colors and love the look that metallic embossing powder gives. I am by NO means a watercolor expert, but I do enjoy watercoloring floral images. I’ve heard so many times “I wish I could watercolor” or “There is no way I could watercolor like that”. Believe me, I once thought that also, but then I thought I would give it a try, and I’m glad I did!! Don’t let watercoloring intimidate you, if you love the look, give it a try for yourself! Follow along with my step by step instructions for the process I use and see what you can do. I always like to work in layers to build my color up, this also adds variation and depth. All of the stamps, dies, cardstock and inks I use are from Gina K. Designs, let’s get started!!

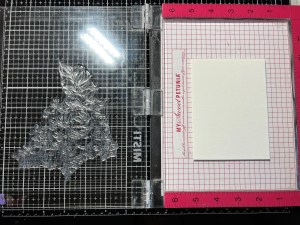
I will be doing all of my work today on my Tim Holtz Glass Media Mat.
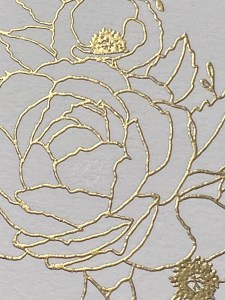
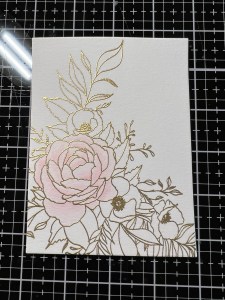
To start, I take the second largest rectangle die from the Master Layouts 1 Die Set and cut out of a piece of Watercolor Cardstock, running them through my Platinum 6 Die Cut Machine. I then place the panel onto my Grip Mat that I have in my MISTI Stamp Positioner which holds it in place while I do my stamping. I take the large floral image from the Poppies & Peonies Stamp Set and position it onto my panel, leaving room for a stamped sentiment later. I then pick up the stamp with the door of my MISTI and prep the panel using an Anti Static Powder Tool. Taking my Versamark Ink Pad, I ink up my stamp then stamp it onto the panel. Because watercolor cardstock has texture and to give it good coverage, I reink the stamp and stamp it onto the panel two more times. I then add Gold Embossing Powder and heat set with my Heat Tool.

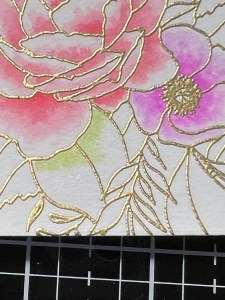
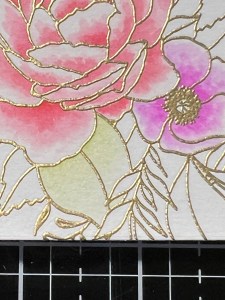
Using the white area of my Glass Mat, I press my ink cubes onto the glass with the colors I want to use for my watercoloring. Taking my Water Brush that I have filled with clean water, I gently press the barrel to release water into the bristles then brush over and wet the first petal that I will be painting. I want the petal “damp” which will help to blend the color I add… there should be no water “puddling”. As far as the water on the bristles of my Water Brush, they should also be damp/wet but not overly wet. Too much water will dilute the color and cause puddling onto the cardstock. I like to keep a paper towel nearby to dab my brush onto should it get too wet. If my brush becomes too dry, I just gently squeeze the barrel of the Water Brush which will release more water into the bristles. Now, I pick up some of the Light Carnation Ink from my palette and add it to the base of my wet petal. I then use my Water Brush to blend the color out towards the end of the petal, fading it out to white. I repeat this process using the same color until all of the petals have been colored.

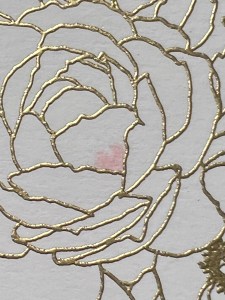
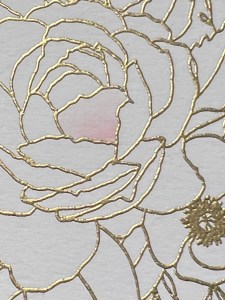
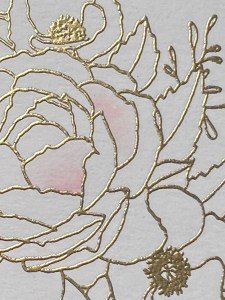
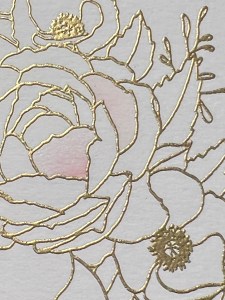
To add depth, I now add Medium Carnation Ink using my Water Brush to the base of a petal then blend it out towards the end, being careful not to completely cover the previous color. I repeat this process for all remaining petals. I do like to add a bit more ink to the areas where petals overlap or fold over as this is where there would be more shadows.
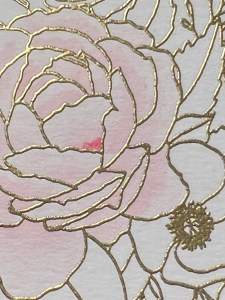

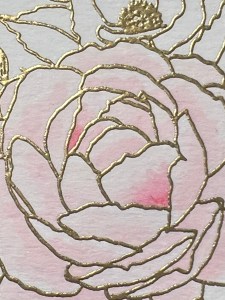
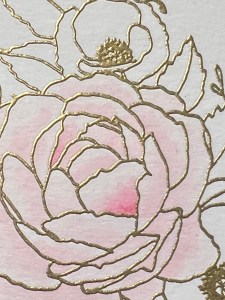

Using my Water Brush, I now add Dark Carnation Ink for even more added depth. This darkest color will add the finishing shadows and help make the flower come to life.
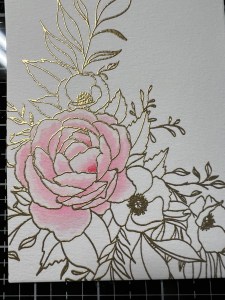
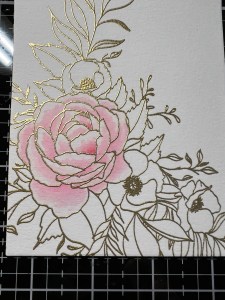
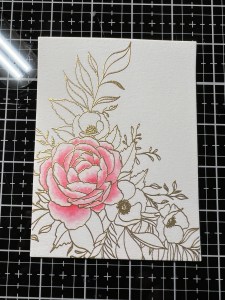
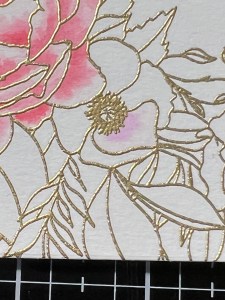
I now move onto the smaller flowers. Using the same process, I first wet the petal with my Water Brush then add Light Orchid Ink to the base of the petal and blend the color out to white. I repeat these steps for the remainder of the petals as well as the other two flowers. I then move onto adding Medium Orchid Ink to the base of the petals and blend the color out a bit. Finally, I add Dark Orchid Ink to the base of each petal. Instead of blending the color out too much, I use my Water Brush to “tap” the color out just a bit. This helps to keep the color more concentrated at the base as well as adds a slightly textured look, which I love.

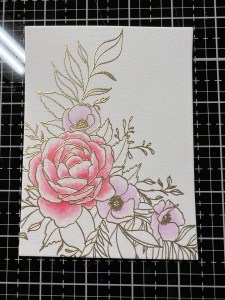
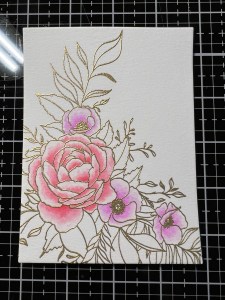
Moving onto the leaves, I repeat the entire process of first dampening each leaf with the water from my Water Brush. I then add Jelly Bean Green Ink to each leaf and blend and fade the color out toward the ends. I then add Grass Green Ink and again, blend the color out about half way as to not completely cover up the previous color. To further deepen the color and depth, I add Fresh Asparagus Ink to the base of each leaf and blend it out. Leaves can be a bit of a struggle for me, so I just keep going back and forth with the color until I am satisfied with the look. *A little tip, you can wipe the Water Brush onto a paper towel to remove all color from the bristles, then brush over any section of coloring that your not happy with, and use a clean paper towel to dab up some of the color. This trick won’t completely remove the color, but allows some of the color to be picked up, then you can add the color again.
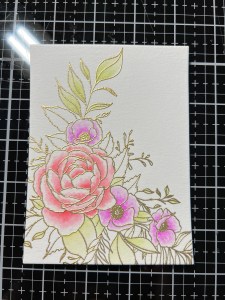
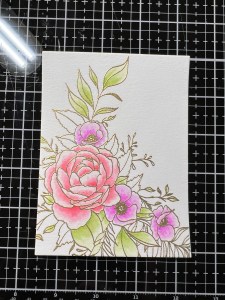
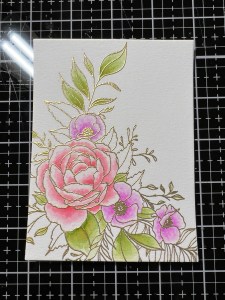
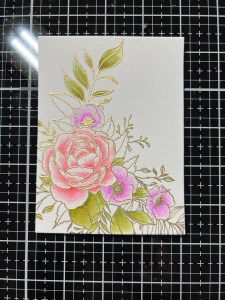
For the remaining leaves, I add Light Spruce Ink and blend it out with my Water Brush. I then add Medium Spruce Ink to the base of each leave and blend it out. I do end up adding Prickly Pear Ink to fill in the centers of the smaller flowers and the little sprigs later on.
Now it’s time to add a sentiment to my panel. I place the panel into my MISTI and position a sentiment from the With Sympathy Stamp Set then stamp it using Amalgam Obsidian Black Ink. To add a little texture and interest to my panel, I spatter some Black Soot Distress Paint over it, using a small paintbrush.


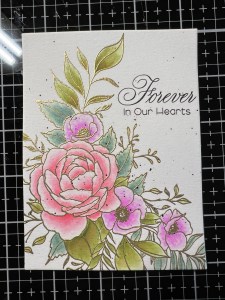
While the spatters dry, I take the largest rectangle die from the Master Layouts 1 Die Set and cut out of Black Cardstock, running them through my P6. Using Liquid Glue I adhere the panels together then glue them onto a Grass Green Cardstock card base. *I felt like the last leaves I painted looked a bit too “blueish” so I added a little Jelly Bean Green Ink to tone them down a bit.

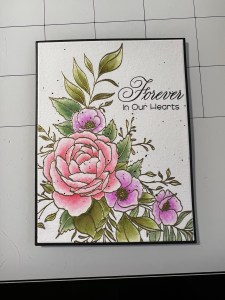
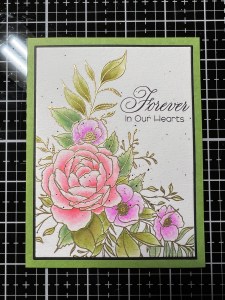
Using my Pick & Stick Tool I add some Dew Drops with Liquid Glue in a Fine Tip Bottle and this completes my card.
I hope you enjoyed today’s lengthy card tutorial! Like I said earlier, I’m not watercolor expert but this is the process that works best for me, it’s my style of watercoloring. Adding metallic embossing powder not only helps to contain the color but it adds such beauty when the light hits it! I encourage you to give my technique a try, if not for a full card panel just try it on a practice flower, you may just surprise yourself! I would love to hear from you, if you do decide to give it a try!
If this is your first time visiting my blog, welcome and I hope you return. If you are a returning visitor, thank you so much for your support!
If you would like to be notified by email each time I post a new project, there is an option to add your email (located at the top menu, or on the right side of my page) then hit the subscribe button. Should you have any questions or comments please leave them in the comments section. I’d love to hear from you and what you thought about today’s card.
Thank you for visiting and I hope you come back soon!
Happy Stamping and God Bless!!
Jeannie

This is such a beautiful card!
LikeLike
Thank you so much, Joanne!!
LikeLike
your card is beautiful and your instructions are very detailed and helpful. Thanks for sharing your inspiration.
LikeLike
Thank you for your kind words, Meredith and for visiting my blog!!
LikeLike
Thank you for sharing this! I just subscribed to your blog so I can continue to follow you and your beautiful cards!
LikeLike
I’m so happy you enjoy my blog, thank you for your kind words and subscribing to my blog!!
LikeLike
This has to be the most detailed and helpful blog I have ever come across! Thank you for sharing so much and being so so helpful 😊
LikeLike
Aww, thank you so much Pamela for the sweet compliment. I’m glad you enjoyed my blog. I try hard to be as detailed as I can be, explaining my process. Thank you for visiting my blog.
LikeLike