
I want to start out by thanking everyone for the support and nice comments you all leave for me. I truly appreciate the support of this blog!! I enjoy card making and bringing my creations to you, this wouldn’t be possible without your support, so again, thank you!! *Affiliate links are used at no additional cost to you. When you purchase products through my links I receive a small commission from these sales, which helps me to purchase new products for the cards I share on my blog. Thank you so much for your support, it is greatly appreciated!! Don’t forget to check out my previous blog for MANY more card projects! You can find them HERE.
*****EDITED***** IF ANY OF THE NEW RELEASE PRODUCTS YOU ARE LOOKING FOR HAPPEN TO BE SOLD OUT ON GINA K DESIGNS WEBSITE, BE SURE TO CHECK OUT SOME OF HER PARTNERED SITES AS THEY HAVE MANY OF THE NEW PRODUCTS STILL IN STOCK. THERMOWEB HAS THE FUSE FOILING GEL AS WELL AS ALL OF THE NEW COLORS OF FOILS STILL IN STOCK AT THE TIME OF THIS EDIT. I NOTICED THAT THEY ALSO HAVE THE FUSE FOILING MACHINE IN STOCK (NORTH AMERICAN VERSION ONLY) ALSO, CHECK OUT THE HUGE LINE OF GINA K PRODUCTS THEY SELL!! ***THERMOWEB OFFERS FREE SHIPPING ON ORDERS OF $50.00 OR MORE!! SIMON SAYS STAMP IS ANOTHER ONE TO CHECK OUT FOR ANY OF THE STAMPS AND BUNDLES THAT HAVE SOLD OUT ON GINA’S SITE. *THIS HAS BEEN A VERY POPLULAR RELEASE!!*
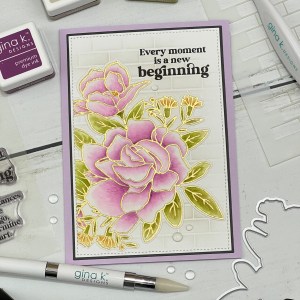
Time for another Gina K Designs release!! Tonight, Gina’s February release goes live at 7:00PM CST, and boy does she have a lot of beautiful new products, including a new kit and another Master Layouts die set!! New products can be found HERE. Be sure to check out Gina’s live on her Facebook page or YouTube channel, where she will be showing all of the new products up close. I am so excited to see the new Master Layouts dies, I cannot say enough about these die series! I use at least one of the ML sets on 99% of my cards. I love how they give a clean, finished look and Gina has started a ML series on her YouTube channel where she focuses on each ML set and shows how each works to create different layout ideas for quick and easy cards. All of these ideas are kept in a binder for future reference… what a great tool to have when you are in a creative slump or just want new ideas. Today, I have a card for you using the brand new, Trust The Magic stamp and die bundle illustrated by Arjita Singh for Gina’s release. This set is filled with encouraging sentiments and has a beautiful floral image that is so big, I decided to use my A6 ML die set so I would have a little more room on my card front. To watercolor my image, I went with my Plum Punch dye ink, which is one of my favorite colors as it gives such a beautiful, soft tone of plums and lavenders depending on how much ink you use. All of the stamps, dies, inks and cardstock (except the watercolor c/s) is from Gina K Designs. Let’s get started!!!
I will be doing all of my work today on my Tim Holtz Glass Media Mat.
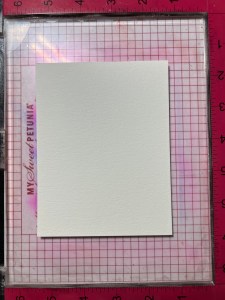
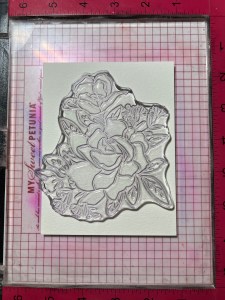
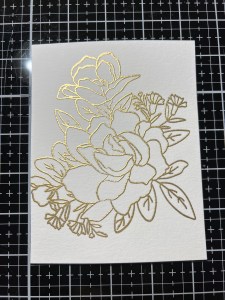
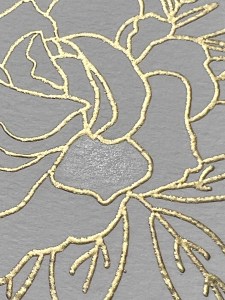
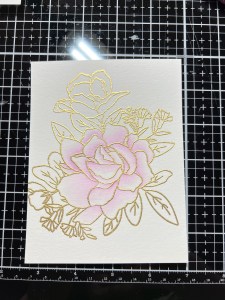
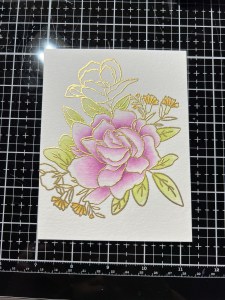
To start, I place a piece of Watercolor Cardstock onto a Grip Mat that I keep in my MISTI Stamp Positioner. I then place the large floral image from the Trust The Magic Stamp & Die Bundle and pick it up with the door of my MISTI. Next, I prep my panel with Anti Static Powder then stamp the image using Versamark Ink. I then add Gold Embossing Powder to the image and heat set it using my Heat Tool.
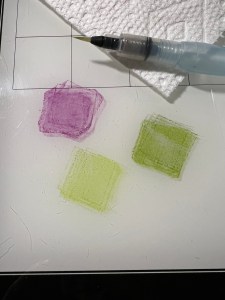
I will be doing my watercoloring using ink cubes and a Water Brush filled with clean water. I choose the colors I want to use and press them onto my Glass Mat, I will use this as my palette. The colors I chose are, Plum Punch, Jelly Bean Green, Fresh Asparagus & (Butterscotch not pictured) Using clean water, I dampen my first petal then pick up some Plum Punch Ink using my Water Brush and add it to the base of the petal. I then remove the ink from my Water Brush by painting it off onto a clean paper towel. Now that my brush is clean, I blend the color I added to the petal, out towards the end, fading off to white.


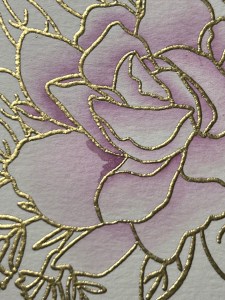
I now work on my second petal, using the same process. I like to blend the color out to almost the tip, but try to leave the tips white as this not only adds highlights, but helps the faded color to be more visible. I continue the same process with all remaining petals to complete my first layer. *Because I will be using only one color for the petals, I like to work in layers and build my color up. This helps to add dimension to the color by creating depth with the darker shades that layering gives.
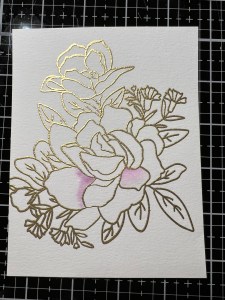
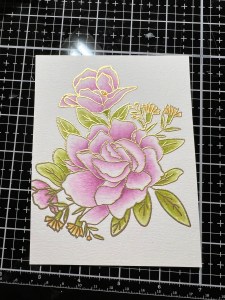
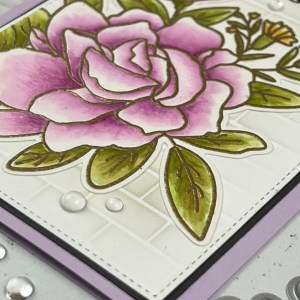
Now it’s time to work on my second layer of color. Using my Water Brush, I pick up some Plum Punch Ink and add it to the base of a petal. I then pull and blend the color about half way down the petal, being careful not to fully cover all of my previous layer. I repeat this process for every petal. Now it’s time for me to look at where petals meet and overlap. These areas would normally be a bit darker with shadows, so I pick up small amounts of the same Plum Punch Ink and add it to these areas, and blend them out just a bit into the previous layer. I do like to tap my brush a bit as I blend these shadows, it not only blends the color, but also adds a bit of texture to the petals. *I like to keep this last layer of ink concentrated to the base of the petals as well as folds and overlaps as it creates depth and separation to the petals.
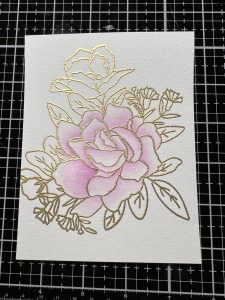


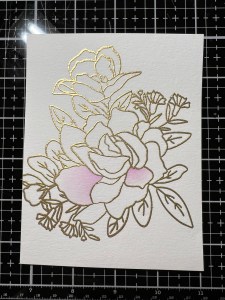
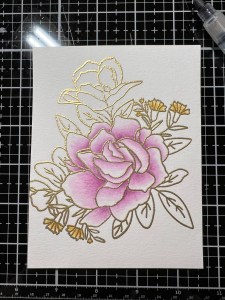
For the small flowers, I add Butterscotch Ink using my Water Brush to each petal. I then go back to each one and add another layer at the base and blend the color out a bit. Next, I color my leaves and stems. I wet my first leaf then add Jelly Bean Green Ink to the base and blend it out towards the tip. I repeat this process for all of the bigger leaves. To add some depth and dimension, I added some Fresh Asparagus Ink to the leaves around the veins and blended it out a bit as well as the stems. I then went back to the other two larger flowers and colored them with the same process I did with the main one.


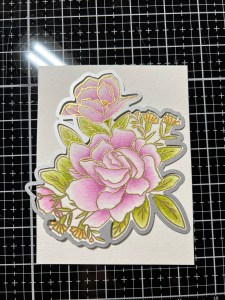
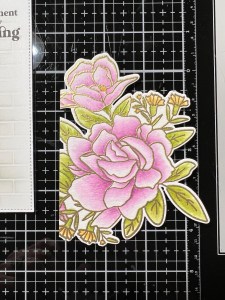
Now that my coloring is complete, I take the coordinating die from the Trust In The Magic Stamp & Die Bundle and cut out the image, running them through my Intri-Cut Die Cutting Machine.
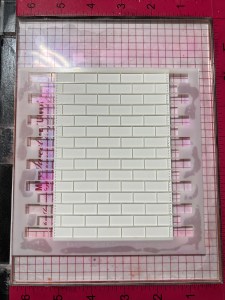
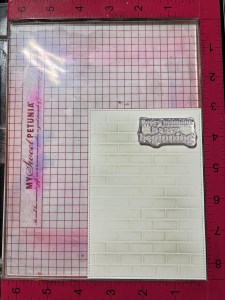
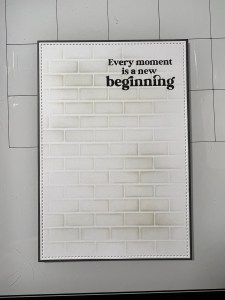
I now take the large stitched rectangle die from the Master Layouts 17 Die Set and cut out of White Cardstock, running them through my Intri-Cut. To add a backdrop to this panel, I place it onto my Grip Mat in my MISTI then place my Brick Wall Stencil over it, adhering it down to my Grip Mat. I then take my Blending Brush and blend Whisper Ink over the stencil to create to create a soft, uneven blend and remove the stencil. I then place the panel back into the corner of my MISTI to stamp my sentiment. Choosing a sentiment from the same Trust The Magic Stamp & Die Bundle, I place it over the top right corner of my panel and stamp it using Amalgam Obsidian Black Ink.


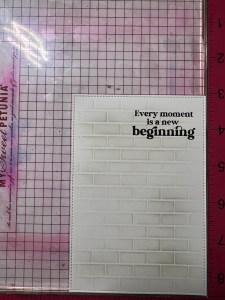
Once my sentiment has a chance to dry, I place my die cut image over my stenciled panel to determine the placement so I know where to cut the image down. Using a pencil, I mark the area I want to trim down then use my Guillotine Paper Trimmer and cut off the left edge of the image.
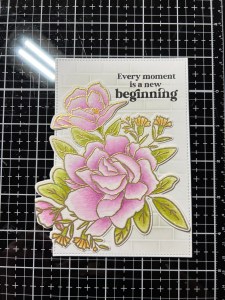
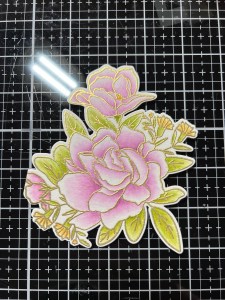
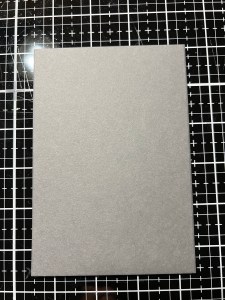
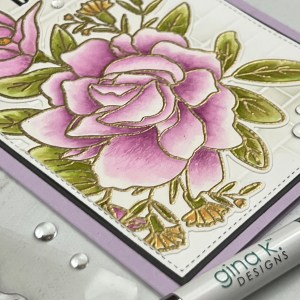
Taking the largest rectangle die from my Master Layouts 17 Die Set, I cut out of Slate Cardstock, running them through my Intri-Cut. Using Liquid Glue, I adhere the two panels together then glue my image over the top, lining up the left edge along the stitched edge and just under my sentiment. Next, I cut a 6″ x 8 1/2″ piece of Lovely Lavender Cardstock, scoring it at 4 1/4″ to create my 4 1/4″ x 6″ card base. I then mount my card front using Liquid Glue.


Using my Pick & Stick Tool, I add a few Dew Drops using Liquid Glue and this completes my card.
I hope you enjoyed today’s card and learned how easy watercoloring can be by just using your ink pads! I have a set of actual watercolors, but find myself always reaching for my ink pads when I want to watercolor an image. With the wide variety of ink pad colors that most of us have, you will always have a great color palette! As you seen with my card today, I only used one ink color for my florals and was able to achieve multiple depths of color by adding extra layers. Experiment with your ink pads, and always remember to go light, especially with the first layer. You can always build up your color and depth by adding more layers. If you are unable to catch Gina’s live presentation at 7:00PM CST, you can always watch the replay her YouTube channel!
If this is your first time visiting my blog, welcome and I hope you return. If you are a returning visitor, thank you so much for your support!
If you would like to be notified by email each time I post a new project, there is an option to add your email (located at the top menu, or on the right side of my page) then hit the subscribe button. Should you have any questions or comments please leave them in the comments section. I’d love to hear from you and what you thought about today’s card.
Thank you for visiting and I hope you come back soon!
Happy Stamping and God Bless!!
Jeannie

This card is absolutely beautiful! Thank you so much for the step by step tutorial.
LikeLike
Thank you so much for your kind words, Joanne and for visiting my blog!!
LikeLike