I want to start out by thanking everyone for the support and nice comments you all leave for me. I truly appreciate the support of this blog!! I enjoy card making and bringing my creations to you, this wouldn’t be possible without your support, so again, thank you!! *Affiliate links are used at no additional cost to you. When you purchase products through my links I receive a small commission from these sales, which helps me to purchase new products for the cards I share on my blog. Thank you so much for your support, it is greatly appreciated!! Don’t forget to check out my previous blog for many more card projects! You can find them HERE.
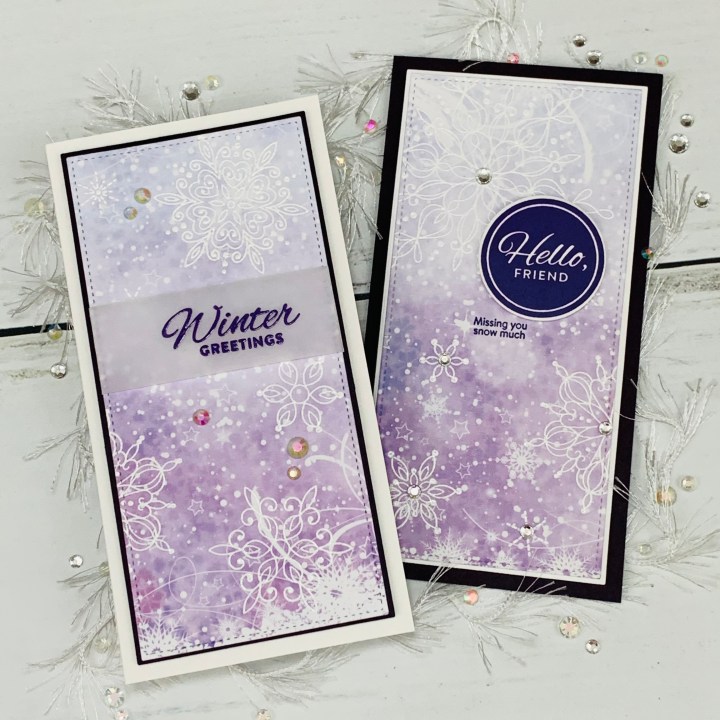
Today I have not one but two mini slimline cards for you! These are super quick and easy to make and the best part is the beautiful backgrounds are already created for you! I will be using the gorgeous Blurry Flurries pattern papers to create my cards. There are SO many beautiful designs to choose from. This pattern paper pack includes 24 double sided 6 x 6 sheets with two each of 12 different designs on front and two each of 12 different designs on back! Each sheet allows for two slimline panels to be cut from them making mass producing so quick and easy! I will be using the Snowflake Season stamp set from Simon Says Stamp. This set is filled with so many beautiful detailed snowflakes along with fun sentiments and greetings for the winter season. If you haven’t yet heard, Simon Says Stamp has a brand new release that started today! Let’s get started on today’s cards!!
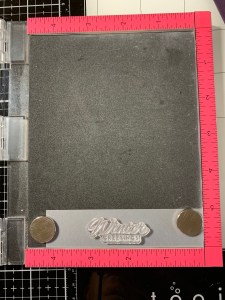
I will be doing all of my work today on my Tim Holtz Glass Media Mat.
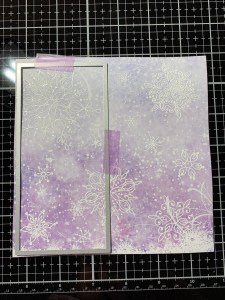
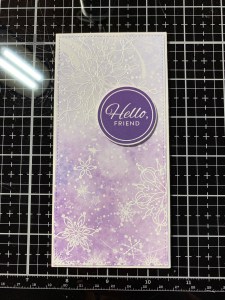
I wanted to start by showing you all of the beautiful patterns from the Blurry Flurries Paper Pad. Boy, was it hard to choose which one I wanted to use but I finally settled on a pretty, soft purple design. To add a little texture to the background and to add in some more snowflakes I placed the background into my MISTI Stamp Positioner and prepped it with my Anti Static Powder Tool.

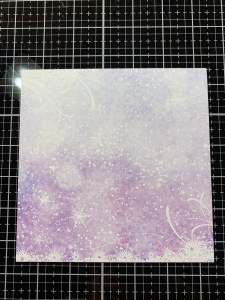
Next, I laid out all of the single snowflake images from the Snowflake Season Stamp Set over my background so that the entire panel was filled. I then picked up the images with the door of my MISTI and inked them up using Versamark Ink then stamped them onto my panel. I add White Embossing Powder to the images and heat set with my Heat Tool. Look how perfect the embossed snowflakes look against the background, I can’t get over how quick and easy this is to create!


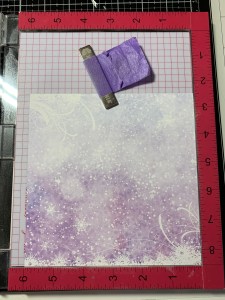
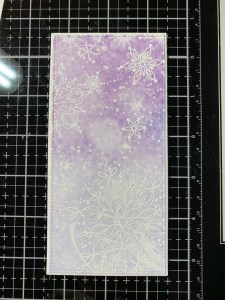
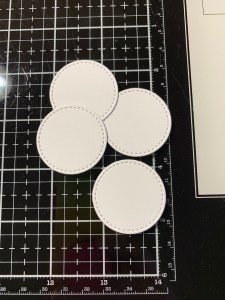
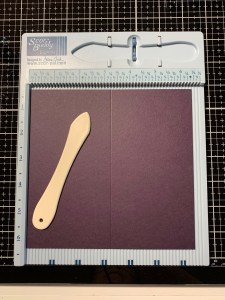
Taking the large stitched die from the Master Layouts 7 Die Set I line it up over the left side of the panel and run them through my Big Shot Die Cut Machine. I then use the same die to cut out of the right side of the panel, I now have two panels with stitched edging that can be made into two cards!

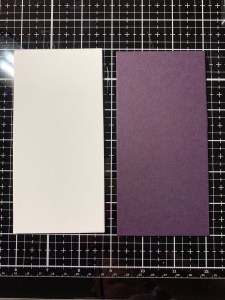
Using the large layering die from the same Master Layouts 7 Die Set I cut once out of White cardstock and once out of Edible Eggplant Cardstock, running them through my Big Shot. Starting out with the white layering panel I use Double Sided Adhesive and mount one of the embossed panels to it.
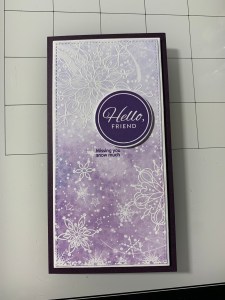
Next, I place a piece of White Cardstock into my MISTI and choose a greeting from the Snowflake Season Stamp Set. Using Villainous Potion Distress Oxide Ink I stamp the image onto the cardstock. I ended up stamping it two times to get a good, solid impression. *You can see just above on the top portion of the cardstock I stamped the image with the same color but in the regular distress formula. I ended up going with the oxide as I liked the shade a little better and the oxide also gives a better crisp, solid image.
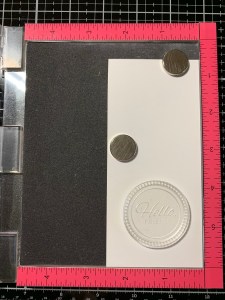

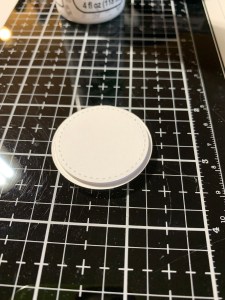
Giving the greeting several minutes to dry, I take the layering circle die from the Master Layouts 7 Die Set and line it up around the edges then cut the greeting out, running them through my Big Shot. To add some dimension to the greeting I take the stitched circle die from the same Master Layouts 7 Die Set and cut out of some scrap cardstock four times. I then stack and glue them together, then onto the back of my greeting using Liquid Glue. Next, I mount the greeting onto the front of my panel using Liquid Glue.
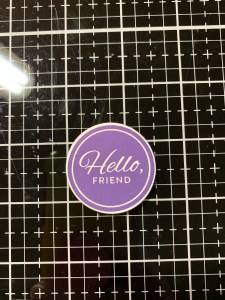
I now place the panel into my MISTI to stamp a sentiment to go along with the greeting. I choose a tiny sentiment from the Snowflake Season Stamp Set and stamp it using the same Villainous Potion Distress Oxide Ink just below and to the left of the greeting.


Next, I place a 6 1/4″ x 6 1/2″ piece of Edible Eggplant Cardstock into my Scor Buddy and score it at 3 1/4″ creating a side folding card base. I then add some Fun Foam to the back of my panel and mount it onto the card base using Liquid Glue.
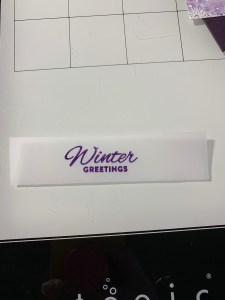
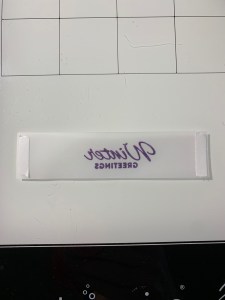
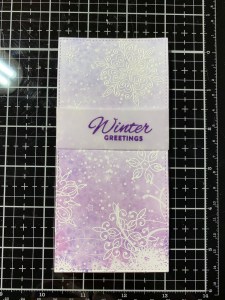
For my second card I take a 1″ x 4 1/4″ strip of Vellum and place it into my MISTI then prep it with my Anti Static Powder Tool. I then stamp a sentiment from the Snowflake Season Stamp Set onto the Vellum using Villainous Potion Oxide Distress Ink, add Clear Embossing Powder and heat set it with my Heat Tool.
To attach the Vellum strip to my panel I add Double Sided Adhesive to the back side of each end, remove the release paper and adhere it to the back of the panel. Using Double Sided Adhesive I adhere the panel onto the previously cut Edible Eggplant Cardstock panel. I then add a piece of Fun Foam to the back of the panel and mount it onto a 6 1/4″ x 6 1/2″, scored at 3 1/4″ White Cardstock card base using Liquid Glue.
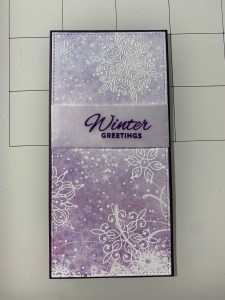


To finish off both cards I use my Jewel Picker to add Angel Aura Iridescent Rhinestones to the “winter greetings” card front and Dazzling Diamond Rhinestones to the centers of the snowflakes on the “hello friend” card front using Liquid Glue and this completes my cards.
I hope you enjoyed my two cards and learned how easy it is to make quick backgrounds using pattern papers! To add more color variations, colored ink with clear embossing powder could be added to the panels. I love stamping greetings and images with oxide inks, it gives nice solid stamping and can also be embossed. Oxide inks have so many different uses, they are not just for ink blending!
If this is your first time visiting my blog, welcome and I hope you return. If you are a returning visitor, thank you so much for your support!
If you would like to be notified by email each time I post a new project, there is an option to add your email (located on the right side of my page) then hit the subscribe button. Should you have any questions or comments please leave them in the comments section. I’d love to hear from you and what you thought about today’s card.
Thank you for visiting and I hope you come back soon!
Happy Stamping and God Bless!!
Jeannie
