I want to start out by thanking everyone for the support and nice comments you all leave for me. I truly appreciate the support of this blog!! I enjoy card making and bringing my creations to you, this wouldn’t be possible without your support, so again, thank you!! *Affiliate links are used at no additional cost to you. When you purchase products through my links I receive a small commission from these sales, which helps me to purchase new products for the cards I share on my blog. Thank you so much for your support, it is greatly appreciated!! Don’t forget to check out my previous blog for many more card projects! You can find them HERE.
***FYI… I wanted to let everyone know that The 12 Days Of Christmas is going on over at Scrapbook.com. This is a yearly sales event that runs from December 1st – 12th with big discounts on many popular brands and freebies!! Be sure to check back often as freebies will be changing. If you are interested, you can check it out HERE.
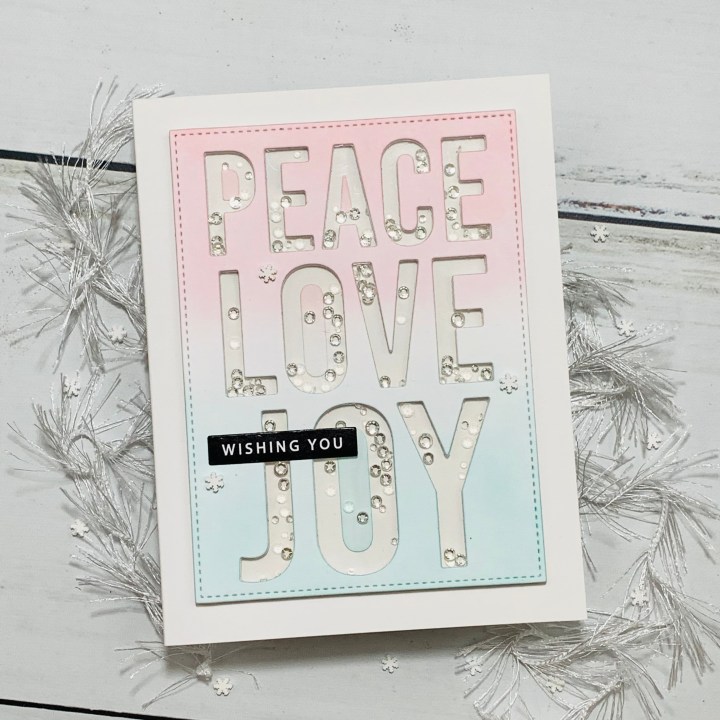
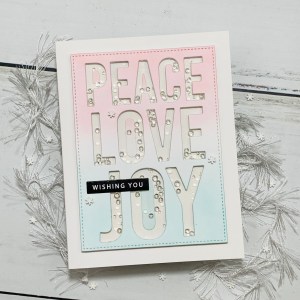
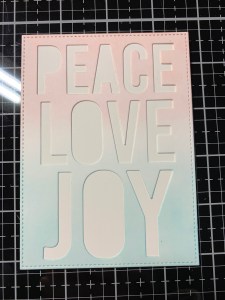
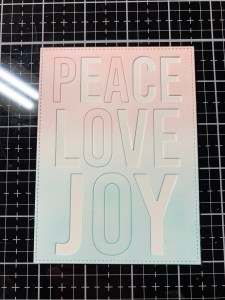
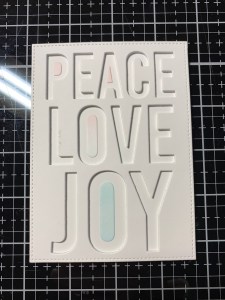
Today I have a fun simple shaker card using the Peace Love Joy Die Plate from Gina K. Designs. I love using die plates that take up all or most of a card front, it makes for a quick, simple card. The best part of this die is that it matches perfectly and is the same size as the large stitched die from the Master Layouts 2 Die Set. Being that they are the same size, the die from the ML2 is great to use as a backer with the die plate when making a shaker card. I love that Gina comes out with products that can be used together, so creative!! Today I went for soft, subtle colors for my card. If you’d like to see a bold, dramatic look using this same die scroll through my blog to see or you can search for it by typing in Peace Love Joy into the search bar. All of the inks, cardstock, dies and sentiment used on today’s card are from Gina K. Designs. Let’s get started!!
I will be doing all of my work today on my Tim Holtz Glass Media Mat.
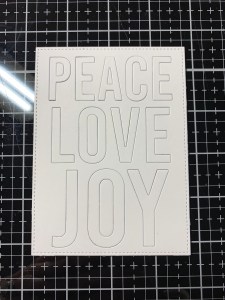
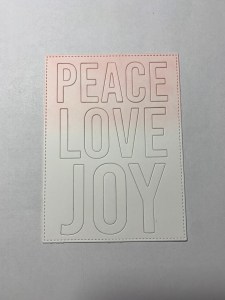
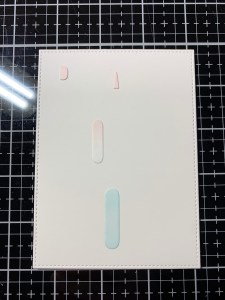
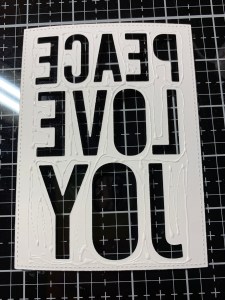
To start I take the Peace Love Joy Die Plate and cut out of White Cardstock, running them through my Big Shot Die Cut Machine. Keeping all of the letters in tact (for any letters that popped out, I just placed them back into the die cut) I use my Mini Blending Brush and blend Innocent Pink Ink over the top portion of the panel, including the letters and blend towards the middle and fade out to white. I then use a Mini Blending Brush to blend Ocean Mist Ink onto the bottom of the panel, blending up towards the middle and fade out to white. Rather than blend the colors together, I sometimes like to fade the ink out leaving a white area between. This white area looks beautiful when blending dark colors also, just remember to fade the ink out so there are no harsh lines. *The reason I keep the letters intact when ink blending is I want the centers of the P, A and O to match the blend as I will be placing these centers back behind the letters.

Next, I need a backer for my shaker well. I take the large stitched rectangle from the Master Layouts 2 Die Set and cut out of White Cardstock, running them through my Big Shot. I then temporarily place my blended panel over the solid panel that I just cut and make sure it is lined up on all four sides.
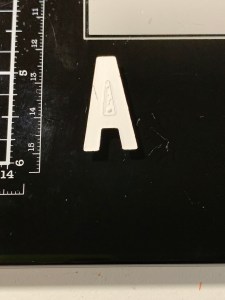
To get the right alignment for my center pieces I add Liquid Glue to the centers of the A, P and O’s then place them with the letters still intact back into the cut out areas of my panel. I give the glue a minute to set then use my Craft Pick to pry up and remove the letters leaving the inside pieces perfectly aligned then remove the blended panel.

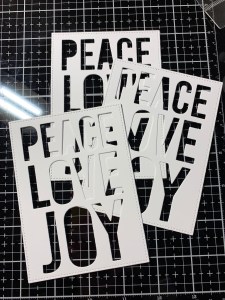
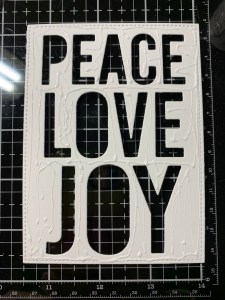
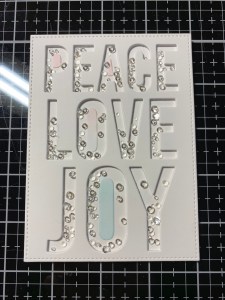
Using the same Peace Love Joy Die Plate I cut out of White Cardstock three times, running them through my Big Shot. Using Liquid Glue I stack and glue the three die cuts together then glue them onto my solid panel. I now have thickness with the stacked dies that my shaker bits will be able to freely move around in.
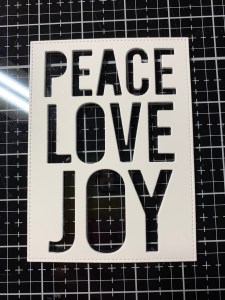
To create my shaker window I cut a 3 1/4″ x 4 1/2″ piece of Acetate using my Guillotine Paper Trimmer. I then add Liquid Glue to the back of my blended panel making sure to go around all of the letters as well as the outer edges then adhere the Acetate piece onto the back.


Next, I add some Clear Crystals to each letter well. This is a great shaker mix with many different sizes, I felt like the largest ones may be a little too big so I did pick them out. I then add Liquid Glue around all of the letters and all four edges and place the blended panel on top making sure all four edges are evenly aligned. To make sure all of the areas around the letters seal good I place something heavier on top of the panel while I work on the rest of the card.

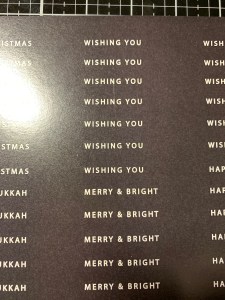
Now I choose a sentiment from the Holiday Greetings Sentiment Sheets and use one of the Sentiment Strip Dies to cut it out, running them through my Big Shot.
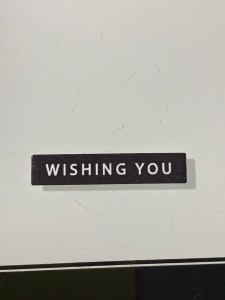
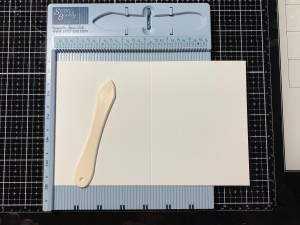
Next, I place a 5 1/2″ x 8 1/2″ piece of White Cardstock into my Scor Buddy and score it at 4 1/4″ creating a side folding card base. I then add Liquid Glue to the back of my shaker panel and adhere it onto the card base. To adhere the sentiment I add a small amount of Liquid Glue to the back and mount it over the lower portion of the panel.
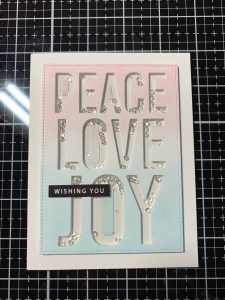
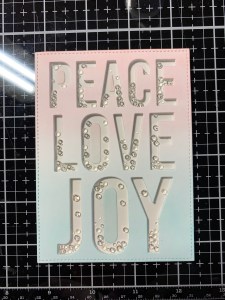
To finish off, I use my Jewel Picker to add a few Mini Snowflakes with Liquid Glue and this completes my card.
I hope you enjoyed my card, it was a quick card to put together. I think this card would also look great using traditional red and green colors. Red and green colors do not blend together nicely, they would produce a brown/muddy color. By fading the ink out to white between the two colors it leaves a beautiful contrast! I chose to stack my panels together to create a well for the shaker elements. Foam tape could also be used but would have to be cut into very thin pieces and placed all around each letter to keep the bits from falling out. Using stacked dies is a quick and easy method to use while giving good stability. In hindsight I would have stacked the inside pieces of the letters to make them stand out a bit more so that the shaker elements would go around them instead of over them, but all in all I am happy with the results!
If this is your first time visiting my blog, welcome and I hope you return. If you are a returning visitor, thank you so much for your support!
If you would like to be notified by email each time I post a new project, there is an option to add your email (located on the right side of my page) then hit the subscribe button. Should you have any questions or comments please leave them in the comments section. I’d love to hear from you and what you thought about today’s card.
Thank you for visiting and I hope you come back soon!
Happy Stamping and God Bless!!
Jeannie
