I want to start out by thanking everyone for the support and nice comments you all leave for me. I truly appreciate the support of this blog!! I enjoy card making and bringing my creations to you, this wouldn’t be possible without your support, so again, thank you!! *Affiliate links are used at no additional cost to you. When you purchase products through my links I receive a small commission from these sales, which helps me to purchase new products for the cards I share on my blog. Thank you so much for your support, it is greatly appreciated!! Don’t forget to check out my previous blog for many more card projects! You can find them HERE.
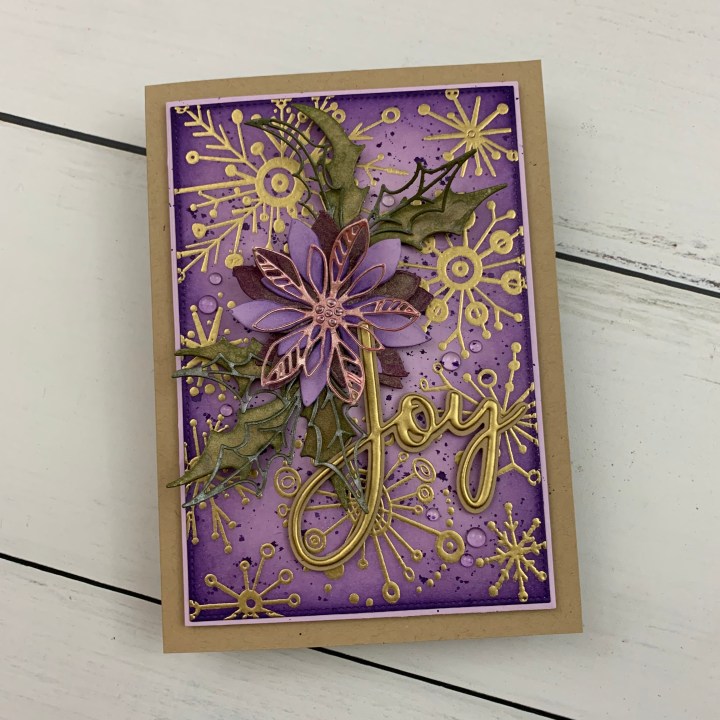
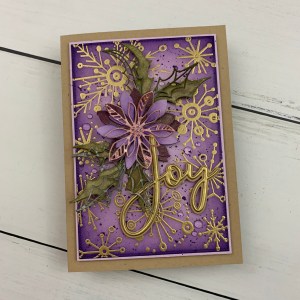
Today I have created a card using the Retro Flakes stamp set to make a fun whimsical background and used the Seasonal Sketch die set to create a dimensional focal point. I will be doing the emboss resist technique to add some shaded inking to my background. I have really been into using non traditional colors for my Christmas cards this year and love the different shades of purple paired with kraft cardstock! Kraft cardstock really adds an old time vintage feel and goes well with so many different colors. I use some mica sprays to tie in with the metallic embossing giving my card lots of shine. Looking through my blog I’m sure you can tell that the Large Joy die has been my favorite this year! This die has such a beautiful font and is the perfect size to use on both A2 size and 5 x 7! I have been enjoying making the larger 5 x 7 size as it gives more room for the larger stamp sets and dies Using the Master Layouts 8 die set makes these cards a breeze while adding faux stitching and the perfect, even mat! I will be using regular distress inks for my ink blending and shading. Let’s get started!!
I will be doing all of my work today on my Tim Holtz Glass Media Mat.
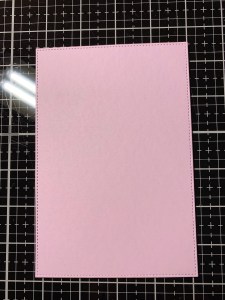
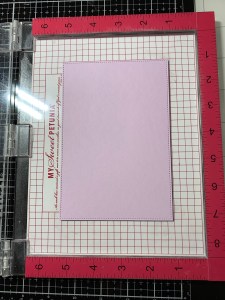
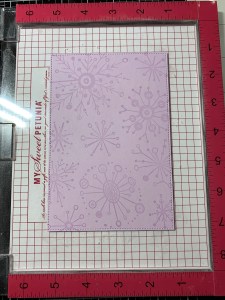
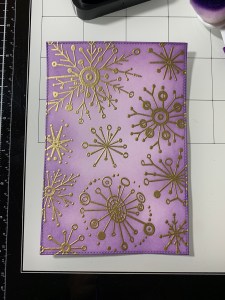
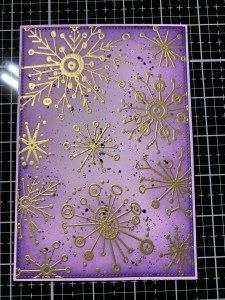
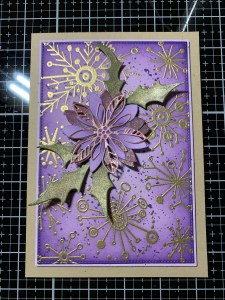
To start I take the large stitched rectangle die from the Master Layouts 8 Die Set and cut out of Lovely Lavender Cardstock, running them through my Big Shot Die Cut Machine. I then add some Adhesive Dot Runner to the back of the panel (to help hold it into place) and set it into the center of my MISTI Stamp Positioner then prep it with my Anti Static Powder Tool. *Because I want my images to hang off the edges of my panel, it is placed in the center for stamping.
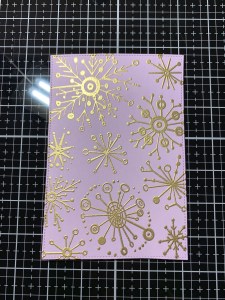
Next, I take all of the images from the Retro Flakes Stamp Set and place them over my panel making sure some are hanging over the edge. I then stamp these images using Versamark Ink onto the panel, add Gold Embossing Powder and heat set with my Heat Tool.
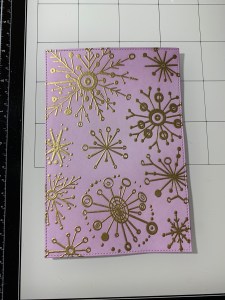
Using my Blending Brush I first blend Milled Lavender Ink Distress Ink around all four sides of my panel, fading the ink out towards the center. I then blend Dusty Concord Distress Ink around the edges and onto the centers of the outer images. To intensify the ink blend and add contrast I blend Villainous Potion Distress Ink around the very edges of the panel and corners. Now that my ink blending is finished I take a dry soft cloth and gently buff any ink sitting on top of my embossed images. *Starting with colored cardstock is a great way to get easy shading while using less ink.

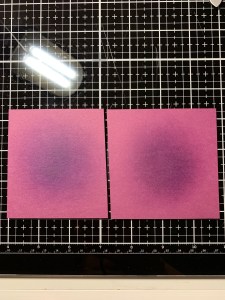
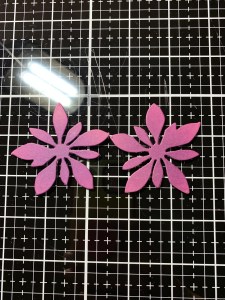
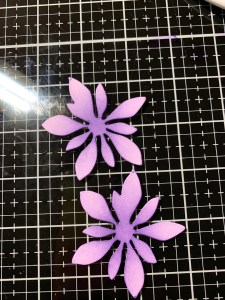
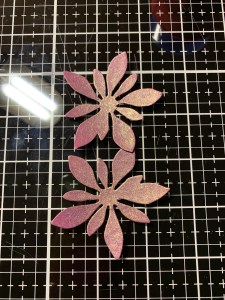
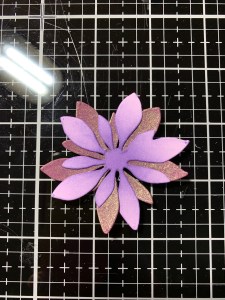
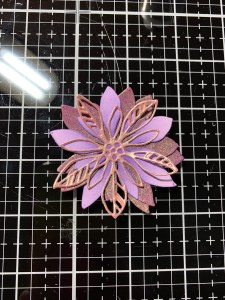
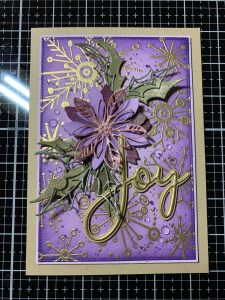
Next, I take my Blending Brush and blend Dusty Concord Distress Ink and Villainous Potion Distress Ink onto Plum Punch Cardstock. I then take the solid floral die from the Seasonal Sketch Die Set and cut out of the blended cardstock, running them through my Big Shot. I also blend Villainous Potion Distress Ink onto a piece of Lovely Lavender Cardstock and cut out using the same die.
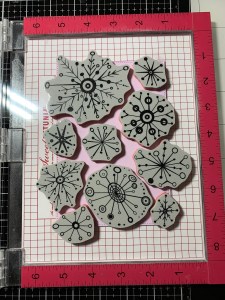
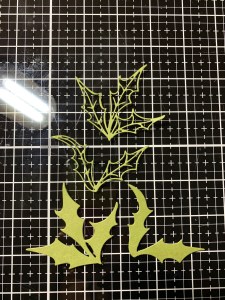
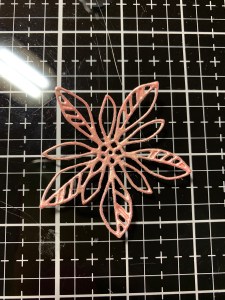
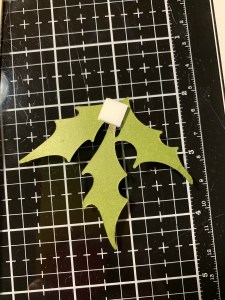
I now take the solid leaf dies as well as the detail dies from the Seasonal Sketch Die Set and cut out of Fresh Asparagus Cardstock, running them through my Big Shot. I lay out all of the die cuts, except for the lavender pieces and spray them with Tarnished Brass Mica Spray then set them aside to dry.

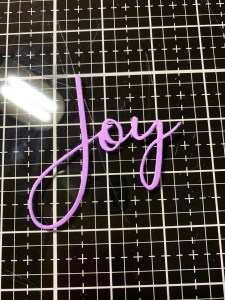
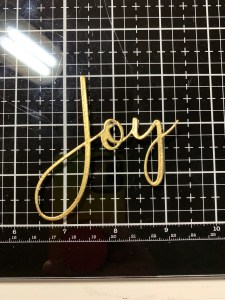
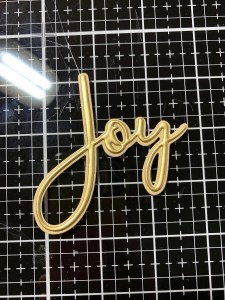
For a greeting I take the Large Joy Die Set and cut out of Lovely Lavender Cardstock, running them through my Big Shot. I then take my Versamark Ink Pad and press it onto the die cut and add Gold Embossing Powder then heat set with my Heat Tool. Because I want to have a thicker embossing to make my greeting stand out more I press the ink pad over the embossed die cut and again add Gold Embossing Powder and heat set with my Heat Tool. I ended up inking and embossing about four times to achieve this look. I now take the shadow die from the same Large Joy Die Set and cut out of Kraft Cardstock, running them through my Big Shot. Adding Liquid Glue to the back of the embossed greeting I adhere it onto the shadow die cut.


Next, I take the large layering die from the Master Layouts 8 Die Set and cut out of Lovely Lavender Cardstock, running them through my Big Shot. I then add Double Sided Adhesive Tape to the back of my blended panel and adhere it to the layering panel. For a little added color and texture I press my Villainous Potion Distress Ink Pad onto my Glass Mat and add a little bit of water. I then mix the water into the ink using a small paintbrush then spatter it onto my panel. *I would have normally spattered the panel before adhering to the layering panel but I didn’t think about adding the spatters until after they were adhered together. Only a few small spatters hit the layered piece which I kind of liked.


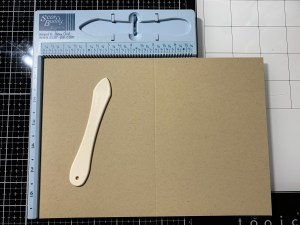
To create a card base I place a 7″ x 10″ piece of Kraft Cardstock into my Scor Buddy and score it at 5″ creating a side folding card base. To the back of my panel I add a piece of Fun Foam then mount it onto my card base using Liquid Glue.


To assemble my flower I add Liquid Glue to the back center of the lavender piece then adhere it onto one of the mica sprayed pieces offset. I then add Liquid Glue to the back center of this and again adhere offset over the other mica sprayed piece. For the final top layer I take the detail floral piece from the Seasonal Sketch Die Set and cut out of a piece of cardstock that was sprayed Winterberry Mica Spray, running them through my Big Shot. I then added Liquid Glue to the back center area and mounted it offset over the other stacked die cuts.

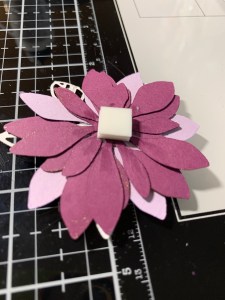
To add a little lift and dimension for my floral I added two stacked Adhesive Foam Squares to the back center and mounted it onto my card front. I then added a single Adhesive Foam Square to the bottom back of the leaf dies and tucked them behind the floral to adhere.


To give my greeting some dimension I cut a few Adhesive Foam Squares into thin pieces and adhered them to the back then mounted the greeting onto my card front slightly tucked into the floral.


For finishing touches I added some Nuvo Crystal Drops to the center of the floral then used my Jewel Picker to add some Clear Round Drops with Liquid Glue. Oh!! I almost forgot to add the detail leaf die cuts!! I added some Liquid Glue to the bottom back side of the leaf die cuts then tucked them under the floral and slightly offset them from the solid leaves and this completes my card.
I hope you enjoyed today’s card! This card has so many different elements… texture, dimension, ink blending and shine, I just love the results! I don’t think this is a card that I would mass produce, but it is the perfect card to give to someone special. It would also be a beautiful card to have out on display for the holidays. I really love the loose look these floral dies give and think this cluster would look so beautiful as a gift topper with a tag hanging from it! I hope everyone has a wonderful, blessed Thanksgiving!! I am especially thankful to all of you who support my blog! There will be a lot of sales going on in the next few days with some already going on!! These craft companies, some small family owned, are so generous to offer us such great deals this time of year. If you are planning to shop some of these sales and do so using my links and or store logos listed on my blog, I thank you SO MUCH for your support!! Any sales generated through my links will give me a small percentage and there is absolutely no additional cost to you, the consumer. These sales help support my blog and enables me to purchase new product to create with and bring to you. I am so grateful and blessed to be doing something I love and sharing with others. I will be back next week with new creations! In the meantime, I will be spending time with some pretty special people in my life, including grandkids!!
If this is your first time visiting my blog, welcome and I hope you return. If you are a returning visitor, thank you so much for your support!
If you would like to be notified by email each time I post a new project, there is an option to add your email (located on the right side of my page) then hit the subscribe button. Should you have any questions or comments please leave them in the comments section. I’d love to hear from you and what you thought about today’s card.
Thank you for visiting and I hope you come back soon!
Happy Stamping and God Bless!!
Jeannie

Thank you for sharing this lovely creation! I love the colors.
LikeLike
Thank you so much for your kind words!!
LikeLike
WOW!! Simply gorgeous!! I love all of your cards!!
LikeLike
Thank you so much for your kind words!!
LikeLike