
I want to start out by thanking everyone for the support and nice comments you all leave for me. I truly appreciate the support of this blog!! I enjoy card making and bringing my creations to you, this wouldn’t be possible without your support, so again, thank you!! *Affiliate links are used at no additional cost to you. When you purchase products through my links I receive a small commission from these sales, which helps me to purchase new products for the cards I share on my blog. Thank you so much for your support, it is greatly appreciated!! Don’t forget to check out my previous blog for many more card projects! You can find them HERE.
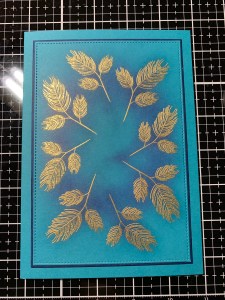
Today is the big day, time for a brand new release from Gina K. Designs!! All of this month’s new products can be found under the “What’s New” tab on Gina’s website. You can also find them HERE. Today I have a 5×7 card made with the new Season Of Peace stamp set, illustrated by Lisa Hetrick for Gina K. Designs. This is a beautiful set that can be used as a holiday set or used year round. There are dies available for this set, however, I will not be using them for this card. Instead, I will be using the circle dies from the Master Layouts 8 die set to create a base for my focal image along with a decorative edge. This stamp set is filled with beautiful images that would be great for all coloring mediums, however, I will keep things simple by adding some ink blending for depth and shading around my embossed images. All of the inks, cardstock, stamps and dies I use on today’s card are from Gina K. Designs. Let’s get started!!

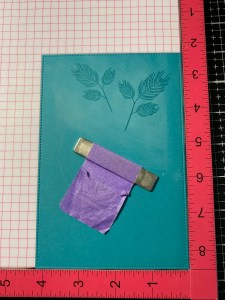
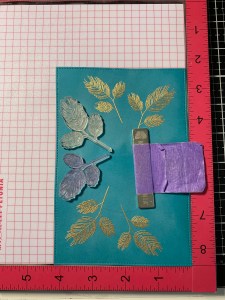
I will be doing all of my work today on my Tim Holtz Glass Media Mat.
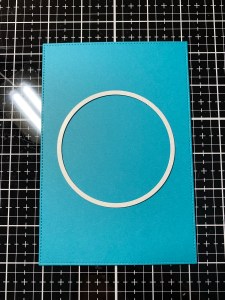
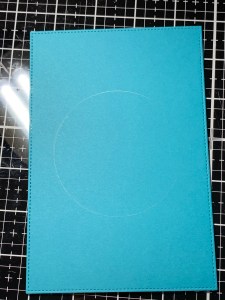
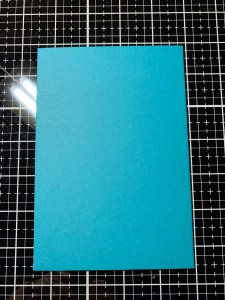
To start, I take the largest stitched rectangle die from the Master Layouts 8 Die Set and cut out of Tranquil Teal Cardstock, running them through my Big Shot Die Cut Machine. To create a circular guideline for my stamping, I take the second largest circle die from the Master Layouts 8 Die Set and center it onto my panel then lightly trace the inside edge with a pencil.
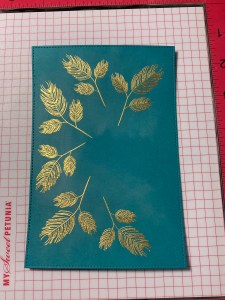
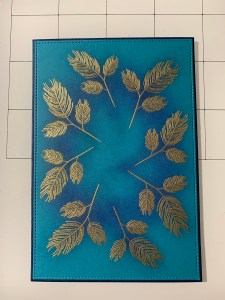
Next, I place the panel into my MISTI Stamp Positioner then arrange two pine branch images from the Season Of Peace Stamp Set over the top of my circle guideline. I then prep the panel with my Anti Static Powder Bag and stamp the images with Versamark Ink, add Gold Embossing Powder and heat set with my Heat Tool.
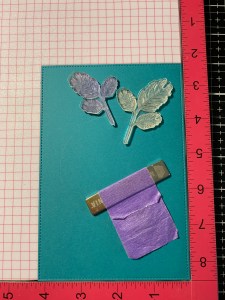
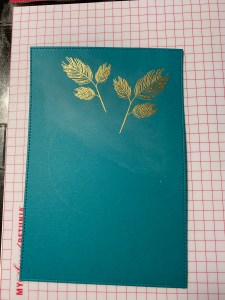
Keeping the images still attached to the door of my MISTI, I rotate the panel and again stamp using Versamark Ink then add Gold Embossing Powder and heat set with my Heat Tool. I now have equal stamping on both ends of my panel.
I clean off my stamps and use the same images from the Season Of Peace Stamp Set and arrange them on the side of the panel to fill in the open area between the previously stamped images. I again stamp them using Versamark Ink, add Gold Embossing Powder and heat set with my Heat Tool. I then rotate the panel and repeat for the other side and now have equal stamped images around my circle guideline. *To remove the excess anti static powder from my cardstock, I use a swiffer cloth to gently buff it away.

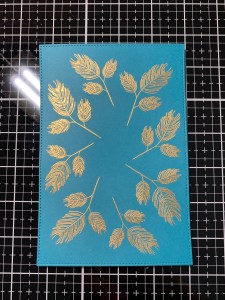
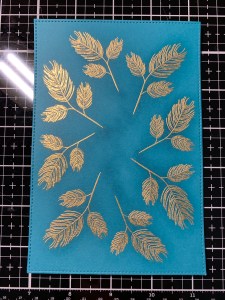
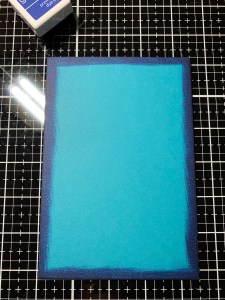
I now want to add some shading to my stamped images. Using my Mini Blending Brushes, I blend Tranquil Teal Ink over each of the images. Using the same color ink as the cardstock gives soft, subtle shadows to the images making them pop off the card a little. For added depth and contrast I now blend Blue Denim Ink over the base of each branch image and the area in between. Once my ink blending is complete, I take a soft cloth and gently buff over the embossed images to remove any ink that may be laying on top.

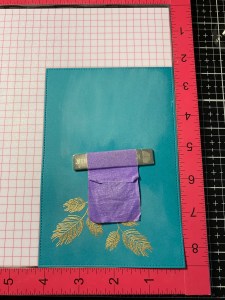
Next, I take the largest layering rectangle die from the Master Layouts 8 Die Set and cut out of Tranquil Teal Cardstock, running them through my Big Shot. I then take my Blue Denim Ink Cube and run it along all four edges of my panel to achieve the same ink tone as my ink blending. Using Terrific Tape I adhere my embossed panel onto the layering panel.
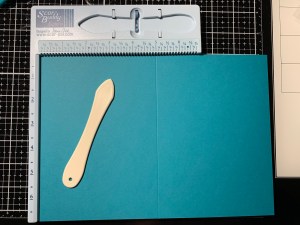
I now place a 7″ x 10″ piece of Tranquil Teal Cardstock into my Scor Buddy and score it at 5″ creating a side folding 5×7 card base. I then add Terrific Tape to the back of my panel and adhere it onto the card base.
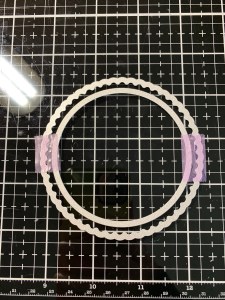
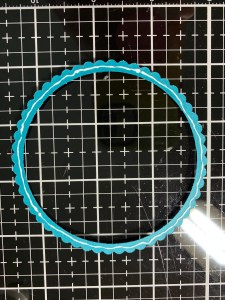
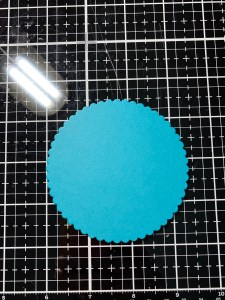
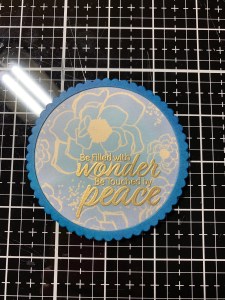
I now want to create a scalloped frame and a stitched die cut for my focal image. To do this I take the stitched circle and scallop circle dies from the Master Layouts 8 Die Set and lay them cutting side down onto my work surface. I center them then add tape to the back of the dies to hold them together and cut out of Tranquil Teal Cardstock, running them through my Big Shot. I want to add some shading to the scalloped frame, to keep it stable while I blend I keep the circle die cut in place then use my Mini Blending Brush to blend Blue Denim Ink around the scalloped frame. I separate the two die cut pieces and set the frame aside.


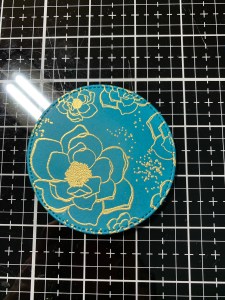
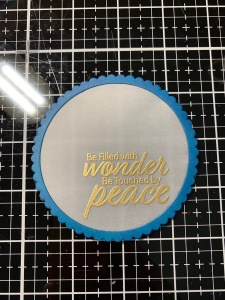
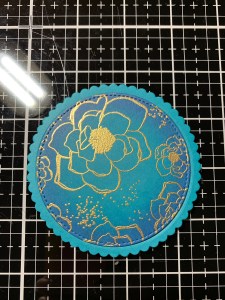
Next, I add some Adhesive Dot Runner to the back of my stitched circle die cut piece and place it into my MISTI and prep it with my Anti Static Powder Bag. I then center an image from the Season Of Peace Stamp Set and stamp it onto my die cut piece using Versamark Ink then add Gold Embossing Powder and heat set with my Heat Tool.


To pull in the same colors of shading, I use my Mini Blending Brushes and blend Tranquil Teal Ink around the edges of my circle die cut and fade out towards the center. I then blend Blue Denim Ink around the edges and fade out into the previous color.

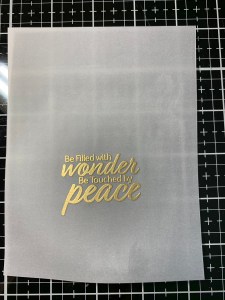
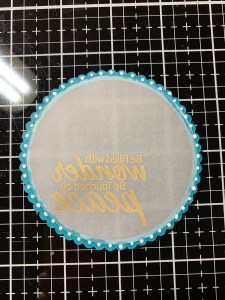
For my sentiment I place a piece of Vellum into my MISTI and prep it with my Anti Static Powder Bag. I then line up a sentiment from the Season Of Piece Stamp Set and stamp it using Versamark Ink, add Gold Embossing Powder and heat set with my Heat Tool.

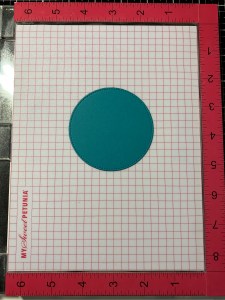
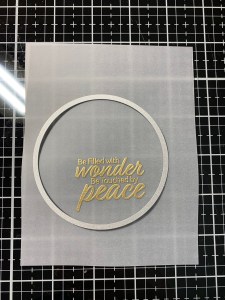
Taking the the second largest circle die from the Master Layouts 8 Die Set, I line it up so that the sentiment will be at lower right side and run them through my Big Shot. Next, I add Liquid Glue to the back of my blended frame die cut then gently adhere my vellum die cut over the glue.

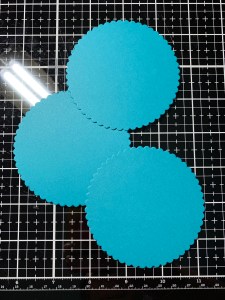
To add some dimension to my sentiment die cut, I take the scalloped circle die from the Master Layouts 8 Die Set and cut out of Tranquil Teal Cardstock three times, running them through my Big Shot. Using Liquid Glue I stack and glue the three die cuts together.
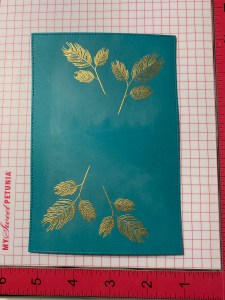
Using Liquid Glue I mount my embossed circle die cut piece onto the scalloped die cuts. I then add small drops of Liquid Glue to the back side of my scalloped sentiment and adhere it over the scalloped stacked die cut making sure to line up the scalloped edges. I then add black Foam Squares onto the back of my die cut and mount it onto the front of my card, centering it over the design.
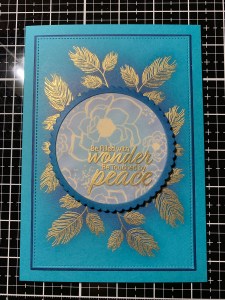
Using my Jewel Picker I add a few Dew Drops with Liquid Glue and this completes my card.
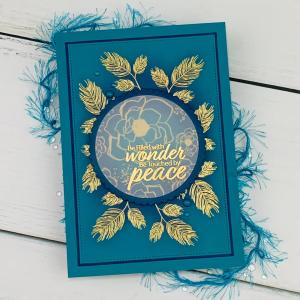
I hope you enjoyed today’s card and my use of one of the new stamp sets from Gina’s release. There are many images from this set that would also be great to use with the Wreath Builder. This is just one of the many new stamp sets available in the new release tonight! I hear that there is also a brand new Master Layouts die set included in tonight’s release!! Don’t forget to check out Gina’s live on YouTube and Facebook where she will be showing close ups of all the new products, talking with a couple of the illustrators and she will have a fun card project at the end, it all starts at 7:00pm CST! I will be taking some time off to finish getting ready for Christmas and spending some time with a special little visitor for a few days after Christmas, my granddaughter! ❤ I will be back in the new year with more creations from Gina’s release! I wish all of you a very Merry Christmas and a new year filled with many blessings! I want to give a special thank you to everyone who has supported my blog throughout the year, you are so much appreciated!!
If this is your first time visiting my blog, welcome and I hope you return. If you are a returning visitor, thank you so much for your support!
If you would like to be notified by email each time I post a new project, there is an option to add your email (located on the right side of my page) then hit the subscribe button. Should you have any questions or comments please leave them in the comments section. I’d love to hear from you and what you thought about today’s card.
Thank you for visiting and I hope you come back soon!
Happy Stamping and God Bless!!
Jeannie
