
I want to start out by thanking everyone for the support and nice comments you all leave for me. I truly appreciate the support of this blog!! I enjoy card making and bringing my creations to you, this wouldn’t be possible without your support, so again, thank you!! *Affiliate links are used at no additional cost to you. When you purchase products through my links I receive a small commission from these sales, which helps me to purchase new products for the cards I share on my blog. Thank you so much for your support, it is greatly appreciated!! Don’t forget to check out my previous blog for many more card projects! You can find them HERE.
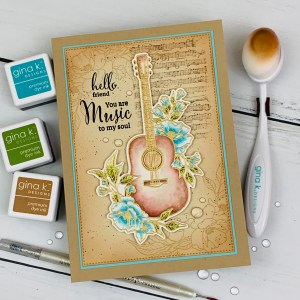
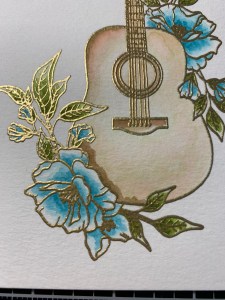
Welcome to Gina K. Designs’ brand new release!! Gina’s release is now live and you can find all of her new products by clicking HERE. Gina will be showcasing all of the new products during her live on both her YouTube channel and Facebook page starting at 7:00pm CST and as always, she will have a fun card project at the end. Can’t make the live or missed it? You can always watch the replay! Included in the new release is a brand new kit! Gina’s kits are always packed with so much product, and is such a tremendous value! Don’t forget when you spend $50.00 or more (before coupons, tax and shipping) you will receive free shipping… and when you spend $75.00 or more (before coupons, tax and shipping) you also will receive a free incentive stamp set! For today’s card I will be using the Music To My Soul stamp set to create a 5 x 7 card. This is a large 6 x 8 stamp set that includes beautiful images along with many sentiments and greetings that are perfect for the music loving people in your life! I chose to watercolor the large guitar image using inks from Gina K. for my focal image and also used a couple of other images from the set to accent my background. Because this is a large sized stamp I decided to go with a 5 x 7 card size to allow for some extra space to create my background. All of the stamps, inks, dies and cardstock I use on today’s card are from Gina K. Designs. Let’s get started!!
I will be doing all of my work today on my Tim Holtz Glass Media Mat.
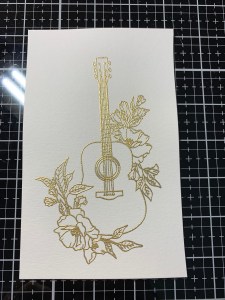
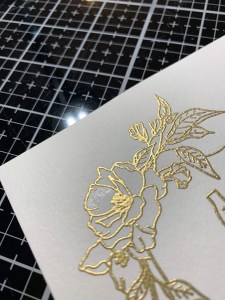
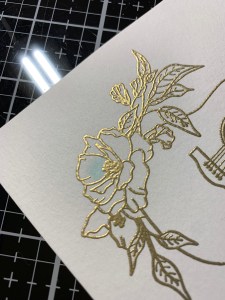
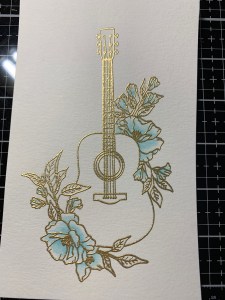
To start, I place a piece of Watercolor Cardstock into my MISTI Stamp Positioner and prep it with my Anti Static Powder Bag. I then choose an image from the Music To My Soul Stamp Set and stamp it onto the panel using Versamark Ink then add Gold Embossing Powder and heat set it with my Heat Tool. *Because the cardstock is textured, I ink up and stamp my image onto the panel two or three times to get a good crisp image before adding the embossing powder.
Next I choose the colors that I will be watercoloring with and press them onto my Glass Mat, this will be used as my palette. Using a Water Bush filled with clean water, I first wet the petal I want to color. I then take the Water Brush and pick up some Sea Glass Ink from my palette and apply it to the base my dampened petal then blend it out towards the end, leaving the very edge of the petal white. I repeat this process for all remaining flowers and buds. *This first layer is my base color and will be very light, I just want to put some color down for the next layers.
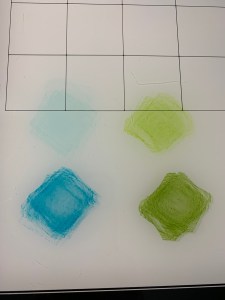
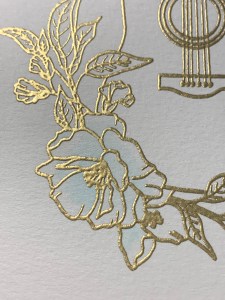

Now that all of the flowers have a base of color, I pick up some Tranquil Teal Ink with my Water Brush and apply it to the base of my first petal and blend it out a bit, being careful not to completely cover up my previous color. I repeat the process for all remaining flowers and buds.
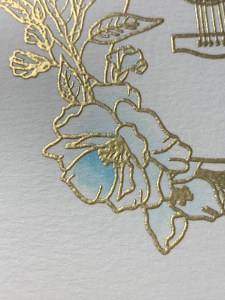
For my last layer of color, I again pick up Tranquil Teal Ink with my Water Brush and add it to the very base of each petal kind of tapping or dotting the color a bit to add some texture. I am by no means a watercolor artist, I just lay down a few layers of color until I am satisfied with the results. I get the best results when I start out light and build the color up with multiple layers.

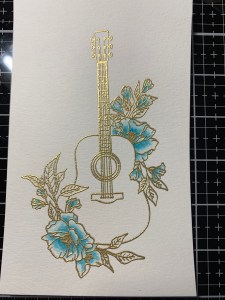
For all of the leaves I use my Water Brush to add a light layer of Jelly Bean Green Ink. Once all leaves are colored I go back and add another layer of Jelly Bean Green Ink to the base and blend the color out a bit being careful not to completely cover up the previous layer. To add some depth and texture I add a layer of Fresh Asparagus Ink to the base of each leaf and lightly tap to blend the color out just a bit.


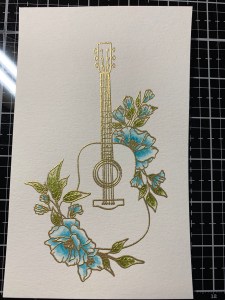
For the guitar I start out by adding a very light wash of Kraft Ink to the entire image using my Water Brush. I then add some Warm Cocoa Ink to the edges and blend the color out towards the center of the image. Again, I am starting out light adding layers and different shades of ink to build up the color.

Next, using my Water Brush and starting in small sections, I add Dark Chocolate Ink to the outside edges and blend the color out towards the center of the image. I add this darker color to any area I would like contrast or shadows. This is a very interesting color to watercolor with as it has some great undertone colors that come out when it mixes with the water, giving some beautiful wood tone colors! I continue adding this color to the edges and blend the color out until I am satisfied with the results. I then set the panel aside to dry while I work on the rest of my card.


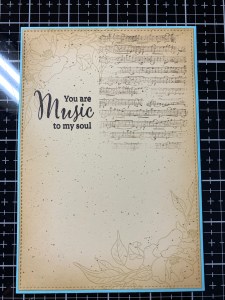
Taking the large stitched rectangle from the Master Layouts 8 Die Set I cut out of Sandy Beach Cardstock, running them through my Big Shot Die Cut Machine. Next, I place the panel into my MISTI then choose an image from the Music To My Soul Stamp Set and position it over the top left corner of my panel. I then ink the stamp up using Kraft Ink and stamp it onto the corner of the panel. Leaving the stamp still attached to the door of my MISTI I rotate the panel so that the same image can be stamped in the opposite corner of the panel. I then ink up the stamp with Kraft Ink and stamp it onto the panel. I now have the same image evenly stamped on the two corners of the panel.

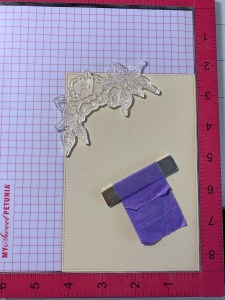

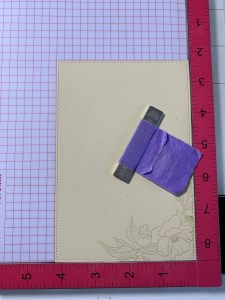
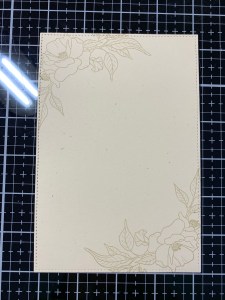
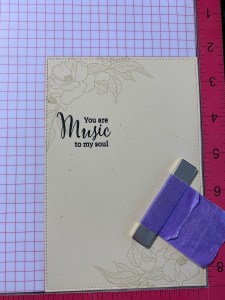
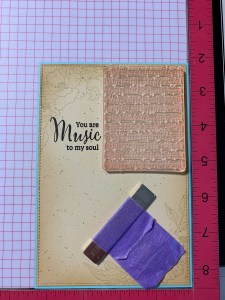
Placing the panel back into my MISTI, I line up a sentiment from the same Music To My Soul Stamp Set and stamp it using Amalgam Obsidian Black Ink. I then take a Blending Brush and lightly blend Warm Cocoa Ink around all four edges and corners of my panel. For some added texture I pick up some Charcoal Brown Ink with a small wet paintbrush and spatter it over the panel. *You will notice that a greeting in the finished card is not mentioned here. It wasn’t until my card was fully completed that I decided to add that greeting! It’s never too late to change things up, LOL
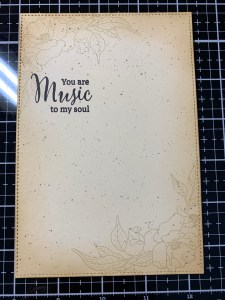
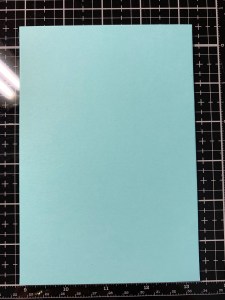
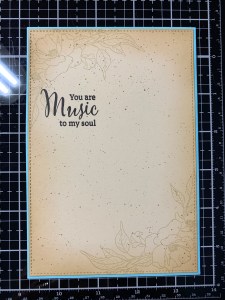
I now take the layering rectangle die from the Master Layouts 8 Die Set and cut out of Sea Glass Cardstock, running them through my Big Shot. Using Liquid Glue I adhere the two panels together. Thinking my background needs something more, I place the panel back into my MISTI and position another image from the Music To My Soul Stamp Set towards the top right corner. I then ink this image up with Charcoal Brown Ink, but before stamping I take my finger to pull off or lighten some of the ink around the edges and other areas of the stamp. I then stamp the image onto my panel. Removing some of the ink gives the image more of a tattered look that I feel blends into the background a bit more and makes it not as stark.
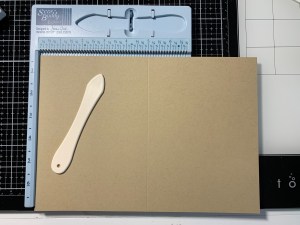
For my card base I place a 7″ x 10″ piece of Kraft Cardstock into my Scor Buddy and score it at 5″ creating a side folding card base. I then add Liquid Glue to the back of my panel and adhere it onto the card base.

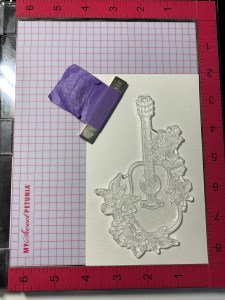
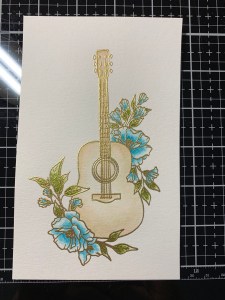
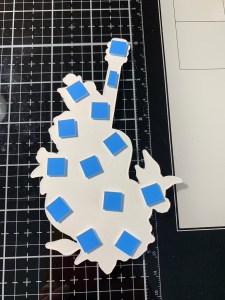
I now go back to my focal image and take the coordinating die from the Music To My Soul Die Set to cut my image out, running them through my Big Shot. I then add Foam Squares to the back of die cut, remove the release papers and mount it onto my card front.
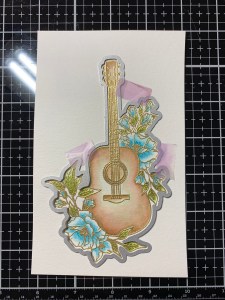

Using my Jewel Picker I add a few Dew Drops to the card front with Liquid Glue.
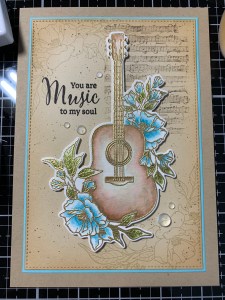
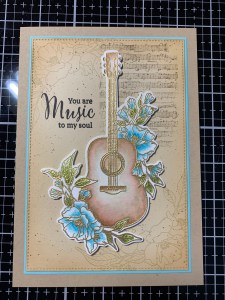
At this point I decided to add a greeting from the Music To My Soul Stamp Set and stamp it onto my card front, just above the sentiment using Amalgam Obsidian Black Ink and this completes my card.
I hope you enjoyed today’s card, I LOVE the the way it turned out! The images in this stamp set are not only great to use on their own, they all collage together so beautifully! I hope you take the time to check out the new release at Gina K. Designs. It is always exciting to see what beautiful new products Gina has in store for us! If you have never purchased products from Gina K. Designs I encourage you to give them a try. Gina sells high quality stamps, dies, inks and cardstock as well as a wide variety of other products. What I love most about Gina’s products is her inks and cardstock. She has a wide selection of colors and her inks match her cardstock perfectly! If you struggle cutting straight, even panels and mats, her Master Layouts Dies gives the perfect, straight cuts every time and some of the sets can be mixed and matched to work together. Not only is Gina herself a sweet wonderful person, her customer service team is top notch and will work out any unforeseen issues with any purchases that may arise. Gina and her husband Tom do a live Stamp & Chat each Monday and Wednesday where Gina highlights a technique and makes a card or two. These lives can be found at 7:00pm on Mondays and 12:00pm on Wednesdays, both CST on Gina’s YouTube channel and Facebook group. Be sure to check them out for lots of tips and techniques that can be applied to any products you may already own.
If this is your first time visiting my blog, welcome and I hope you return. If you are a returning visitor, thank you so much for your support!
If you would like to be notified by email each time I post a new project, there is an option to add your email (located at the top menu, or on the right side of my page) then hit the subscribe button. Should you have any questions or comments please leave them in the comments section. I’d love to hear from you and what you thought about today’s card.
Thank you for visiting and I hope you come back soon!
Happy Stamping and God Bless!!
Jeannie

This is so gorgeous! Just love the colors, the placement, the shading! Everything! Thank you so much for the detailed recipe of how you created this masterpiece!
LikeLike
Thank you so much for your kind words Laura!!
LikeLike
Absolutely gorgeous!! A masterpiece, truly xx
LikeLike
Thank you so much Margaret!!
LikeLike
Such a beautiful card! I enjoyed reading how you created it.
LikeLike
Thank you so much Charlene!!
LikeLike
Just found this card on Pinterest. Love, love, love it!
LikeLike
Thank you so much for visiting my blog Angie!!
LikeLike
Just found this card on Pinterest. I absolutely love it!
LikeLike
Thank you so much for visiting my blog!!
LikeLike