
I want to start out by thanking everyone for the support and nice comments you all leave for me. I truly appreciate the support of this blog!! I enjoy card making and bringing my creations to you, this wouldn’t be possible without your support, so again, thank you!! *Affiliate links are used at no additional cost to you. When you purchase products through my links I receive a small commission from these sales, which helps me to purchase new products for the cards I share on my blog. Thank you so much for your support, it is greatly appreciated!! Don’t forget to check out my previous blog for many more card projects! You can find them HERE.
Today I have a card made with the Flowing Flowers stamp set that is currently part of the newest kit from Gina K. Designs called Let’s Celebrate. When Gina releases the next kit, this set will be available to purchase on it’s own. For today’s card I will be using a blended ink technique on my stamping. This technique gives beautiful results to a stamped image where the colors fade into each other. It’s a technique that is so simple yet I forget to use it more! I will also be using the Master Layouts 8 die set to create a 5 x 7 card, the layered circles for my greeting are also from the same die set. All of the stamps, dies, inks and cardstock are from Gina K. Designs. Let’s get started!!

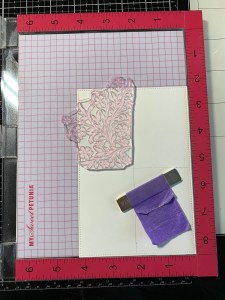
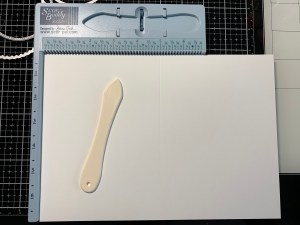
I will be doing all of my work today on my Tim Holtz Glass Media Mat.
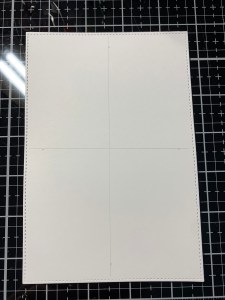
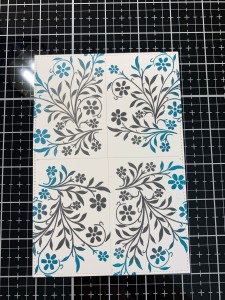
To start, I take the large stitched rectangle from the Master Layouts 8 Die Set and cut out of White Cardstock, running them through my Big Shot Die Cut Machine. I then take my T-Square Ruler and mark the center points at 2 1/4″ (on the short side) and 3 1/4″ (on the long side) then lightly draw pencil lines to divide the panel into four equal sections for my stamping. *This will help me to evenly center my stamping without overlapping.

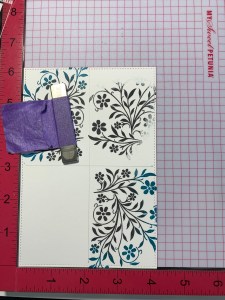
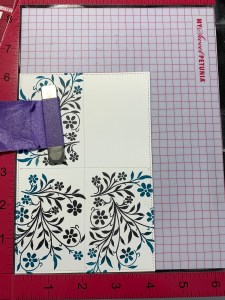
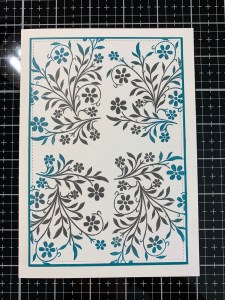
Placing the panel into the corner of my MISTI Stamp Positioner, I choose an image from the Flowing Florals Stamp Set and center over the left top corner between the pencil lines. I pick up the stamp with the door of my MISTI then ink up the center and inside portion of the stamp with Slate Ink. Using my Mini Blending Brush I lightly tap around the top and outside portion of the inked area to soften the ink (as this is where the two colors of ink will meet) then stamp the image onto my panel. Next, I ink up the stamp around the top and outside portion with Tranquil Teal Ink and again use a Mini Blending Brush to lightly tap away and soften the ink towards the center and bottom of the image, where the two colors of ink will meet then stamp the image onto the panel. I now have two colors of inks stamped that fade into each other.
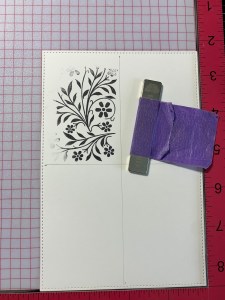
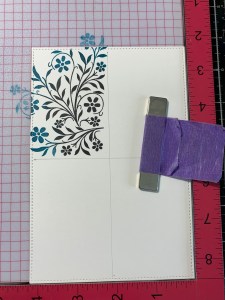
Leaving the stamp still attached to the door of my MISTI, I rotate the panel so that the opposite corner is lined up for stamping. I repeat the same process and ink the stamp with Slate Ink in the center and inside portion, then again use my Mini Blending Brush to soften the ink around the top and outside portion of the inked area then stamp it onto my panel. Again, I ink up the stamp around the top and outside portion with Tranquil Teal Ink and use my Mini Blending Brush to lightly tap away and soften the ink towards the center and bottom of the image, then stamp it onto the panel. Now, I have opposite corners of the panel equally stamped.

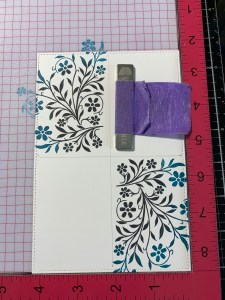
To stamp the remaining two corners, I flip my MISTI around so that I can place my panel into the opposite corner so that the unstamped portion will be towards the center allowing the stamp to hang over the edge when stamping. I again line up my image from the Flowing Flowers Stamp Set and center it between the pencil lines on my panel. I repeat my stamping process using Slate Ink and Tranquil Teal Ink then rotate the panel and repeat.


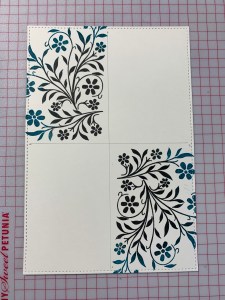
Now that my panel is complete, I can erase the pencil lines. *Before erasing I give the ink on my panel a few minutes to dry so that the eraser doesn’t smear the ink.
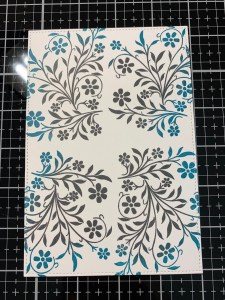
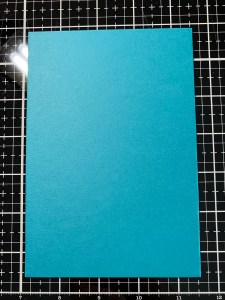
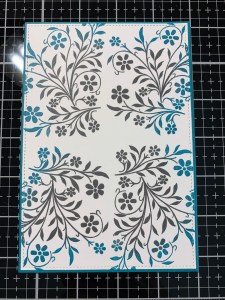
Taking the largest layering rectangle from the Master Layouts 8 Die Set I cut out of Tranquil Teal Cardstock, running them through my Big Shot. Using Liquid Glue I adhere two panels together. Next, I place a 7″ x 10″ piece of White Cardstock into my Scor Buddy and score it at 5″ creating a 5 x 7 card base. Using Liquid Glue I adhere the panels onto the card base.
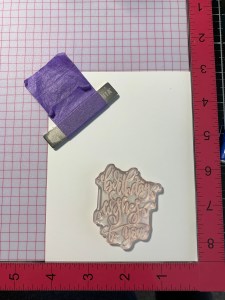
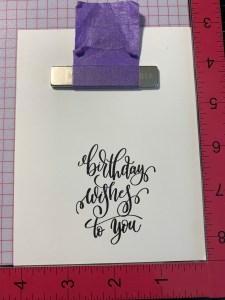
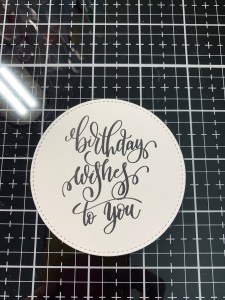
Next, I place a piece of White Cardstock into my MISTI and choose a greeting from the Fancy Greetings Stamp Set. I ink up the stamp with Amalgam Obsidian Black Ink and stamp it onto the cardstock. After allowing the ink to dry for a few minutes I use the stitched circle die from the Master Layouts 8 Die Set and cut out my greeting, running them through my Big Shot.
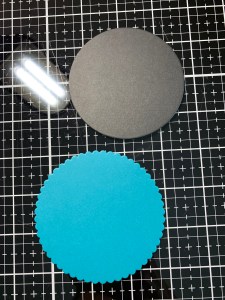
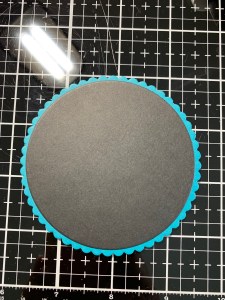
I then take the plain circle die and cut out of Onyx Black Cardstock and the scalloped circle die to cut out of Tranquil Teal Cardstock and run them all through my Big Shot. Both of these circle dies are also from the Master Layouts 8 Die Set and layer perfectly together. Using Liquid Glue I layer and adhere the die cuts together.
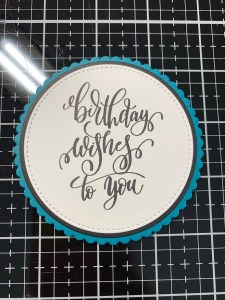
To add a little dimension to my greeting, I add some foam squares to the back then adhere it to the center of my card front.

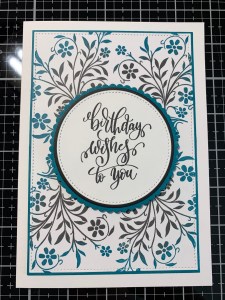
Using my jewel picker I add some Dew Drops onto my greeting with Liquid Glue and this completes my card.

I hope you enjoyed today’s card and learned how easy it is to add blended ink colors to a stamped image. This technique is simple yet adds a unique look to a simple card. I think a rainbow of colors would also look great with this technique. This would also be a great way to color coordinate for occasions such as graduations, weddings, baby cards, etc. I love choosing different color combinations for my cards, and for this particular technique I really liked how the slight softness of the slate ink color went well with the turquoise color. I wanted to save the black ink for my greeting to help it stand out a bit more. Using a technique such as this would be great for mass producing a set of cards, changing up the colors and greeting on each to give as a gift to someone!
If this is your first time visiting my blog, welcome and I hope you return. If you are a returning visitor, thank you so much for your support!
If you would like to be notified by email each time I post a new project, there is an option to add your email (located at the top menu, or on the right side of my page) then hit the subscribe button. Should you have any questions or comments please leave them in the comments section. I’d love to hear from you and what you thought about today’s card.
Thank you for visiting and I hope you come back soon!
Happy Stamping and God Bless!!
Jeannie

Gorgeous card, love this stamp I’m have ordered it and it’s on the way over the pond to Scotland xx
LikeLike
Thank you so much Jacqueline!! You are going to love this kit, it is packed with so much fun!
LikeLike
Love the card and the technique !
LikeLike
Thank you so much Marilyn!!
LikeLike