I want to start out by thanking everyone for the support and nice comments you all leave for me. I truly appreciate the support of this blog!! I enjoy card making and bringing my creations to you, this wouldn’t be possible without your support, so again, thank you!! *Affiliate links are used at no additional cost to you. When you purchase products through my links I receive a small commission from these sales, which helps me to purchase new products for the cards I share on my blog. Thank you so much for your support, it is greatly appreciated!! Don’t forget to check out my previous blog for many more card projects! You can find them HERE.
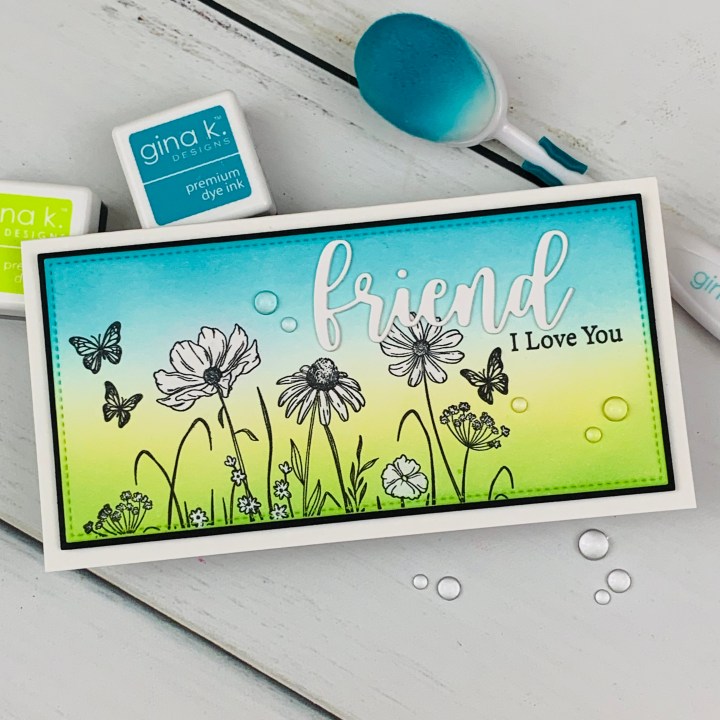
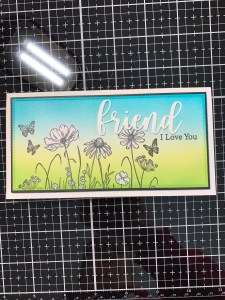
Tonight is the night for Gina K. Designs’ brand new release!! The release goes live at 7:00pm CST and all of the new products will be available for purchase. You can see each product in detail during Gina’s live presentation on her Facebook page and YouTube channel. All of the new products can be found under the “What’s New” category on her website. Gina has many new stamp sets in this release, including a brand new kit, with six new ink cube colors!! The new ink colors are only available in the kit right now. Beginning in the first part of May, the new ink colors will be available separately for purchase in ink pads, cubes and reinkers. With the release of these new ink colors, the kit is sure to be a big hit, once the kits have sold out they normally are not restocked. Today I made a card using the new Spring Mountain stamp set using a bleaching technique. There is a large beautiful image in this set that has mountains and a wildflower border that fills up most of an A2 sized card panel along with a wildflower border and many sentiments. For my card, I used the single border of wildflowers to stamp on a mini slimline panel. I ink blended my panel then stamped the image. To highlight the flowers and create a “masked” look, I painted bleach onto each of the flower petals which removed the blended ink in those areas. Bleaching is a great way to remove ink, revealing white area to make an image stand out. *When using bleach be sure to open a window and work in a well ventilated area. All of the stamps, dies, inks and cardstock I use on today’s card are from Gina K. Designs. Let’s get started!!

I will be doing all of my work today on my Tim Holtz Glass Media Mat.
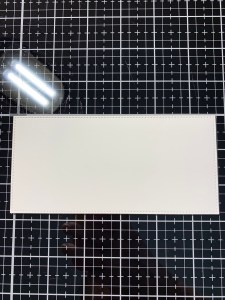
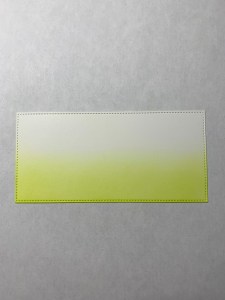
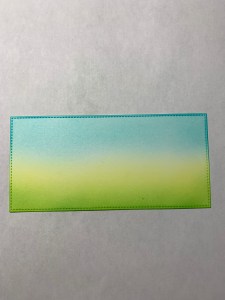
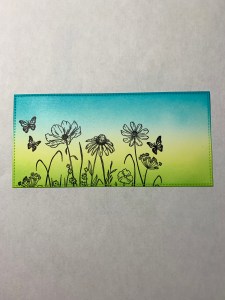
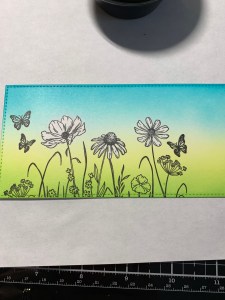
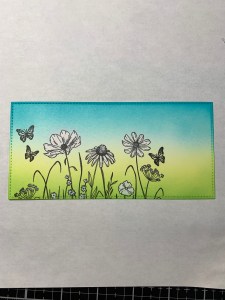
To start, I take the large stitched rectangle die from the Master Layouts 7 Die Set and cut out of White Cardstock, running them through my Big Shot Die Cut Machine. Using my Blending Brushes I blend Key Lime Ink on the lower half of my panel, fading the ink out as I blend towards the center. To deepen the color at the very bottom of the panel, I blend Lucky Clover Ink and fade it into the previous color. Next, I take another Blending Brush and blend Turquoise Sea Ink onto the top half of my panel, fading the ink out as I blend towards the center. To deepen this color a bit I blend Blue Lagoon Ink onto the edge of the panel and fade it into the previous color.


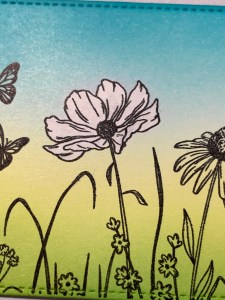
I allow my ink blend to dry for several minutes then place the panel into my MISTI Stamp Positioner and line up on the edge an image from the Spring Mountain Stamp Set. I pick up the image with the door of my MISTI and ink it up using Amalgam Obsidian Black Ink then stamp it onto my panel. I remove the panel from the MISTI and set it aside to completely dry.
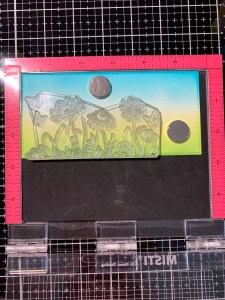
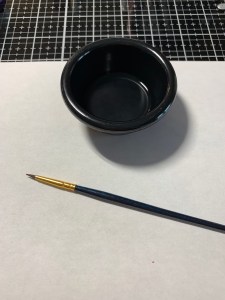
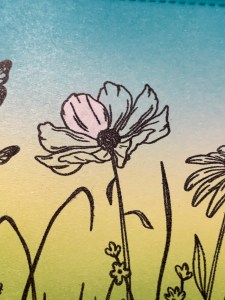
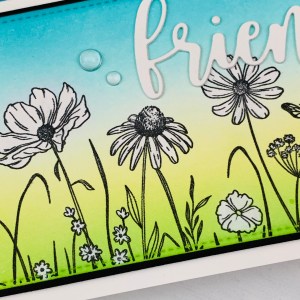
Next, I take a very small paintbrush and paint small amounts of bleach onto the petal of my first flower. I then move on to each of the remaining petals applying small amounts of bleach, being carful to stay inside of the lines. I repeat the process for all of the other flowers, including the tiny clusters. *When applying bleach start out with very small amounts so it doesn’t bleed into other areas that you don’t want bleached. You can always add a little more if needed. It only takes a small amount of bleach to remove the ink. **It is very important to work in a well ventilated area so you are not breathing in the bleach fumes, it’s also a good idea to open a window if possible.
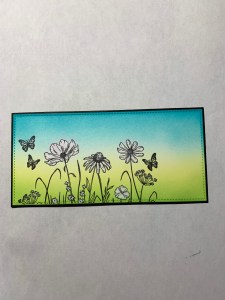
To create a mat for my blended panel I take the large layering rectangle die from the Master Layouts 7 Die Set and cut out of Black Onyx Cardstock, running them through my Big Shot. Using Liquid Glue I adhere the two panels together.

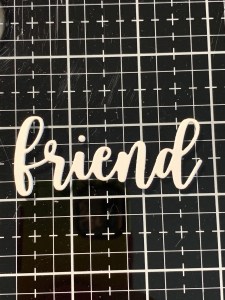
For my greeting, I take the friend die from the Master Layouts 9 Die Set and cut out of White Cardstock three times, running them through my Big Shot. Using Liquid Glue I stack and glue the die cuts together, including the dot for the “i”.

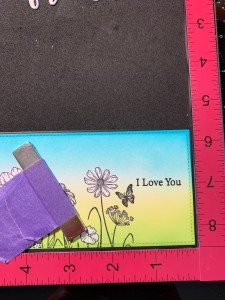
To stamp a sentiment, I place the panel into my MISTI and temporarily place my die cut greeting onto the panel to figure out my placement. I then choose a sentiment from the Spring Mountain Stamp Set and line it up just under the sentiment. Now I can remove my die cut greeting and stamp the sentiment using Amalgam Obsidian Black Ink onto my panel.


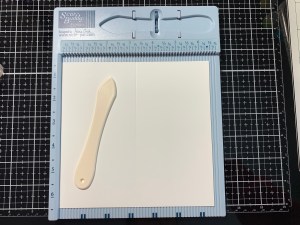
Next, I place a 6 1/4″ x 6 1/2″ piece of White Cardstock into my Scor Buddy and score it at 3 1/4″ creating a slimline card base. For some dimension, I add Foam Tape to the back of my blended panel and mount it onto the card base.
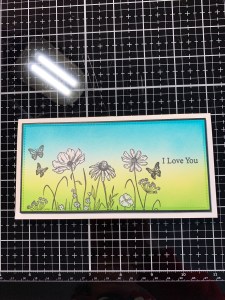
Using Liquid Glue I adhere my die cut greeting above my stamped sentiment and shifted to the left a bit.
Finally, I take my Jewel Picker and add some Dew Drops using Liquid Glue and this completes my card.
I hope you enjoyed today’s card and learned how quick and easy it is to highlight an image or images using bleach. This is a fun technique that gives great results! I used the bleaching technique to remove blended ink but did you know the bleaching technique can also be used on colored cardstock to bleach away the color? Give this technique a try with an image stamped on colored cardstock and see the results you get, just remember that bleach reacts differently with different colors. Always test out the bleach on a scrap piece of cardstock so you know what results to expect. While bleach turns most colors white, there are some ink and cardstock colors that the bleach will turn to a different tone instead of white. Have fun testing out all different colors and see what you can come up with!
If this is your first time visiting my blog, welcome and I hope you return. If you are a returning visitor, thank you so much for your support!
If you would like to be notified by email each time I post a new project, there is an option to add your email (located at the top menu, or on the right side of my page) then hit the subscribe button. Should you have any questions or comments please leave them in the comments section. I’d love to hear from you and what you thought about today’s card.
Thank you for visiting and I hope you come back soon!
Happy Stamping and God Bless!!
Jeannie

I love your card. It is stunning. Good job to stay with in the lines. I have tried this bleaching technique but yours I love. I need more practice.
Cheers Deb.
LikeLike
Thank you so much Deb! I did use a very tiny paintbrush with small amounts of bleach, I think that helps to stay in the lines better. Happy stamping to you!
LikeLike
This technique is simple yet gorgeous! Bleaching the flowers really makes them pop! I’m new to your blog and can I just say how refreshing it is to see someone take the time to photograph every single step of the process and give detailed instructions. Thank you so very much! I’ll definitely be back for more inspiration.
LikeLike
Thank you for visiting my blog and for such kind words, Kristy!! I’m happy you found my blog and enjoy it. I like to detail each step with photos and instructions to help answer any questions. For more inspiration, I have even more cards on my previous blog… the link is located in the menu at the top of the page.
LikeLike
Hi, this is a beautiful card ❤
My question is -does the bleach smell when used or is the amount so small, that one doesn’t notice it?
LikeLike
Thank you so much Mai!! The completed card doesn’t smell of bleach as I used very little for this design. When using the bleach, however small amount, remember to work in a well ventilated area even opening a window. Have fun!!
LikeLike
There might not be a video but you gave very detailed clear instructions and pictures so it was almost like one. Lovely card!
LikeLike
Thank you so much Nana!! I try to detail things so crafters of all levels can understand, like a paused video 🙂
LikeLike
Beautiful card! I love how you explain everything in such great detail. Thank you.
LikeLike
Thank you so much Kim! I’m happy you enjoyed my post!!
LikeLike
Thank you so much for sharing this link on my post! I absolutely love this card!
LikeLike
Thank you so much Shannon, thank you also for visiting my blog!!
LikeLike