
I want to start out by thanking everyone for the support and nice comments you all leave for me. I truly appreciate the support of this blog!! I enjoy card making and bringing my creations to you, this wouldn’t be possible without your support, so again, thank you!! *Affiliate links are used at no additional cost to you. When you purchase products through my links I receive a small commission from these sales, which helps me to purchase new products for the cards I share on my blog. Thank you so much for your support, it is greatly appreciated!! Don’t forget to check out my previous blog for many more card projects! You can find them HERE.
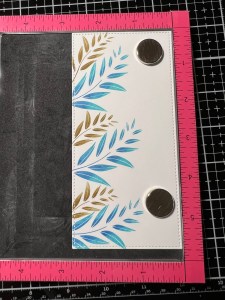
Today, for my second card, I kept it clean and simple using the brand new Happy Life stamp set illustrated by Lisa Hetrick from the new release. I decided to go with a mini slimline card and do some simple stamping. To step my card up a little, I added some ink shading to the stamped images. To help my focal image stand out a little more I added gold embossing for the outline stamped image. Using different colored ink that compliments each other or creates contrast is a great way to step up a simple look. Switching up card sizes is a fun way to add variety to your card making and allows different layout options! All of the stamps, dies, inks, cardstock and embellishments I used on today’s card are from Gina K. Designs. Let’s get started!!

I will be doing all of my work today on my Tim Holtz Glass Media Mat.
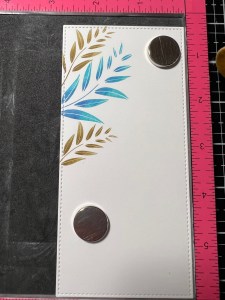
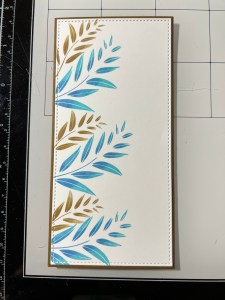
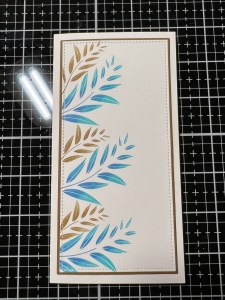
To start, I take the stitched rectangle die from the Master Layouts 7 Die Set and cut out of White Cardstock, running them through my Big Shot Die Cut Machine. I then place the panel into my MISTI Stamp Positioner and choose an image from the Happy Life Stamp Set and place it toward the top of my panel. I ink the stamp with Kraft Ink and stamp it onto my panel. To add some shading to this image, I leave the image attached to the door of my MISTI then take my Warm Cocoa Ink cube and add ink to the inner parts of the leaves of the stamp, I then take my Mini Blending Brush and tap around the outer edges of the inked leaves to soften the blend and stamp it over the stamped image. I now have an ink blended stamped image.
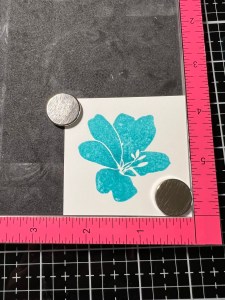
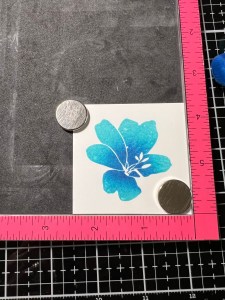
I remove the previous stamp and choose a larger image from the same Happy Life Stamp Set and position it just under the previous image. I then ink the stamp with Turquoise Sea Ink and stamp it onto the panel. Leaving the image attached to the door of my MISTI, I ink up the inner parts of the leaves using Blue Denim Ink then take my Mini Blending Brush and tap it along the outer edges of the inked leaves to create a soft blend then stamp it over the stamped image. *For this technique I like to use my ink cubes as they are easier to get into smaller areas. A mini blending brush could also be used to add ink to an image, it would just take a couple of extra applications for the ink to show up better.

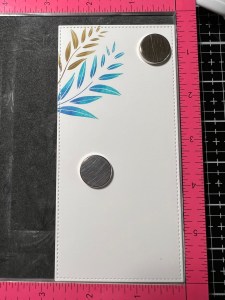
Next, I go back to the first stamp I used and repeat the process (using the same colors of ink), alternating the images until I reach the bottom of the panel.
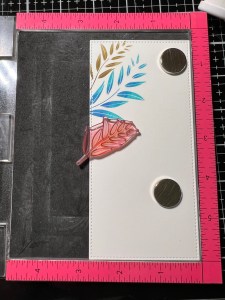
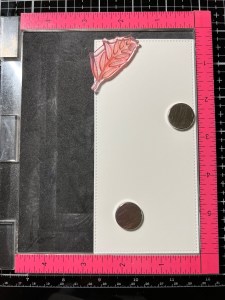
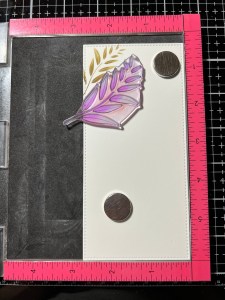
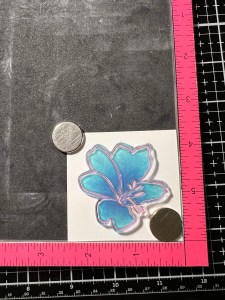
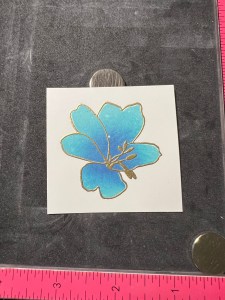
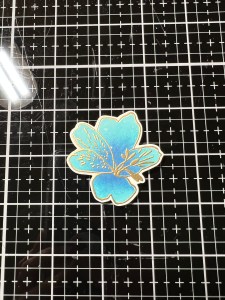
For my focal image, I place a piece of White Cardstock into my MISTI then choose the solid floral image from the Happy Life Stamp Set. I ink it up with Turquoise Sea Ink and stamp it onto the cardstock. To add some depth to this image I add Blue Denim Ink to the center of the stamp then use my Mini Blending Brush to tap around the outside edges of the ink to soften the blend. I then stamp it over the stamped image and now have a floral image with a darker center. *This blending process can be repeated until you have the amount of contrast you are looking for.
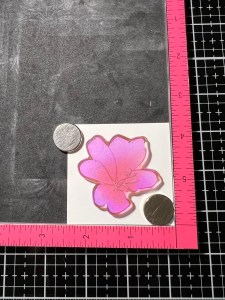
Next, I prep the stamped image with my Anti Static Powder Bag then take the outline image from the same Happy Life Stamp Set and center it over my stamped image. I ink up the outline with Versamark Ink then add Gold Embossing Powder and heat set with my Heat Tool.
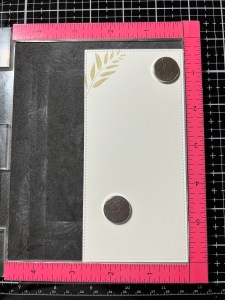
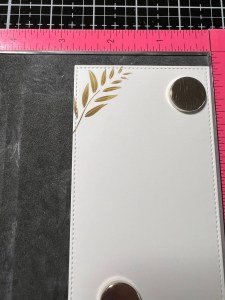
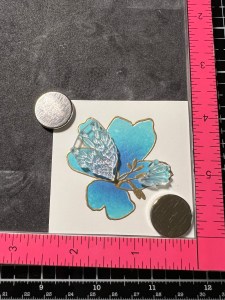
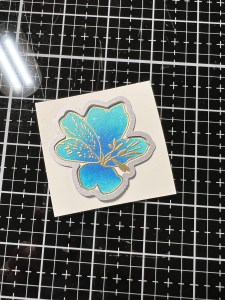
To add some texture to my image, I take the detail images from the same Happy Life Stamp Set and line them up over the petals. I then stamp them with Versamark Ink, add Gold Embossing Powder then heat set with my Heat Tool. Taking the coordinating die from the Happy Life Die Set I center it over my stamped image the run them through my Big Shot.

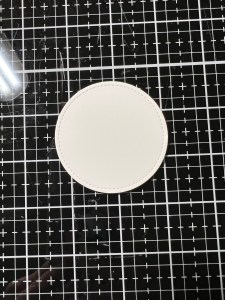
To create my sentiment, I take the smallest die from the Single Stitched Circles Die Set and cut out of White Cardstock, running them through my Big Shot. Next, I place the die cut into my MISTI and line up a greeting from the Happy Life Stamp Set across the lower portion and stamp it Amalgam Obsidian Black Ink. I then line up a sentiment from the same set just under the greeting and stamp it also with Amalgam Obsidian Black Ink.

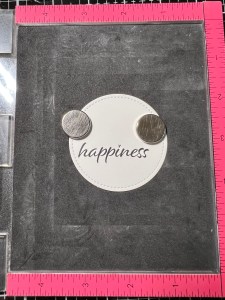
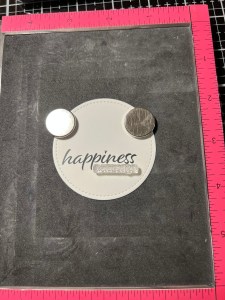
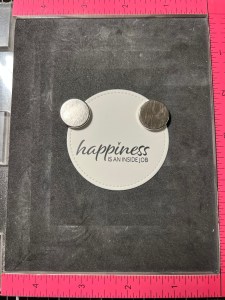
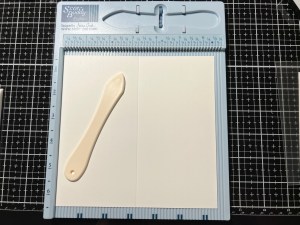
Now it’s time to put the card together. Taking the largest layering die from the Master Layouts 7 Die Set, I cut out of Warm Cocoa Cardstock, running them through my Big Shot. Using Liquid Glue I adhere the two panels together. Next, I place a 6 1/4″ x 6 1/2″ piece of White Cardstock into my Scor Buddy and score it at 3 1/4″ creating a side folding mini slimline card base. I then adhere the panels onto the card base using Liquid Glue. To add the sentiment I add White Foam Squares to the back of the circle die cut then mount it onto the card front. I then add Liquid Glue to the back of the flower and mount it onto the circle die cut just above the sentiment.
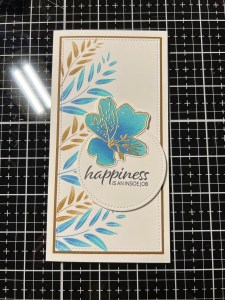
Using my Jewel Picker I add Gold Pearls with Liquid Glue around the sentiment and this completes my card.
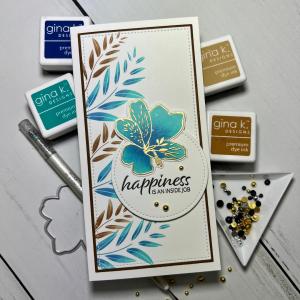
This was such a fun set to create a clean and simple card with. I love using blue and brown inks, the colors go so well together! This stamp set has several leaf branches that are great for creating backgrounds and building floral arrangements. There are also different elements in this set that are great for creating shadows and backdrops for the floral images! Be sure to check out the rest of Gina’s new release, it is pack with so many great things!!
If this is your first time visiting my blog, welcome and I hope you return. If you are a returning visitor, thank you so much for your support!
If you would like to be notified by email each time I post a new project, there is an option to add your email (located at the top menu, or on the right side of my page) then hit the subscribe button. Should you have any questions or comments please leave them in the comments section. I’d love to hear from you and what you thought about today’s card.
Thank you for visiting and I hope you come back soon!
Happy Stamping and God Bless!!
Jeannie

Love this card and your great instructions. Feel like I learned a lot.
LikeLike
Thank you for your kind words Pat!! I’m so happy that you found my instructions helpful!
LikeLike
Absolutely gorgeous!
LikeLike
Thank you so much Kathy!!
LikeLike
Beautiful card!
LikeLike
Thank you so much Carol!!
LikeLike