I want to start out by thanking everyone for the support and nice comments you all leave for me. I truly appreciate the support of this blog!! I enjoy card making and bringing my creations to you, this wouldn’t be possible without your support, so again, thank you!! *Affiliate links are used at no additional cost to you. When you purchase products through my links I receive a small commission from these sales, which helps me to purchase new products for the cards I share on my blog. Thank you so much for your support, it is greatly appreciated!! Don’t forget to check out my previous blog for many more card projects! You can find them HERE.
Tonight is the night!!! Gina K. Designs has a brand new release that is now live and available to shop!! All of the new products can be found under the “What’s New” category on Gina’s website or can be found by clicking HERE. This month’s release is amazing with so many new stamp sets, dies, brand new KIT (YAY!!!) and even some new ink colors!! If you are a fan of Gina’s kits (they are an incredible value!), you will want to be sure to check this one out! Gina’s kits are so popular already and with this one having new ink colors it is sure to go quickly! Once the kit sell out, they are usually not restocked and the contents of the kit will be sold separately when a new kit releases, usually within the next couple of months. Remember, when you place an order of $50.00 or more (after any discounts and before tax) you will receive free shipping! Also, when you place an order of $75.00 or more (after any discounts and before tax) you will receive free shipping AND an incentive stamp set!!
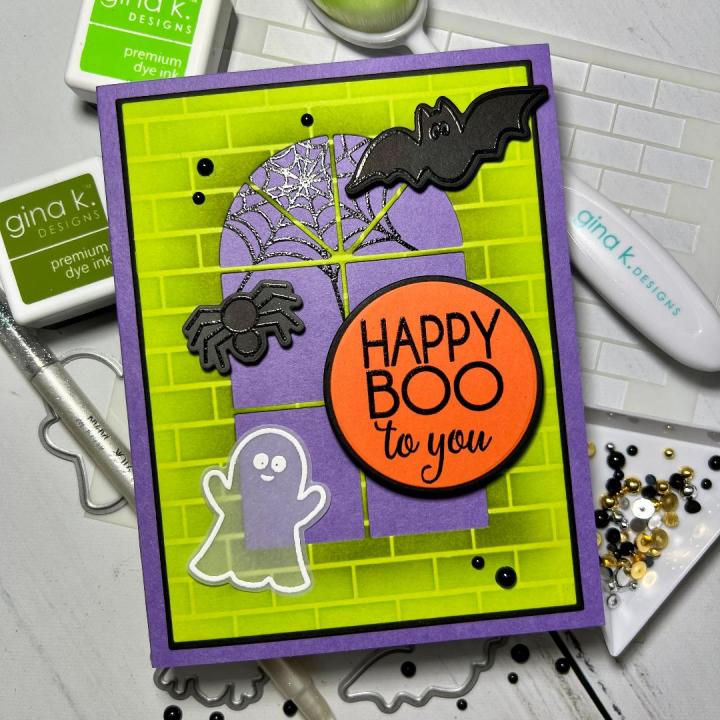
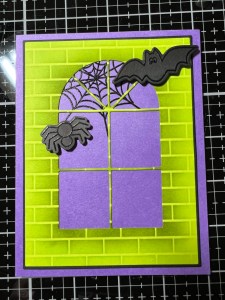
Today, I have two cards, my first card is a fun Halloween card created with the new Frightful & Delightful stamp set and coordinating dies illustrated by Beth Silaika, which is part of Gina K. Designs’ brand new release! I chose some bright, fun cardstock colors with added stenciling for some texture and interest to create my card. The die cut images were perfect for adding some Halloween fun and whimsical feel. All of the stamps, dies, ink, cardstock and embellishments are from Gina K. Designs. Let’s get started!!

I will be doing all of my work today on my Tim Holtz Glass Media Mat.
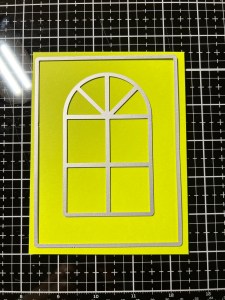
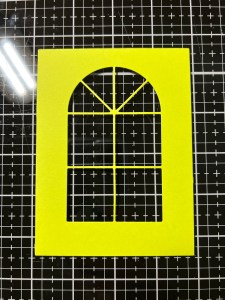
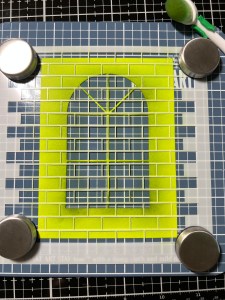
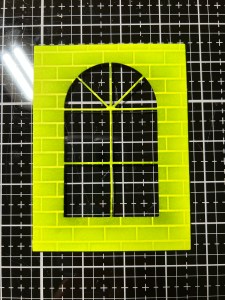
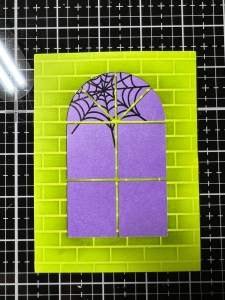
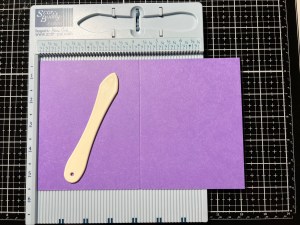
To start, I cut a 4 1/4″ x 5 1/2″ panel out of Key Lime Cardstock using my Guillotine Paper Trimmer. I then took the second largest rectangle die from the Master Layouts 1 Die Set then placed the window die from the Master Layouts 5 Die Set and centered them over the panel and ran them through my Big Shot Die Cut Machine.
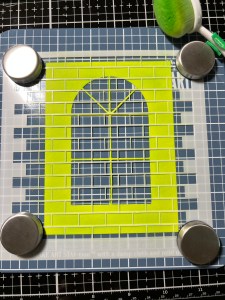
Next, I place the window panel onto my Make Art Stay-tion and place the Brick Wall Stencil over the top of it then adhere down using the magnets. Using my Blending Brush I blend Key Lime Ink over the entire panel, then take my Mini Blending Brush and blend Fresh Asparagus Ink around the edges of the window frame to add some depth.

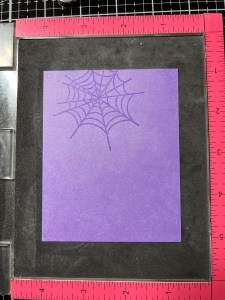
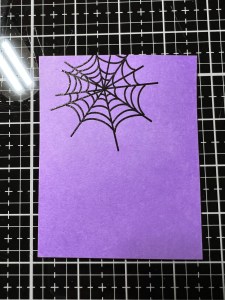
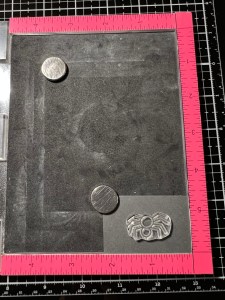
To create a backer to my window where I want to add a spider web, I cut a 3″ x 4 1/4″ piece out of Wild Lilac Cardstock, added a little Adhesive Dot Runner to the back and placed it into the center of my MISTI Stamp Positioner. I then placed the window panel over the top to determine my stamp placement. I want to line up the image so that the ends of the web look to be connected to the window frame except where the spider will be. Once I have it lined up, I pick up the stamp with the door of my MISTI then remove the window panel. I prep the purple panel with my Anti Static Powder Tool then ink up the stamp with Versamark Ink and stamp it onto my panel. I then add Black Embossing Powder and heat set with my Heat Tool.

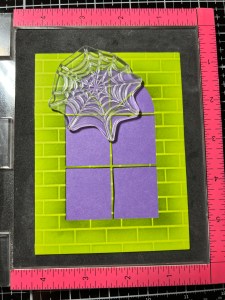
Now that the spider web is stamped and embossed I take the window panel and add Liquid Glue onto the back of it, just around the window frame. I then line up the ends of the web so that they look like they attach to the panes of the window and press the panel into place. Next, I take the largest layering rectangle die from the Master Layouts 1 Die Set and cut out of Black Onyx Cardstock, running them through my Big Shot. Using Liquid Glue I mount the two panels together.
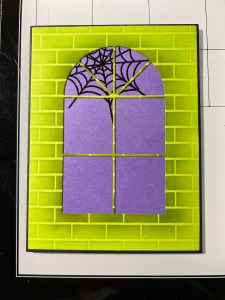
I now place a 5 1/2″ x 8 1/2″ piece of Wild Lilac Cardstock into my Scor Buddy and score it at 4 1/4″ creating a side folding card base. Using Liquid Glue I adhere my panel onto the card base.

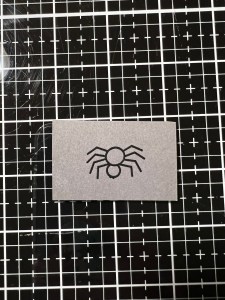
Next, I create the elements that will be mounted onto my card front. I take a piece of Slate Cardstock into my MISTI and prep it will my Anti Static Powder Bag then stamp the spider image from the Frightful & Delightful Stamp Set using Versamark Ink. I then add Black Embossing Powder and heat set with my Heat Tool. Taking the coordinating die from the Frightful & Delightful Die Set I cut out the image, running them through my Big Shot. To add some slight shading to the image, I use my Mini Blending Brush and blend some Slate Ink onto the body.


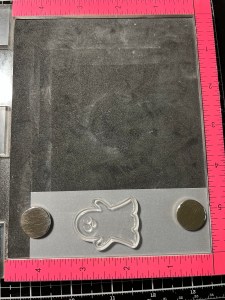
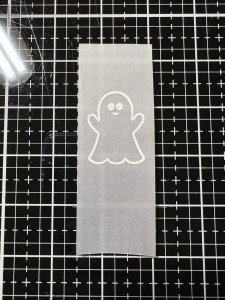
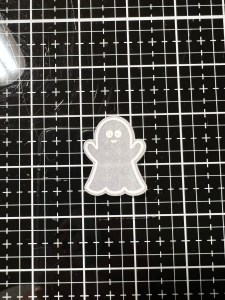
For the ghost image, I place a piece of Vellum into my MISTI and prep it with my Anti Static Powder Bag. I then stamp the ghost image from the Frightful & Delightful Stamp Set using Versamark Ink, add White Embossing Powder and heat set with my Heat Tool. Using the coordinating die from the Frightful & Delightful Die Set I cut out the image, running them through my Big Shot.
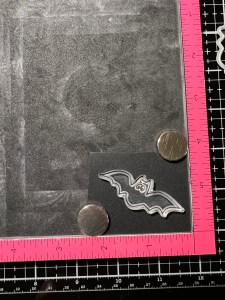
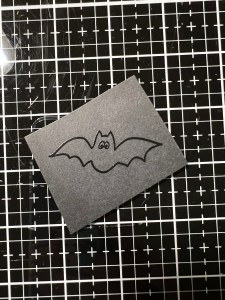
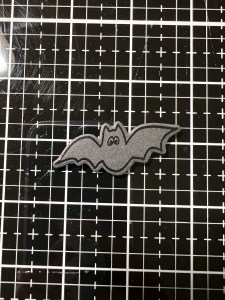
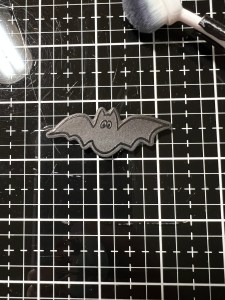
For my third image I prep a piece of Black Onyx Cardstock with my Anti Static Powder Bag then stamp the bat from the Frightful & Delightful Stamp Set using Versamark Ink. I then add Black Embossing Powder and heat set with my Heat Tool. I use the coordinating die from the Frightful & Delightful Die Set to cut the image out, running them through my Big Shot. I again add some ink blending with Black Onyx Ink to the top of the wings and head using my Mini Blending Brush.
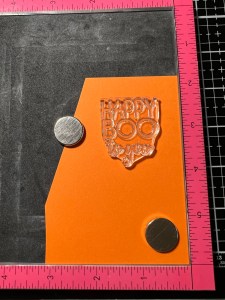
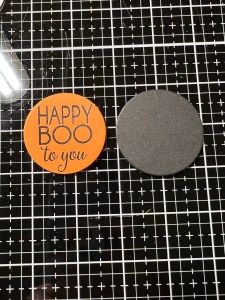
Now it’s time for my greeting, I place a piece of Tangerine Twist Cardstock into my MISTI and prep it with my Anti Static Powder Bag. I then choose a greeting from the same Frightful & Delightful Stamp Set and stamp it using Versamark Ink then add Black Embossing Powder and heat set with my Heat Tool. To cut my greeting out, I take the smaller plain layering circle die from the Master Layouts 3 Die Set and center it over the greeting then run them through my Big Shot. To help my greeting to stand out I create a shadow layer by taking the plain circle die from the Master Layouts 5 Die Set and cut out of Black Onyx Cardstock, running them through my Big Shot.

To assemble my elements, I add a Black Foam Square to the back of the spider and bat then adhere them onto the card front. I then stack two layers of the same Black Foam Squares and add them to the back of my greeting and mount it also onto my card front. *Stacking the foam squares helps the greeting to sit a bit higher than the other elements. To add the little ghost, I add two very small drops of Liquid Glue to the back of the eyes (to prevent the glue from showing through the vellum) and gave the glue several seconds to set up just a bit then pressed the image onto the card front. To help hold down the rest of the ghost image I also added the tiniest amount of Liquid Glue to the lower right area, behind the embossing. *Because glue shows through on vellum, I allow the small drops of glue to “set up” for a few seconds before adhering. This prevents the glue from oozing when the image is pressed into place.
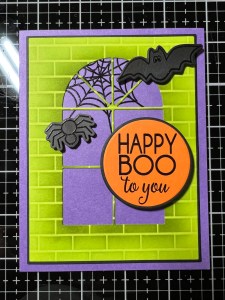
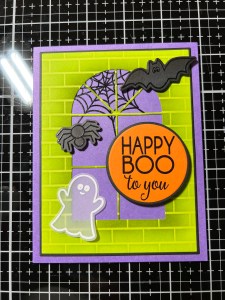
To finish off my card I use my Jewel Picker to add some Black Pearls with Liquid Glue and his completes my card.
I hope you enjoyed today’s card, it was a fun card to create… the little images are so cute! This set is not only great for greeting cards but would also be fun to create special treat bags for the little goblins in your life! Be sure to check out Gina’s Facebook page for even more inspiration! If you miss Gina’s live presentation, be sure to catch the replay on her YouTube channel to see all of the new products up close and she always has a fun card project at the end!
If this is your first time visiting my blog, welcome and I hope you return. If you are a returning visitor, thank you so much for your support!
If you would like to be notified by email each time I post a new project, there is an option to add your email (located at the top menu, or on the right side of my page) then hit the subscribe button. Should you have any questions or comments please leave them in the comments section. I’d love to hear from you and what you thought about today’s card.
Thank you for visiting and I hope you come back soon!
Happy Stamping and God Bless!!
Jeannie
