I want to start out by thanking everyone for the support and nice comments you all leave for me. I truly appreciate the support of this blog!! I enjoy card making and bringing my creations to you, this wouldn’t be possible without your support, so again, thank you!! *Affiliate links are used at no additional cost to you. When you purchase products through my links I receive a small commission from these sales, which helps me to purchase new products for the cards I share on my blog. Thank you so much for your support, it is greatly appreciated!! Don’t forget to check out my previous blog for many more card projects! You can find them HERE.
Tonight is Gina K. Designs brand new release!! Gina will be reveling her brand new products live starting at 7:00 PM CST on her YouTube channel as well as her Facebook page. Products will be available on her website under the “What’s New” category at that time and can also be found HERE. Remember, when you spend $50.00 or more (before any discounts and tax) you receive free shipping! When you spend $75.00 or more (before any discounts and tax) you will receive free shipping as well as an incentive stamp for free! No need to add the free set to your order, it will be automatically added when your qualifies. My card today is made using the new Hello Beautiful stamp set, illustrated by Beth Silaika for Gina’s new release. This set has a beautiful background stamp along with a couple of “hello” greetings that pair with many sentiments included in this set! All of the stamps, dies, cardstock and ink I use on my card are from Gina K. Designs. Let’s get started!!

I will be doing all of my work today on my Tim Holtz Glass Media Mat.
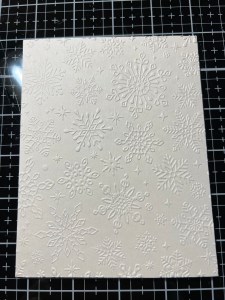
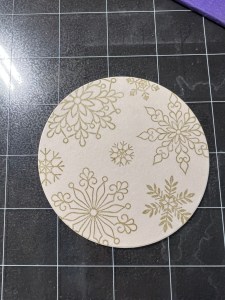
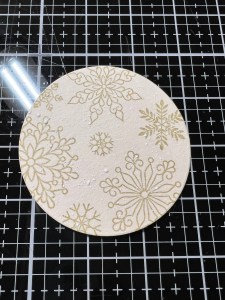
To start, I cut a 4 1/4″ x 5 1/2 piece of Barely There Cardstock using my Guillotine Paper Trimmer and place it into my Snowflakes Embossing Folder and run it through my Platinum 6 Die Cutting Machine. I set it aside and work on my panel.

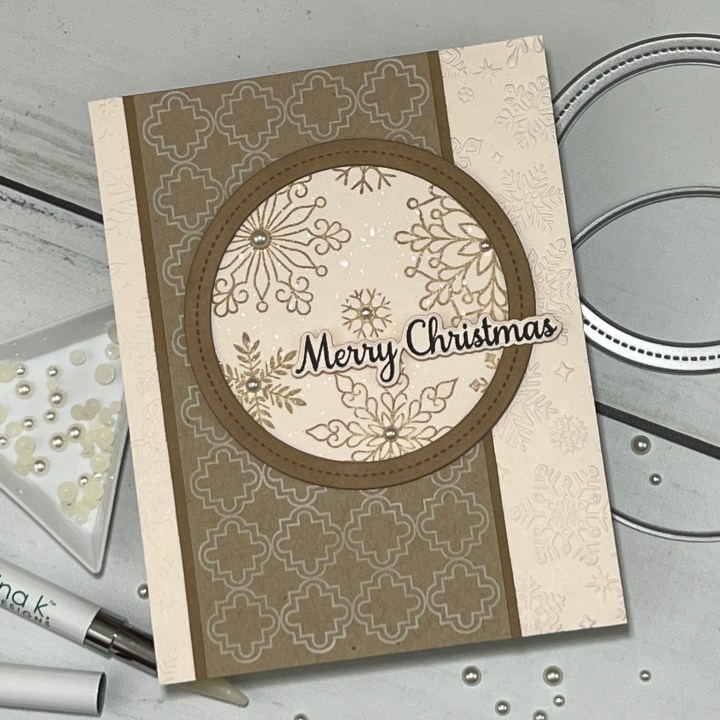
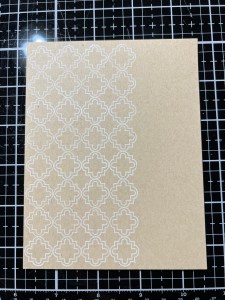
To create a layered panel, I place a 4 1/4″ x 5 1/2″ piece of Kraft Cardstock into my MISTI Stamp Positioner and line up the background image from the Hello Beautiful Stamp Set so it is even along the edge of the cardstock. I then pick up the stamp with the door of my MISTI and ink the stamp with White Pigment Ink and stamp it onto the cardstock. *I end up stamping the image 2 – 3 times to get a good image.


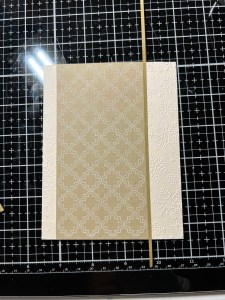
Using my Guillotine Paper Trimmer, I trim the side off of the panel so the image is centered. I then use Liquid Glue and adhere the panel onto my embossed panel, slightly off center, towards the left side.

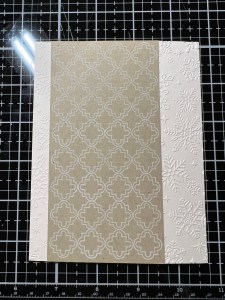
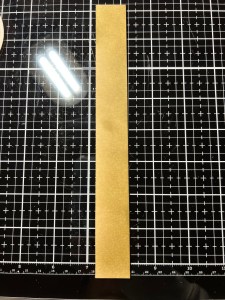
To create a little interest to separate the two panels, I take a strip of Kraft Cardstock and blend Kraft Ink over it with my Mini Blending Brush to make the cardstock a shade darker. I then cut two thin strips using my Guillotine Paper Trimmer then added Liquid Glue to adhere them against each edge of the panel and trimmed off the overhang. *I didn’t want to add too much contrast to the strips so I ink blended with the same color of ink to give it a slightly darker shade. Using tone on tone is a great way to add subtle shading within the same color.


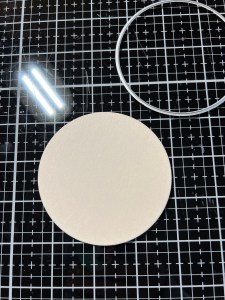
For my focal image I take the outline die from the Circle Shadow Shakers Die Set and cut out of Barely There Cardstock, running them through my Platinum 6. Next, I placed the die cut piece onto my Sticky Mat in my MISTI then arranged some of the snowflakes from the Blizzard Stamp Set over it. I inked them using Kraft Ink then stamped them onto the die cut piece using my Stampin Bug to apply even pressure (I also used it for my background panel). ***Using a sticky mat is a great way to hold cardstock in place for off the edge stamping. The sticky mat that I use (that I have linked) has pretty low tack stickiness. This mat is not overly sticky at all. I have only used it a few times so I’m not sure what the long term stickiness will be. To preserve the stickiness be sure to replace the top acetate piece back over the sticky side of the mat when not in use.
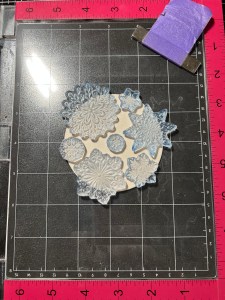
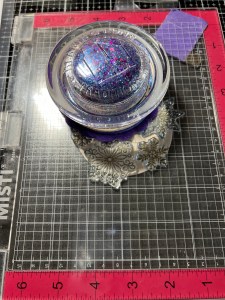
To add a little interest and the look of snow I apply a small amount of Picket Fence Distress Paint onto my Glass Mat then take a dampened paintbrush to pick up the paint and spatter it over the snowflakes then set it aside to dry as I work on my frame.
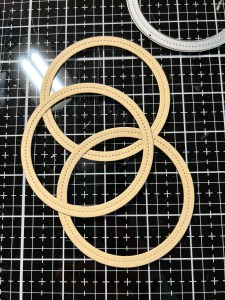
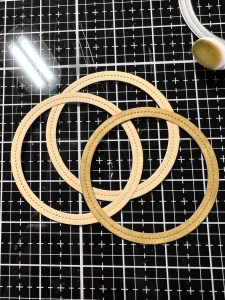
Using the frame die from the Circle Shadow Shakers Die Set I cut out of Kraft Cardstock three times, running them through my Platinum 6. To bring in the same shading as my strips, I blend Kraft Ink onto one of the die cut circles with my Mini Blending Brush. Using Liquid Glue I stack and glue the die cuts together with the blended piece on top.

Now that my paint has dried I adhered the stacked frame onto the snowflake circle using Liquid Glue. I then glued the circle onto my panel, shifting it to the right so it hangs off a bit.


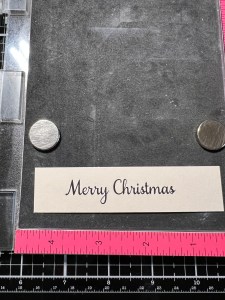
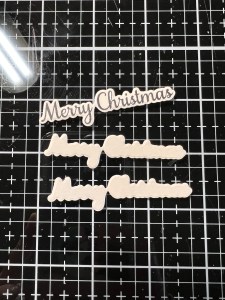
For my sentiment, I place a piece of Barely There Cardstock into my MISTI and chose a greeting from the same Blizzard Stamp Set then stamped it using Amalgam Obsidian Black Ink. After allowing the ink to completely dry, I take the coordinating die from the Blizzard Die Set and cut the greeting out, running them through my Platinum 6.
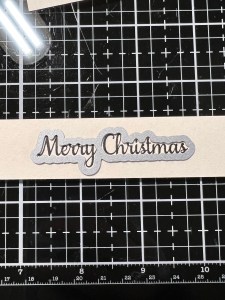

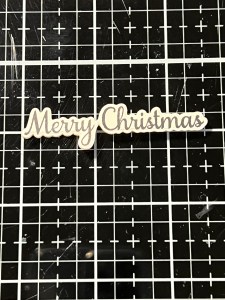
Using the same die from the Blizzard Die Set I cut out two additional times from Barely There Cardstock to give my greeting some dimension and stability. With Liquid Glue, I stack and glue the pieces together with the greeting on top.
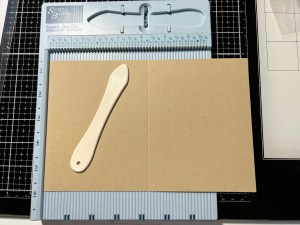
For my card base, I place a 5 1/2″ x 8 1/2″ piece of Kraft Cardstock into my Scor Buddy and score it at 4 1/4″ creating a side folding base. I then use Liquid Glue to adhere my panel onto the base. Next, I add small pieces of thin Foam Tape to the back of my greeting, except for the end that will hang over the frame, to that area I add Liquid Glue then adhere it over the circle and frame.
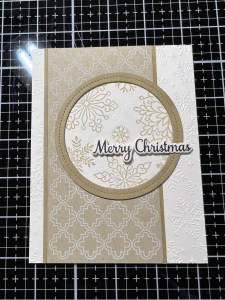
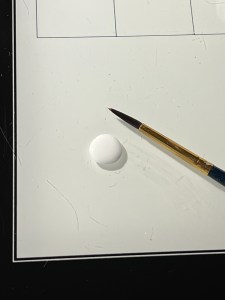
Using my Pick And Stick Tool, I add Soft White Pearls to the centers of the snowflakes with Liquid Glue and this completes my card.
I hope you enjoyed today’s card and get a chance to check out Gina’s new release! I also wanted to thank all of you for all your thoughts and prayers and checking in with me over the past month and a half. My surgery went better than expected and I am healing well. My shoulder/bicep is still stiff and a bit sore but I am continuing my daily exercises and stretches and hopeful to have full use of my arm in the coming months. I’m working on getting back on track with creating my cards on a regular basis but I will have to listen to my shoulder to see how much it will allow. I do find that die cutting seams to irritate it the most and I am only holding onto the die cut machine with that arm! Anyhow, thank you all for your support, I appreciate you all!! ❤
If this is your first time visiting my blog, welcome and I hope you return. If you are a returning visitor, thank you so much for your support!
If you would like to be notified by email each time I post a new project, there is an option to add your email (located at the top menu, or on the right side of my page) then hit the subscribe button. Should you have any questions or comments please leave them in the comments section. I’d love to hear from you and what you thought about today’s card.
Thank you for visiting and I hope you come back soon!
Happy Stamping and God Bless!!
Jeannie
