I want to start out by thanking everyone for the support and nice comments you all leave for me. I truly appreciate the support of this blog!! I enjoy card making and bringing my creations to you, this wouldn’t be possible without your support, so again, thank you!! *Affiliate links are used at no additional cost to you. When you purchase products through my links I receive a small commission from these sales, which helps me to purchase new products for the cards I share on my blog. Thank you so much for your support, it is greatly appreciated!! Don’t forget to check out my previous blog for many more card projects! You can find them HERE.
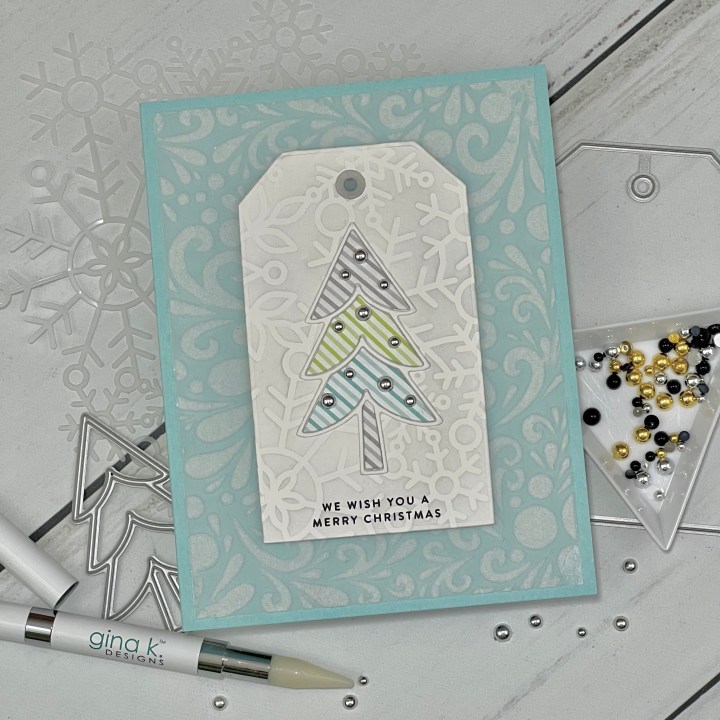
Today I have a sweet Christmas card where I add flocking to vellum! Did you know there are flocked transfer sheets that can be used along with Transfer Gel Duo and stencils by running them through a heated laminator? This technique gives beautiful results and adds a velvety texture to your projects. For my card I added the flock to vellum for a soft look…using cardstock instead of vellum would also give beautiful results! The flock can also be added to die cut pieces using double sided adhesive and ran through a die cut machine to press the flock into the adhesive. Another use is to run a flock sheet through an embossing folder, all such beautiful results! Let’s get started on today’s card!!

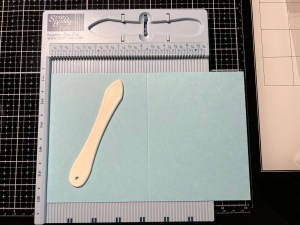
I will be doing all of my work today on my Tim Holtz Glass Media Mat.
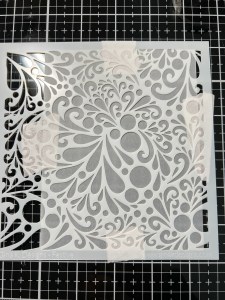
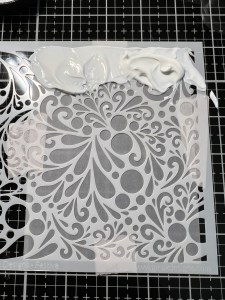
To start I cut a 4 1/4″ x 5 1/2″ piece out of Vellum using my Guillotine Paper Trimmer. Using Pixie Tape, I attached the Festive Stencil over my Vellum. I then add Transfer Gel Duo to the top of the stencil, then use my Stencil Pal to pull and spread the gel down over the entire front of the stencil. After the gel is evenly spread, I carefully remove the stencil, and set the Vellum aside to completely dry. Once the gel has completely dried, it will turn clear instead of cloudy. ***After removing the stencil, my vellum panel really started to curl! I forgot that vellum does not take liquid well, while this is a gel, it’s moisture content is high and curls the vellum. So, in hindsight I would most definitely tape the edges of the panel down before adding the gel and leave it taped down until completely dry. I have to apologize that I didn’t get photos of removing the stencil and the laminating process. To be honest, my vellum panel had curled so much after removing the stencil that I didn’t think I would be able to use this piece. I fiddled around with it and taped down the corners as best I could to flatten it back out a bit to dry. After it dried, I still didn’t think it would be a usable piece as I did smear some of the gel around the sides while trying to flatten out the curl.


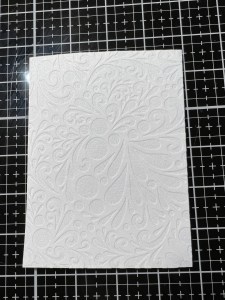
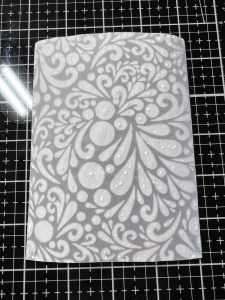
Now it’s time to add flock to my Vellum! I cut a piece out of White Latte Flock Transfer Sheet about the same size and place it fuzzy side down over my Vellum panel then place it into a folded Carrier Sheet. I also add a piece of cardstock over it to give added pressure, close the carrier sheet then run it through my laminator. I like to run my pieces through my laminator two times to be sure everything adheres well. I then wave my panel through the air for a few seconds to allow it to cool down a little then peel back the flock from my panel and now I have a perfectly flocked design! And look at that beautiful negative piece!! I will save that piece to create a bonus card that will be posted at the end of this blog! ***The vellum was quite warped but I went ahead with the laminating process just to see if the flock would work on the vellum and it ended up turning out amazing after I trimmed off the bad edges, and the panel had completely flattened out. Who knew!!? Always continue on with the process to see what works out, I’m so thankful that I didn’t throw out what looked to be a fail!

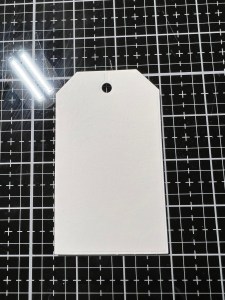
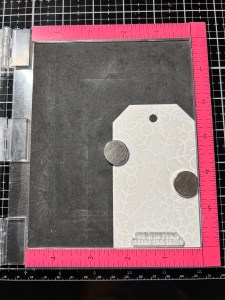
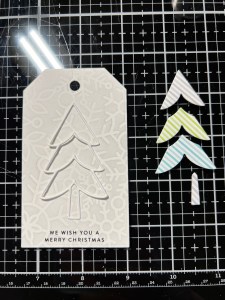
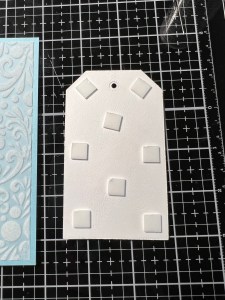
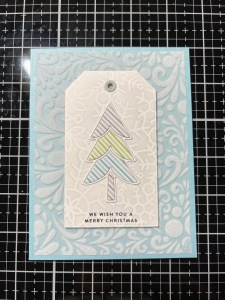
I set my flocked panel aside and work on my tag. Using the second largest die from the Nesting Tags Die Set I cut out of White Cardstock, running them through my Platinum 6 Die Cut Machine. To add some texture and interest to my tag, I place the Snowflake Cluster Stencil over my tag and lightly blend Fog Ink over the top using my Blending Brush. *Because the stencil is so delicate, before ink blending I lightly sprayed Pixie Spray over the back of the stencil to help hold it into place.


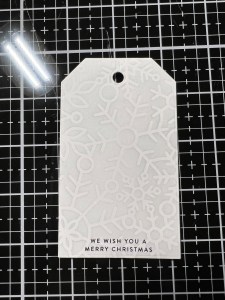
For a sentiment, I place the tag into my MISTI Stamp Positioner then line up a stamp from the Tiny Words Christmas Stamp Set along the bottom of the tag and stamp it using Versafine Clair Nocturn Ink.
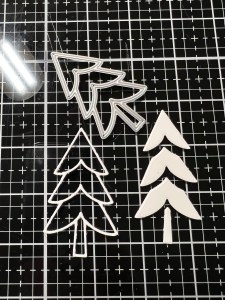
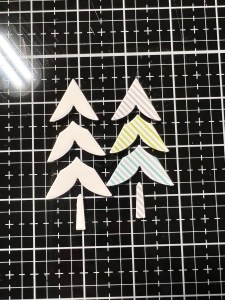
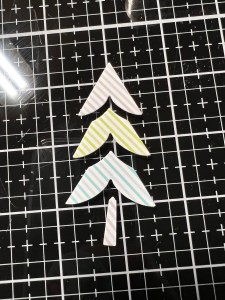
To create a focal image for my card, I take the Mod Tree Die and cut out of White Cardstock, running them through my P6, I will use this for the outline of my tree and use the pieces for layering behind the pattern paper pieces. Next, I use the same die and cut out of three different colors of the same pattern from the Flower Market Petite Paper Pack, running them through my P6. I take one color for each part of the tree and use Liquid Glue to adhere them onto the white cardstock pieces to add a little dimension.

Now it’s time to add the dies to the tag. Because the outline die cut piece is so delicate, it can easily get stretched a bit when removing it from the cutting plate of the die cut machine. To be sure the outline will fit snugly around the inside pieces, I lay the outline (without glue) onto my tag where I want it adhered. I then add Liquid Glue to the back of my first inside die cut piece and adhere it onto the tag. Continuing, I add Liquid Glue to the next die cut piece and adhere it into place. I repeat this process until all pieces are adhered into place then carefully remove the outline die cut piece.
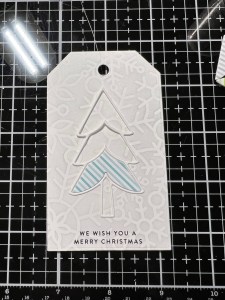
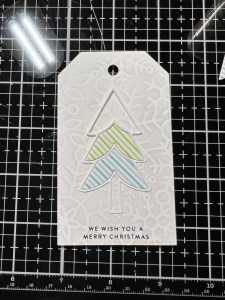
Now that everything is adhered down in the correct position, I can now add Liquid Glue to the back of the outline die cut and press it into place around all of the pieces. I also die cut a circle enforcer from the same Nesting Tags Die Set out of White Cardstock and blend Fog Ink onto it then glue it over the hole of the tag for a completed look.
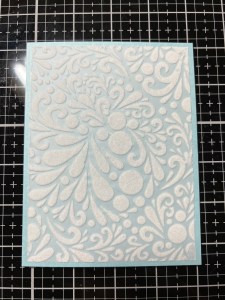
Next, I place a 5 1/2″ x 8 1/2″ piece of Ocean Mist Cardstock into my Scor Buddy and score it at 4 1/4″ to create a side folding card base. To allow a border around my flocked panel, I trim the panel down to be 4″ x 5 1/4″ using my Guillotine Paper Trimmer. I then add small drops of Liquid Glue to the back side of my flocked panel. *Because glue can show through on vellum I only add glue to the back side of the flocked areas to hide the glue. I now adhere my flocked panel onto the card base leaving even margins on all four sides.

To attach my tag onto the card front, I add Foam Squares to the back then adhere it to the center.
Using my Pick And Stick Tool I add Silver Pearls to the tree using Liquid Glue and this completes my card.
For my bonus card I took the negative piece of flock leftover from my first card and trimmed it down to be 3 3/4″ x 5″ then mounted it onto a 3 7/8″ x 5 1/8″ panel of Matte Gold Cardstock using Liquid Glue then onto a white card base. I then used the Flourished Merry Christmas Die and cut out of the same Matte Gold Cardstock once and twice out of White Cardstock, running them through my P6. Next, I stacked and glued the die cuts together with the gold on top using Liquid Glue then glued the stacked greeting onto the card front just above center. To finish I used Liquid Glue to adhere a few Gold Pearls and this completes the card.

I hope you enjoyed today’s cards! I never really thought about adding flock to vellum, and to be honest I wasn’t even sure if it would work. The results are amazing, so much prettier in real life!! Flock on vellum gives such a soft, velvety look and feel… with so many different stencils out there, there is a design for any occasion. I think flock would be perfect for any snowflake stencil, it would give a soft wintery feel and would be the perfect backdrop for a scene or even just a simple die cut greeting. Adding flock to colored cardstock or an ink blended background would also be beautiful!
If this is your first time visiting my blog, welcome and I hope you return. If you are a returning visitor, thank you so much for your support!
If you would like to be notified by email each time I post a new project, there is an option to add your email (located at the top menu, or on the right side of my page) then hit the subscribe button. Should you have any questions or comments please leave them in the comments section. I’d love to hear from you and what you thought about today’s card.
Thank you for visiting and I hope you come back soon!
Happy Stamping and God Bless!!
Jeannie

Beautiful as always. Loved the bonus card as well. Thanks for sharing Jeanne.
LikeLike
Thank you so much Barb!! You’re always so kind!
LikeLike
Thank you again for another great and beautiful creation of your talents. I love getting your emails showing what you have made.
LikeLike
Thank you for your kind words Pam, you are very sweet!!
LikeLike