Hello, welcome to my blog!!
I want to start out by thanking everyone for the support and nice comments you all leave for me. I truly appreciate the support of this blog!! I enjoy card making and bringing my creations to you, this wouldn’t be possible without your support, so again, thank you!! *Affiliate links are used at no additional cost to you. When you purchase products through my links I receive a small commission from these sales, which helps me to purchase new products for the cards I share on my blog. Thank you so much for your support, it is greatly appreciated!! Don’t forget to check out my previous blog for many more card projects! You can find them HERE.
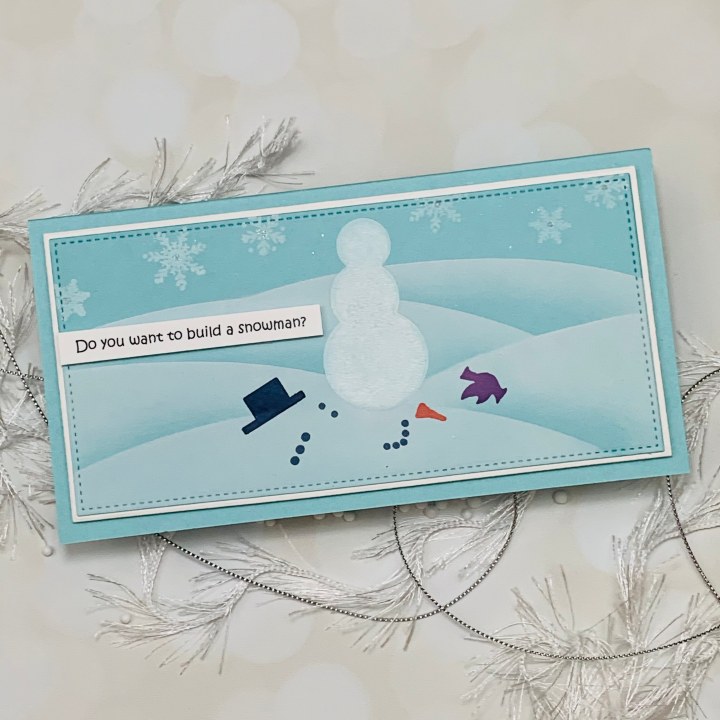
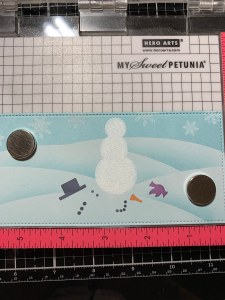
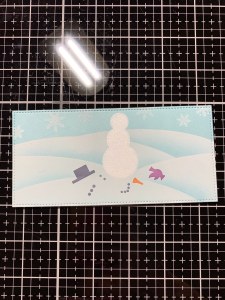
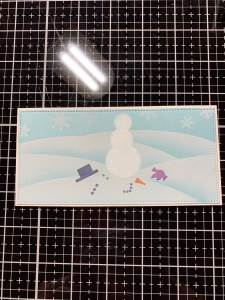
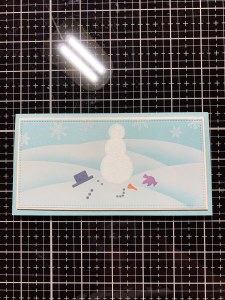
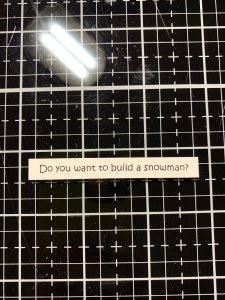
Today I have a card made with the Winter Wonderland stamp set from the brand new release from Gina K. Designs!! Gina’s new release goes live tonight at 7:00pm CST. There are several new stamp sets in this new release, a new Master Layouts and a Holiday Kit!! Gina’s kits are always a big hit and packed with so much product which is a great value for the price. If you’d like to view the new products from this release you can click on the store logo located on the right side of my blog page, once there click on shop then the “What’s New” tab on Gina’s website, they can also be found HERE. Today’s card is a mini slimline that was easily created using the Master Layouts 7 die set also from Gina K. Designs. The Winter Wonderland stamp set is filled with elements to create a snowman, decorate the trees and many sentiments. When I received this set all I kept thinking is, “Do you want to build a snowman?” so I decided to go with it! The sentiment I used was not included in the set so I used my computer to create and print my own. All of the inks, stamps, dies and cardstock are from Gina K. Designs. Let’s get started!!

I will be doing all of my work today on my Tim Holtz Glass Media Mat.
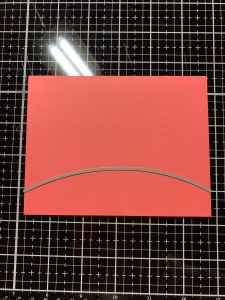
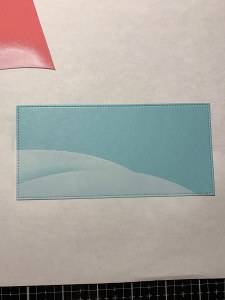
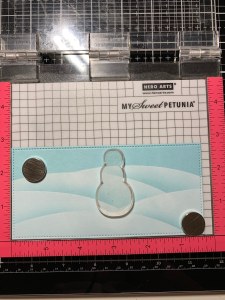
To start I take the large stitched rectangle from the Master Layouts 7 Die Set and cut out of Ocean Mist Cardstock, running them through my Big Shot Die Cut Machine. To create a temporary stencil, I take the hill die from the Master Layouts 6 Die Set and cut out of a scrap panel of cardstock, this will be used to create my snow drifts.


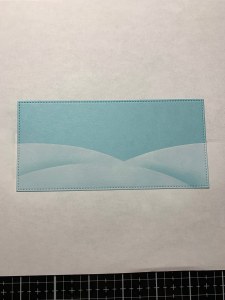
Placing the the hill die cut piece over my stitched panel I use my Blending Brush to blend White Pigment Ink over the lower portion of my panel. I then move the die cut piece above the previous blend at an angle and again blend White Pigment Ink around the die cut, this time fading the ink out towards the previous drift so that there is separation between the drifts. *I keep a blending brush dedicated to use only with my white pigment ink so that I don’t contaminate my other dye ink pads.
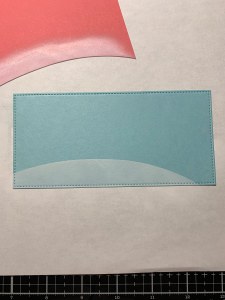
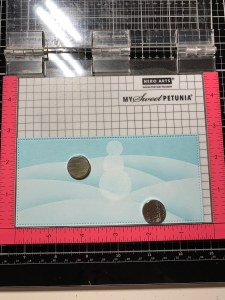
I continue moving the hill die cut piece above each previous drift at different angles and blend White Pigment Ink until my panel has several snow drifts.

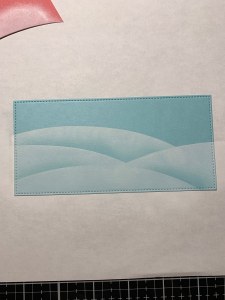
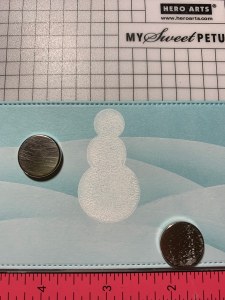
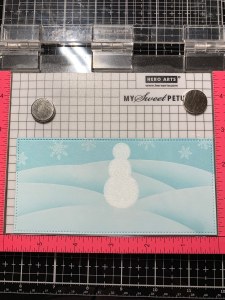
After allowing my panel to completely dry, I place it into my MISTI Stamp Positioner and line up the snowman image from the Winter Wonderland Stamp Set over the snow drifts. I then ink up the image using the same White Pigment Ink and stamp it onto the panel. As you can see, the snow drifts show through my image. I reink the image and stamp it several times until a have a thick ink coverage, which also gives the image a bit of texture. To dry my stamped image in between stampings a bit, I use my Air Blower which provides cool air and dries the ink enough in between applying more ink. This is a great tool to not only use on alcohol inks but creates cool air to dry dye and pigment inks instead of using a heat tool which could warp the cardstock.
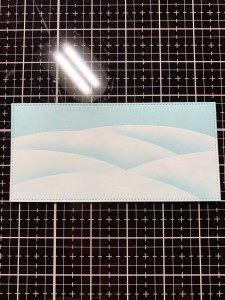
After allowing the snowman image to completely dry (I actually left mine to dry overnight), I arrange the snowflake images from the Winter Wonderland Stamp Set over the top right portion of my panel and stamp them using White Pigment Ink. I then clean off the stamps and repeat the stamping over the top left side of my panel.

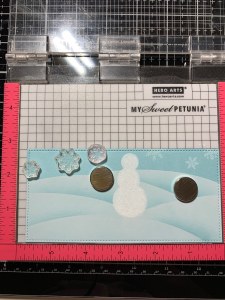
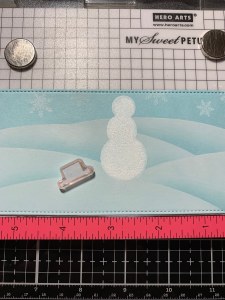
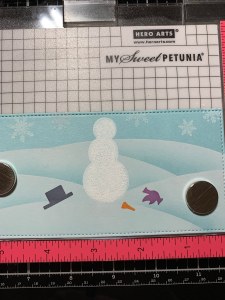
Now it’s time to stamp the snowman elements! I want these images to look like they are scattered in the snow, I start with the hat and stamp it using Slate Ink. I end up stamping my images a few times to get good solid stamping over the drifts. I also clean off the stamps in between each stamping to remove any of the white ink that may stick to the stamps so I don’t contaminate my dye ink pads. Next, I stamp the scarf using Plum Punch Ink onto the right side of the snowman. ***OK… I just got a good laugh!! After the release went live I was looking at other designer’s samples and noticed that what I used on this card for a scarf is actually a bird!!!! In my own defense when turned upside down it does actually fit as a scarf! Oh my, I am so embarrassed yet laughing at my self hysterically!! Please forgive me for this error!

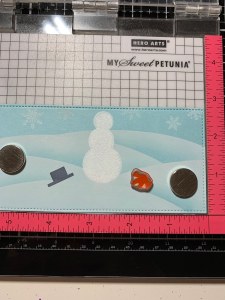

Using Tangerine Twist Ink I stamp the nose. I then use Slate Ink to stamp the eyes, mouth and buttons onto the snow drifts and this completes my stamping. All of these elements are from the same Winter Wonderland Stamp Set.
Next, I take the large layering die from the Master Layouts 7 Die Set to cut out of White Cardstock, and run them through my Big Shot. Using Terrific Tape, I adhere the two panels together.

To create a card base for my panel I place a 6 1/4″ x 6 1/2″ piece of Ocean Mist Cardstock into my Scor Buddy and score it at 3 1/4″. I then add Foam Tape to the back of my panel and mount it onto the card base.

There wasn’t the right sentiment that I wanted to use for my card included in the stamp set so I decided to make my own. I used my computer to type out the exact wording I wanted to use for a sentiment then went through my fonts until I found one I liked. I then typed the sentiment out in a few different font sizes and printed them out onto a sheet of cardstock. After finding the size I wanted, I used my Guillotine Paper Trimmer to cut a thin strip around the sentiment. I then added a thin strip of Foam Tape to the back of the sentiment strip and mounted it onto my card front.

Though it is hard to see in the photo, I did add a small drop of Liquid Glue to the center of each snowflake then sprinkled on some iridescent glitter from my stash and this completes my card. *Today’s card fits perfectly into the Slimline Envelopes available at Gina K. Designs.
I hope you enjoyed today’s card and get a chance to check out Gina K. Designs’ new release! If you like making larger cards, there have been some hints about products working with 5 x 7 cards in this release. I am as excited as everyone else to see what Gina has in store for us tonight!!
If this is your first time visiting my blog, welcome and I hope you return. If you are a returning visitor, thank you so much for your support!
If you would like to be notified by email each time I post a new project, there is an option to add your email (located on the right side of my page) then hit the subscribe button. Should you have any questions or comments please leave them in the comments section. I’d love to hear from you and what you thought about today’s card.
Thank you for visiting and I hope you come back soon!
Happy Stamping and God Bless!!
Jeannie

Love this cute card.
LikeLike
Thank you so much Vivian!!
LikeLike