I want to start out by thanking everyone for the support and nice comments you all leave for me. I truly appreciate the support of this blog!! I enjoy card making and bringing my creations to you, this wouldn’t be possible without your support, so again, thank you!! *Affiliate links are used at no additional cost to you. When you purchase products through my links I receive a small commission from these sales, which helps me to purchase new products for the cards I share on my blog. Thank you so much for your support, it is greatly appreciated!! Don’t forget to check out my previous blog for many more card projects! You can find them HERE.
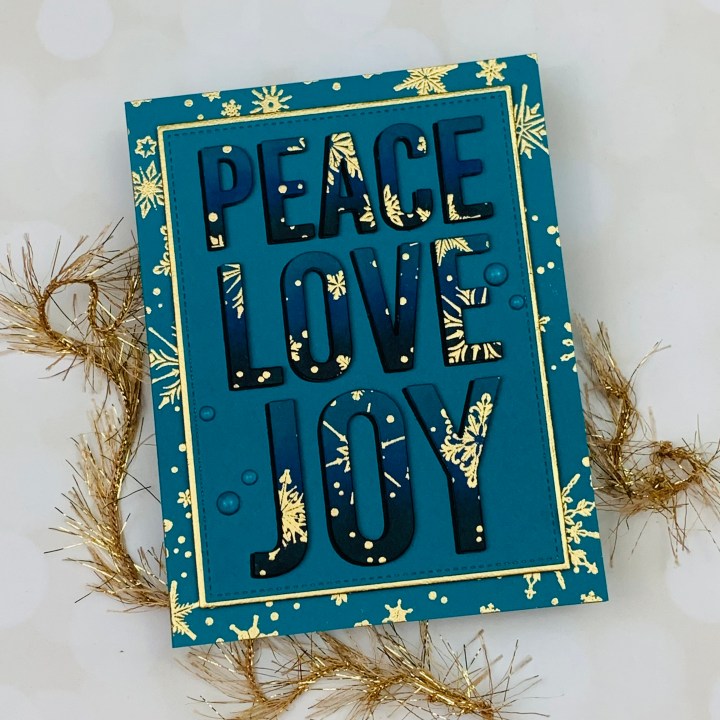
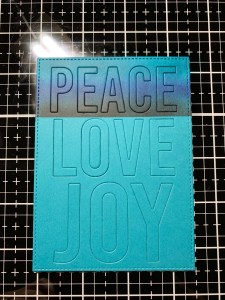
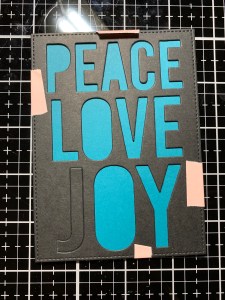
Today I have a card using the Peace Love Joy die plate from Gina K. Designs’ latest release. This is a beautiful die that can be used to create a shaker card, or kept simple by using the cut out letters on a card front as well as using the cut out window over a background. I wanted to use the letters from this die to layer onto a card front and step it up a bit by adding ink blending and embossing for some added interest. I love the size of this die plate as it is the same size as the stitched rectangle from the Master Layouts 2 die set also from Gina K. Designs. Being it is the same size as the ML2, the layering die from that set is the perfect mat for the die plate also! For added texture and contrast on my card, I embossed the Delicate Snowflake background die onto my card base as well as the letters using gold embossing powder. You can’t really tell that the images are snowflakes on the letters but I thought it added some nice interest and tied in with the background of the card base. I love doing dramatic ink blends paired with metallic embossing. All of the stamps, dies, inks and cardstock I use on today’s card are from Gina K. Designs. Let’s get started!!

I will be doing all of my work today on my Tim Holtz Glass Media Mat.
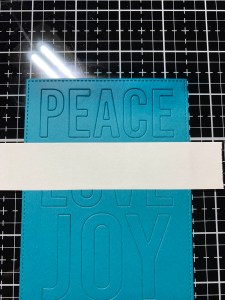
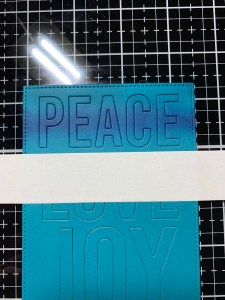
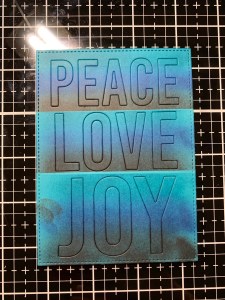
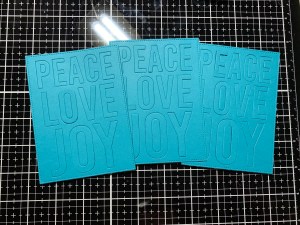
To start, I take the Peace Love Joy Die Plate and cut out of a 4 1/4″ x 5 1/2″ panel of Tranquil Teal Cardstock, running them through my Big Shot Die Cutting Machine. To keep the letters all intact while I do my ink blending, I place strips of Post It Tape over the back of the panel. I then take a piece of Post It Tape and place it just under the first word “peace” to avoid getting any ink onto the word below when I do my ink blending.


To start ink blending, I take my Mini Blending Brushes and blend Tranquil Teal Ink onto the top third of the letters. Next, I blend Blue Denim Ink onto the center of the letters and finish by blending Black Onyx Ink onto the bottom of each letter. I then move the Post It Tape down and add another piece so that the center work “love” is only exposed and repeat my ink blend using the same colors. For the last word “joy” I place a piece of Post It Tape just above it then repeat the ink blend. *Using the mini blending brushes is a great way to control the ink coverage on the smaller area.

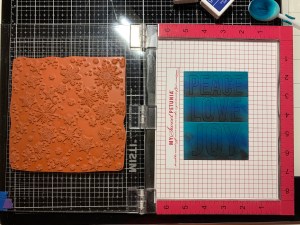
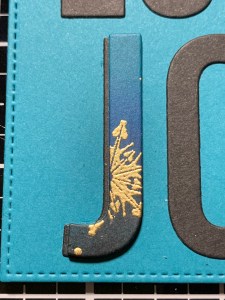
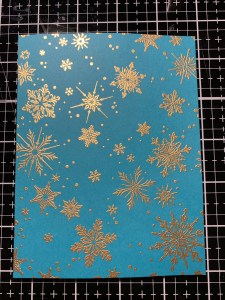
After the blended ink is completely dry, I leave the Post It Tape still intact on the back of my panel (so that the letters don’t move) and place the panel into my MISTI Stamp Positioner then prep it with my Anti Static Embossing Pad. I then place the Delicate Snowflake Background Stamp over the panel and pick it up with the door of my MISTI. Next, I ink up the stamp with Versamark Ink then stamp it onto my panel. I then remove the panel and add Gold Embossing Powder and heat set with my Heat Tool.
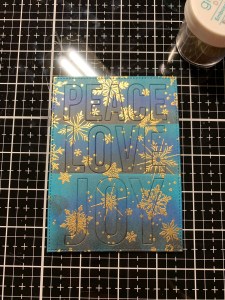
To add some dimension to my letters, I use the same Peace Love Joy Die Plate and cut out of Tranquil Teal Cardstock three times, running them through my Big Shot. I remove all of the letters from the panels then use Liquid Glue to stack and glue each letter die cut together. I then remove all of the ink blended die cut letters from my blended panel and glue them to each stacked die cut, using Liquid Glue.


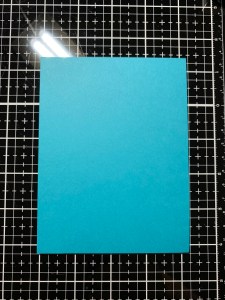
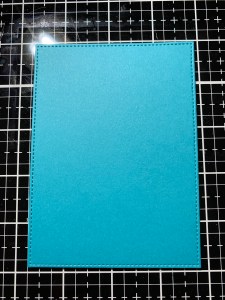
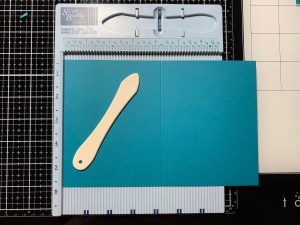
I want to add a shadow for each of my letters so I take the Peace Love Joy Die Plate and cut out of Black Onyx Cardstock, running them through my Big Shot. I remove the letters from the die cut and set them aside. To create a card front to mount my letters on, I take the largest rectangle die from the Master Layouts 2 Die Set and cut out of Tranquil Teal Cardstock, running them through my Big Shot.
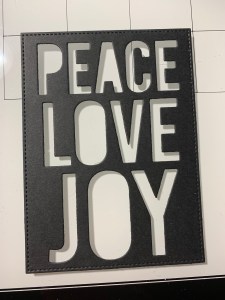
I now place the black template over the teal panel and hold them together using some washi tape. Starting with the “J” I add some Liquid Glue then inlay the black die cut into the opening. I continue adding Liquid Glue into each of the letter openings and inlay the die cut letters until the panel is complete then carefully remove the black die cut panel. *Using the die cut panel as a guide ensures proper placement of each letter and gets everything lined up perfectly!
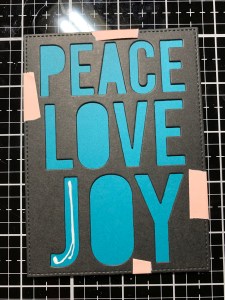


To adhere my ink blended letters, I add Liquid Glue to the backs then place them over the black die cut letters shifting them slightly to the right so that a bit of black shows on the left side. I continue adding glue to the ink blended letters and adhere them into place on my panel, shifting each one slightly to the right. *By using the template to line up and adhere the black letters, it gives me perfect alignment for placing the stacked die cut letters. Slightly shifting the stacked die cut letters over the black gives the letters a bit of a shadow appearance which helps them to stand out a bit.
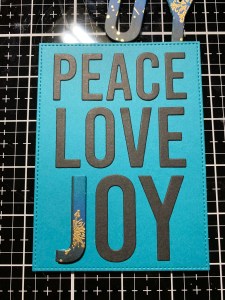
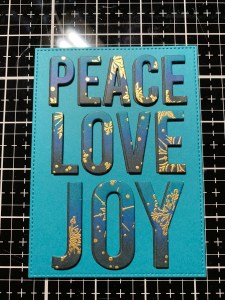
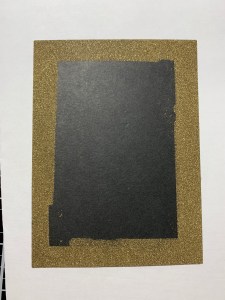
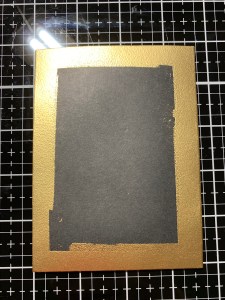
Next, I create a mat for my panel. Taking the largest die from the Master Layouts 2 Die Set I cut out of Black Onyx Cardstock, running them through my Big Shot. Using the edge of my Versamark Ink Pad I apply ink to all four edges of the panel. I then add Gold Embossing Powder and heat set with my Heat Tool then set the panel aside while I work on my card base.
I place a 5 1/2″ x 8 1/2″ piece of Tranquil Teal Cardstock into my Scor Buddy and score it at 4 1/4″ creating a side folding card base. To add some texture and shine to the card base I place it into my MISTI and place a half sheet of scrap copy paper inside the fold to protect the rest of the card base. I then prep the front of the card base with my Anti Static Powder Pad and ink up the Delicate Snowflake Background Stamp with Versamark Ink and stamp it onto the card base. I remove the card base and add Gold Embossing Powder then heat set with my Heat Tool.

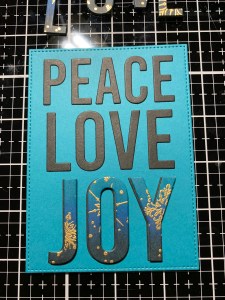
To assemble my card I add Terrific Tape to the back of my teal panel and adhere it to the gold edged panel. I then add Foam Squares to the back of the panel and mount it onto the card base.
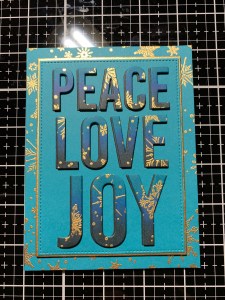
Using my Jewel Picker I add Dew Drops with Liquid Glue and this completes my card.
I hope you enjoyed today’s card! One of my favorite techniques is ink blending bold colors onto colored cardstock then adding metallic embossing powder. Adding black ink around the edges of dark ink blends really makes the colors pop and adds so much depth. I enjoy dramatic looks with embossing on Christmas cards, I feel like nothing is too fancy! The die plate I used on today’s card cuts so nicely and I can’t wait to create a shaker card with it soon! I also love the fact that this die is the exact same size as the stitched panel from the Master Layouts 2 Die Set so I will always have the perfect size backer for my die plate as well as a perfect matting die. I love how Gina creates her products to work together!!
If this is your first time visiting my blog, welcome and I hope you return. If you are a returning visitor, thank you so much for your support!
If you would like to be notified by email each time I post a new project, there is an option to add your email (located on the right side of my page) then hit the subscribe button. Should you have any questions or comments please leave them in the comments section. I’d love to hear from you and what you thought about today’s card.
Thank you for visiting and I hope you come back soon!
Happy Stamping and God Bless!!
Jeannie

Thank you for explaining how you made this beautiful card. Such a great help. Totally in love with your card. Thank you for sharing.
LikeLike
Thank you so much Lynne!! I really love this die!
LikeLike
I saw your card on FB and had to come over to see how you made it. It is wonderful. I love the rich colour and the gold snowflakes. Great tutorial too.
LikeLike
Thank you so much Deb, I’m happy you stopped by!!
LikeLike
This card is so pretty! Thank you for sharing the how to! Love it!!!
LikeLike
Thank you so much for your kind words!!
LikeLike
Exquisite work as always. Love your tutorials.
LikeLike
Thank you so much Shel!!
LikeLike