I want to start out by thanking everyone for the support and nice comments you all leave for me. I truly appreciate the support of this blog!! I enjoy card making and bringing my creations to you, this wouldn’t be possible without your support, so again, thank you!! *Affiliate links are used at no additional cost to you. When you purchase products through my links I receive a small commission from these sales, which helps me to purchase new products for the cards I share on my blog. Thank you so much for your support, it is greatly appreciated!! Don’t forget to check out my previous blog for many more card projects! You can find them HERE
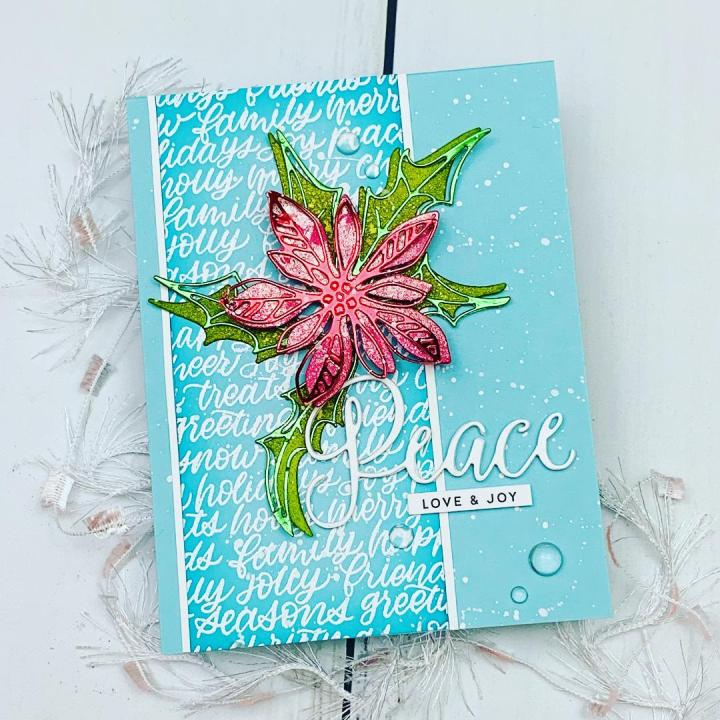
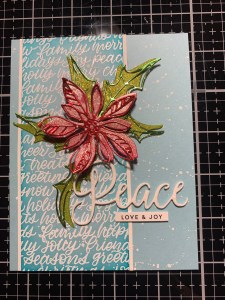
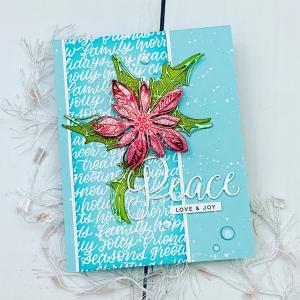
Today I have a Christmas card using the Seasonal Sketch dies from Tim Holtz. I love the fun, whimsical look of the poinsettia and holly leaves. I added the new holiday mica sprays over colored cardstock for the flower and leaves, while the outline die cuts are cut out of metallic kraft cardstock. My ink blended background strip is stamped using the Hand Lettered Holiday Background stamp and the Peace die cut is from the new Joyful Holiday Kit from Gina K. Designs. I also added a spattering of white paint over my card front for an added winter feel. Let’s get started!!

I will be doing all of my work today on my Tim Holtz Glass Media Mat.
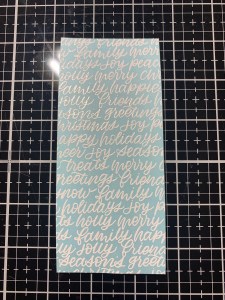
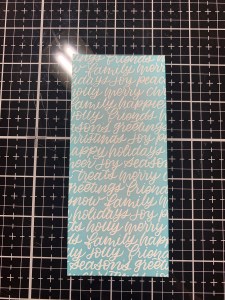
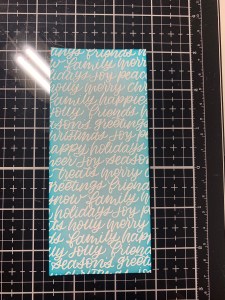
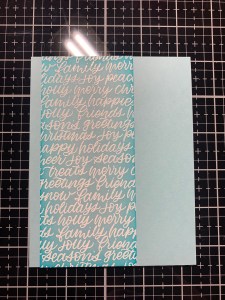
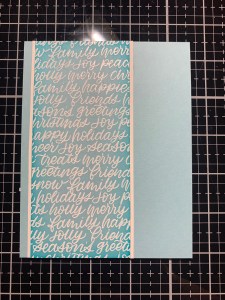
To start, I cut a 2 1/2″ x 5 1/2″ panel out of Ocean Mist Cardstock using my Guillotine Paper Trimmer. Next, I place the Hand Lettered Holiday Background Stamp onto the door of my MISTI Stamp Positioner. I then add a little Adhesive Dot Runner to the back of my cardstock panel and place it face down onto the stamp making sure to line it up with the words. Because this is a red rubber stamp I remove the mousepad from my MISTI and close the base onto the door. I flip the MISTI over and gently press down on the door, now when I open the door my cardstock is perfectly lined up and ready to be stamped.
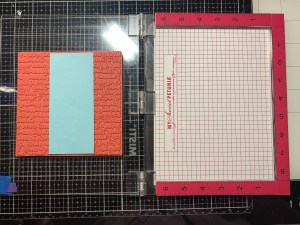
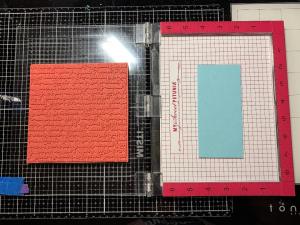
With my cardstock panel strip in place I prep it with my Anti Static Powder Tool then ink up my stamp with Versamark Ink and stamp it onto the panel. I then add White Embossing Powder and heat set with my Heat Tool. To add some shading to my panel I use my Blender Brush to blend Turquoise Sea Ink around all four sides, fading out towards the center. *I don’t want to cover all of the cardstock color, I’m just creating a blend to make this panel and embossing to stand out a bit. Next, I blend Blue Lagoon Ink to the very edges of the panel, fading into the previous color.
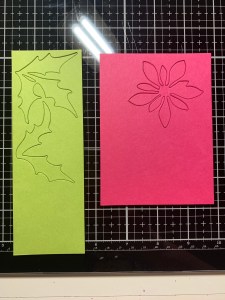
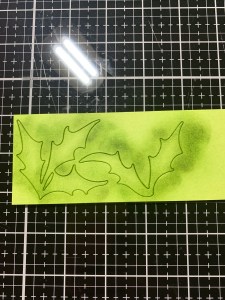
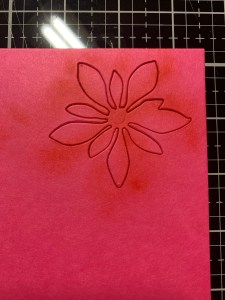
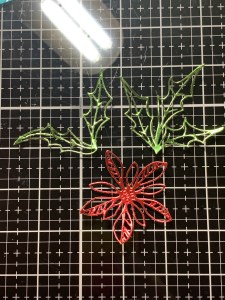
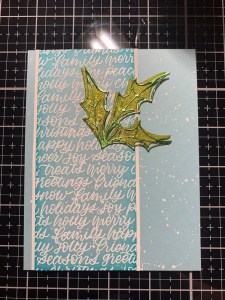
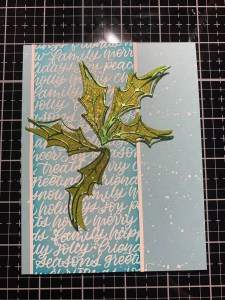
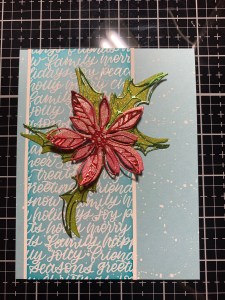
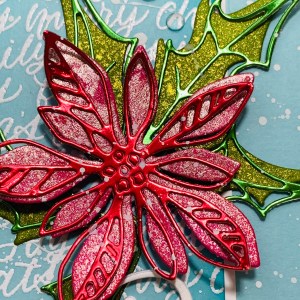
I now take the Seasonal Sketch Wafer Dies Set and use the poinsettia die to cut out of Passionate Pink Cardstock and take the holly dies to cut out of Jelly Bean Green Cardstock, running them through my Big Shot Die Cut Machine. To add some shading to the die cuts, I keep them in the panels and use my Mini Blending Brush to blend Fresh Asparagus Ink around the edges of the holly leaves and blend Lipstick Ink around the edges of the poinsettia.

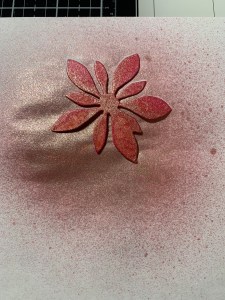
Next, I place the die cut pieces onto a piece of copy paper and spritz the leaves with Holly Branch Mica Spray then spritz the poinsettia with Winter Berry Mica Stain, both of these sprays are from the Holiday 2 set. When I have the coverage I want, I set them aside to dry for a few minutes. ***These mica stains are a limited release meaning once they are sold out they are gone. Both Simon Says Stamp and Scrapbookcom are sold out of these sprays. However, if you are interested in purchasing these sprays you could give Stacy at Scrapmania a call (she ships!) to she if she has any left in stock at her store. Last time I checked, Joanns still had them available online.

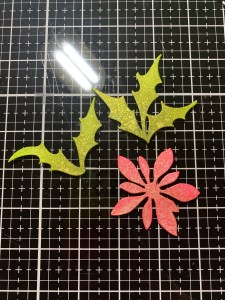
I now take the outline leaves and poinsettia dies from the same Seasonal Sketch Wafer Die Set and cut out of Metallic Jewels Kraft Cardstock, running them through my Big Shot. Using Liquid Glue I adhere the outline die cut pieces to the solid sprayed pieces slightly off center. *When using with intricate dies I place a Metal Adaptor Plate under the cutting plate of my die cut machine.

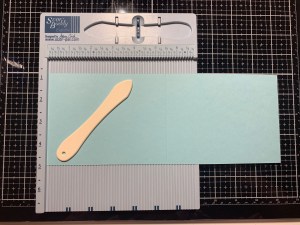
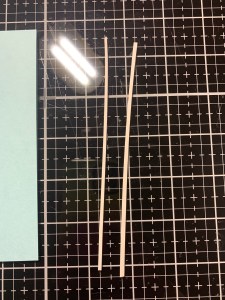
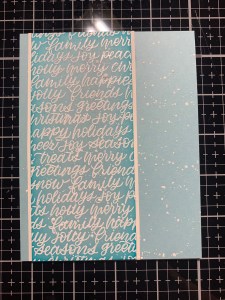
Next, I place a 4 1/4″ x 8 1/2″ piece of Ocean Mist Cardstock into my Scor Buddy scoring it at 5 1/2″ creating a top folding card base. I then take my embossed panel and adhere it to my card base toward the left side using Double Sided Adhesive Tape. Using my Guillotine Paper Trimmer I cut two thin strips about 1/16″ wide out of White Cardstock and adhered them to both sides of my embossed panel using Liquid Glue and cut off any overhang.
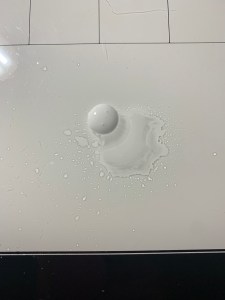
To add some interest and to bring in a snowy effect on my card, I placed a small amount of White Distress Paint on my Glass Mat along with a small amount of water. I then took a small paintbrush to mix the paint and water then spattered it over my card front. I also spattered a very small amount over my die cut pieces.

Using Liquid Glue I adhered the leaves onto my embossed panel off center a bit, allowing them to hang over a bit. To pop up the poinsettia I add a Foam Square to the back center and place it over the leaves and adhere it down.
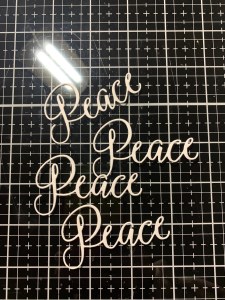
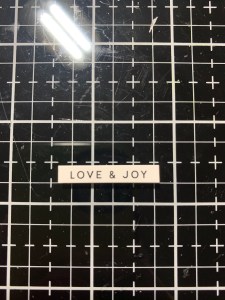
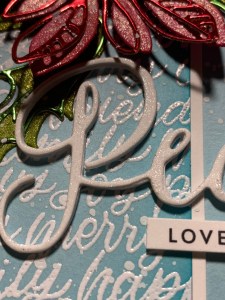
I now take my Peace Die and cut out of White Cardstock four times, running them through my Big Shot. Using Liquid Glue I stack and glue the die cuts together then mount them onto my card front with Liquid Glue.

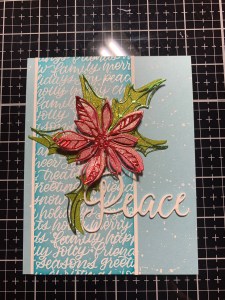
Next, I choose a sentiment from the Sentiment Strips Holiday Wishes and trim it to a thin strip using my Guillotine Paper Trimmer. For some dimension I add three thin strips of cardstock to the back of the sentiment using Liquid Glue, leaving the left side of the sentiment strip without dimension. I don’t add dimension to the left side as it will be mounted over the embossed panel which will make up for the dimension. I then add Liquid Glue to the back of my sentiment and mount it just under the die cut greeting.

To give a little shimmer to my die cut greeting, I brush on some Nuvo Aqua Shimmer. I’ve added a couple of close up photos to show the shimmer on the greeting as well as the mica spray on the flower and leaves.
Using my Jewel Picker I add some Clear Round Drops with Liquid Glue and this completes my card.
I’ve been having a lot of fun creating holiday cards lately, it’s never to early to start, right??! I will still throw in a non holiday card here and there in the next couple of months but the time frame for using all of those holiday products is so short, I want to enjoy it while I can! When do you start making your holiday cards? Some work on them throughout the year, some after Halloween or Thanksgiving, while others get all of theirs done a few weeks before Christmas…. which are you?? =) I will be taking the rest of the week off as we have company coming to visit. I hope everyone has a safe and wonderful weekend, see you next week!!!
If this is your first time visiting my blog, welcome and I hope you return. If you are a returning visitor, thank you so much for your support!
If you would like to be notified by email each time I post a new project, there is an option to add your email (located on the right side of my page) then hit the subscribe button. Should you have any questions or comments please leave them in the comments section. I’d love to hear from you and what you thought about today’s card.
Thank you for visiting and I hope you come back soon!
Happy Stamping and God Bless!!
Jeannie

I do love your step-by-step photos and explanations! Thank you!
LikeLike
Thank you so much Nan!!
LikeLike
This is such a beautiful card. Thank you so much for the awesome inspiration and for the work that you put into the blog post. It is very much appreciated.
LikeLike
Thank you so much for your kind words, I greatly appreciate it!!
LikeLike