
I want to start out by thanking everyone for the support and nice comments you all leave for me. I truly appreciate the support of this blog!! I enjoy card making and bringing my creations to you, this wouldn’t be possible without your support, so again, thank you!! *Affiliate links are used at no additional cost to you. When you purchase products through my links I receive a small commission from these sales, which helps me to purchase new products for the cards I share on my blog. Thank you so much for your support, it is greatly appreciated!! Don’t forget to check out my previous blog for many more card projects! You can find them HERE.
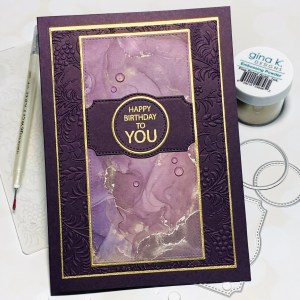
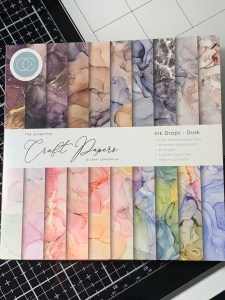
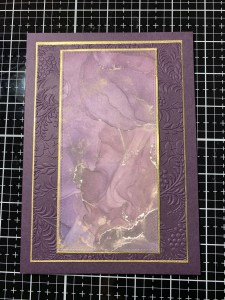
Do you love the look of alcohol inked backgrounds but struggle to achieve the perfect look? Today, I have a card that uses pattern papers to give the perfect alcohol inked look! While I love to play with my alcohol inks and can sometimes achieve the look I want, these papers give the perfect look every time without dragging out the mess! There are several different designs and colors included in this pack that go well with almost any color of cardstock! So simple and elegant too! I will also be using the brand new Tapestry Embossing Folder from Gina K. Designs’ latest release to create a backdrop for my pattern paper. This is a beautiful embossing folder that coordinates with the ever popular Holiday Tapestry Stamp Set, also from Gina K. Designs! Though the images are the same with the embossing folder and stamp set, the images on the folder are smaller in size. To make things simple and uniformed, I will be using two of Gina’s Master Layouts die sets to create my layers. I went with a 5 x 7 card size to give more space for my design to show through. Let’s get started!!
I will be doing all of my work today on my Tim Holtz Glass Media Mat.
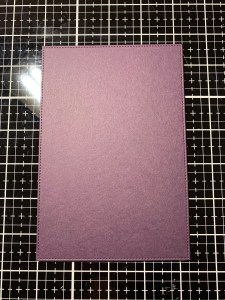
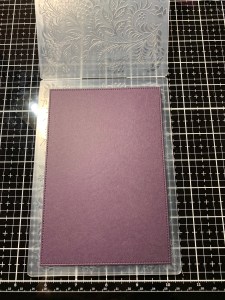
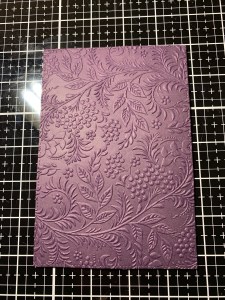
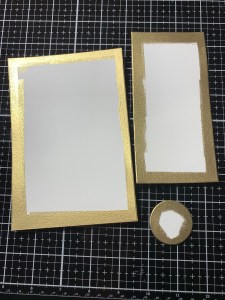
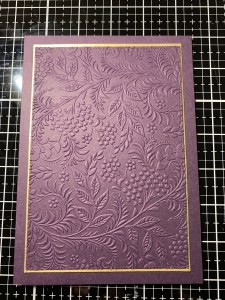
To start, I take the large stitched rectangle die from the Master Layouts 8 Die Set and cut out of Edible Eggplant Cardstock, running them through my Big Shot Die Cut Machine. To add texture and design, I place the panel into my Tapestry Embossing Folder and run them through my Big Shot. I then take the largest layering rectangle die from the same Master Layouts 8 Die Set and cut out of White Cardstock, running them through my Big Shot. *I will be die-cutting the layering pieces along the way, putting them aside to deal with later.
Next, I choose a design from the Ink Drops – Dusk Paper Pad and take the largest stitched rectangle die from the Master Layouts 7 Die Set to cut out of the paper, running them through my Big Shot. I also take the largest rectangle die from the same Master Layouts 7 Die Set and cut out of White Cardstock, running them through my Big Shot.


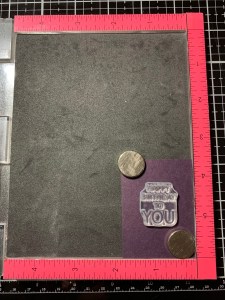
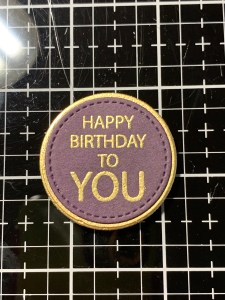
For my sentiment, I place a piece of Edible Eggplant Cardstock into my MISTI Stamp Positioner and prep it with my Anti Static Powder Bag. I then choose a sentiment from the It’s All You Mini Stamp Set and stamp it onto the cardstock using Versamark Ink. I then add Gold Embossing Powder and heat set it with my Heat Tool. Taking the small stitched circle die from the Master Layouts 7 Die Set I cut my sentiment out, running them through my Big Shot. *To remove the residual powder from my sentiment, I take a soft dry cloth and gently buff the cardstock.

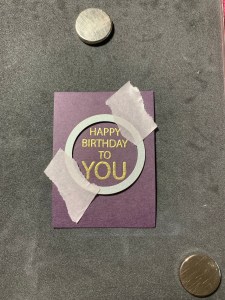
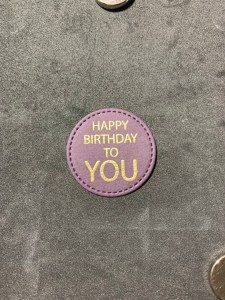
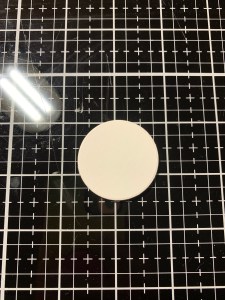
For my last layering piece, I take the small layering circle die from the Master Layouts 7 Die Set and cut out of White Cardstock, running them through my Big Shot. To add a gold edge to all of my layering pieces, I drag my Versamark Ink Pad over all of the edges of the layering pieces then add Gold Embossing Powder and heat set with my Heat Tool. I now have the same gold from my sentiment on all of the edges of the layering pieces. Using Liquid Glue I mount my sentiment onto the layering circle die-cut. I then adhere the embossed panel and pattern paper to their coordinating layering pieces using Liquid Glue.
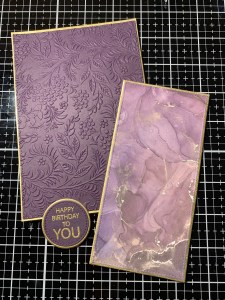
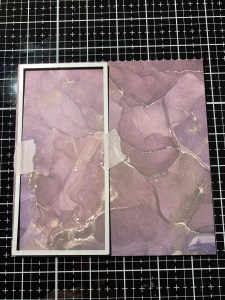
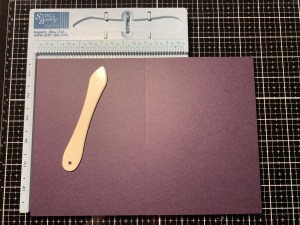
To create a card base, I place a 7″ x 10″ piece of Edible Eggplant Cardstock into my Scor Buddy and score it at 5″, creating a 5 x 7 side folding card base. Using Liquid Glue I adhere the embossed panel onto the card base. I then mount my pattern paper piece over the center of the card front, also using Liquid Glue.
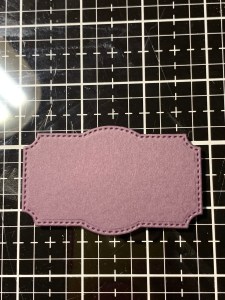
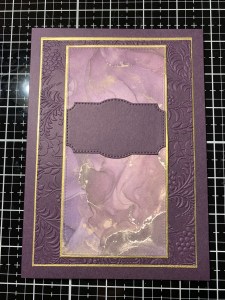
To create a backdrop for my sentiment, I take the label die from the Master Layouts 7 Die Set and cut out of Edible Eggplant Cardstock, running them through my Big Shot. Using Liquid Glue I mount the label onto the card front just above center then adhere my sentiment onto the label.
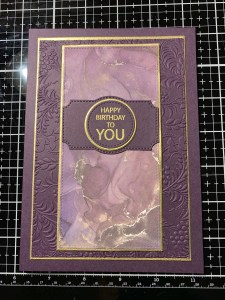
Using my Jewel Picker, I add Dew Drops with Liquid Glue and this completes my card.

I hope you enjoyed today’s card! Whether you create your own alcohol inked backgrounds or give these pattern papers a try, this is an easy card to put together. With all of the color choices in this paper pad, this could also make a great masculine card. Change up the sentiment and it would be perfect for any occasion!
If this is your first time visiting my blog, welcome and I hope you return. If you are a returning visitor, thank you so much for your support!
If you would like to be notified by email each time I post a new project, there is an option to add your email (located at the top menu, or on the right side of my page) then hit the subscribe button. Should you have any questions or comments please leave them in the comments section. I’d love to hear from you and what you thought about today’s card.
Thank you for visiting and I hope you come back soon!
Happy Stamping and God Bless!!
Jeannie

Wow, that card is phenomenal, the purple is gorgeous!!
LikeLike
Thank you! This cardstock is one of my favorites!!
LikeLike
What a fantastic card! I love the purple shades and gold, great color combo!! It’s so elegant.
LikeLike
Thank you! Purple and gold go so well with each other!
LikeLike
Nice
LikeLike
Thank You!!
LikeLike