
I want to start out by thanking everyone for the support and nice comments you all leave for me. I truly appreciate the support of this blog!! I enjoy card making and bringing my creations to you, this wouldn’t be possible without your support, so again, thank you!! *Affiliate links are used at no additional cost to you. When you purchase products through my links I receive a small commission from these sales, which helps me to purchase new products for the cards I share on my blog. Thank you so much for your support, it is greatly appreciated!! Don’t forget to check out my previous blog for many more card projects! You can find them HERE.
The new release for Gina K. Designs is now live, if you are interested in seeing the new products they can be found HERE. Gina will be having a live presentation showcasing all of her new products starting at 7:00 PM (CST) tonight over on her Facebook page and YouTube channel. If you are unable to catch Gina’s live presentation tonight, be sure to watch it on the replay to see all of the new products close up. Today I have a card made with the brand new Beautiful Butterflies 3 stamp set, illustrated by Melanie Muenchinger which is a part of tonight’s release. This set is beautiful on it’s own, but it also coordinates with the previously released Beautiful Butterflies 2 stamp set! The images from the new Beautiful Butterflies 3 stamp set fill in the open, unstamped areas of the previous Beautiful Butterflies 2 stamp set!! There are also some smaller stand alone images included in this set, with a small coordinating die set available for additional purchase. If you already own the Beautiful Butterflies 1 or Beautiful Butterflies 2 stamp sets and have the coordination dies, they will also work with the new butterflies. Melanie has really put a lot of thought into these sets, it’s amazing how they work together and use only one main die set for all three stamps sets! A fun addition to the Beautiful Butterflies 3 stamp set are some sweet sentiments in the shape of antennae that can be stamped with the butterflies. In my finished card, I used these on two of the butterflies which went great with my main sentiment at the bottom of the card. All of the stamps, dies, inks and cardstock I use are from Gina K. Designs. Let’s get started!!

I will be doing all of my work today on my Tim Holtz Glass Media Mat.
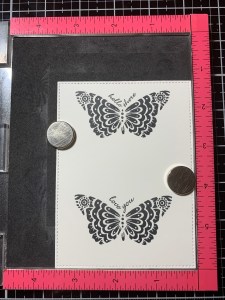
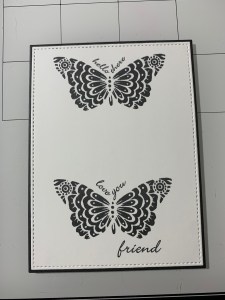
To start, I take the large stitched rectangle die from Master Layouts 2 Die Set and cut out of White Cardstock, running them through my Big Shot. I then place the panel into the lower right corner of my MISTI Stamp Positioner. I will be stamping three butterflies (all of the same image) onto this panel. I choose an image from the Beautiful Butterflies 3 Stamp Set and position it so there will be enough room to stamp two additional times above it while leaving a little extra room at the bottom to be able to stamp a sentiment (I temporarily place my sentiment stamp under the image to be sure I am leaving enough space before stamping). I then ink up the image using Amalgam Obsidian Black Ink and stamp it onto the panel. I clean off the stamp then line it up at the top of the panel so there is enough space in between to even stamp the center image. I again stamp the image using Amalgam Obsidian Black Ink.

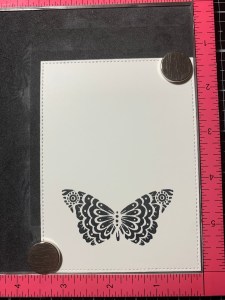

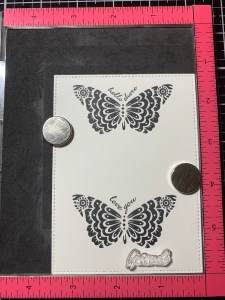
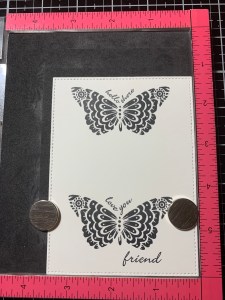
Next, I take two of the antennae sentiment images from the Beautiful Butterflies 3 Stamp Set and position them just above the butterflies then stamp the with Amalgam Obsidian Black Ink. I then take the “friend” image from the same stamp set and stamp it under the bottom image again, with Amalgam Obsidian Black Ink.
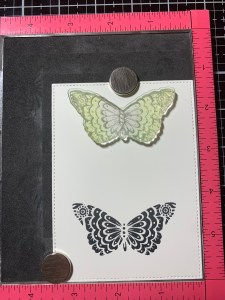
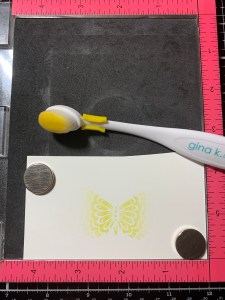
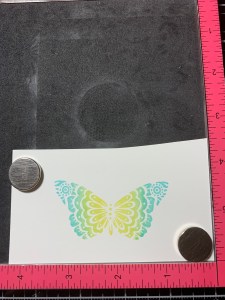
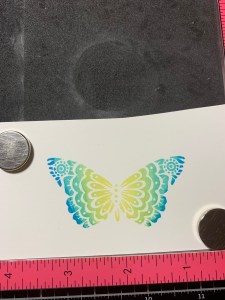
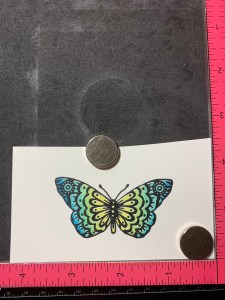
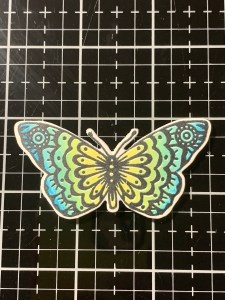
For the center image a place a piece of White Cardstock into the corner of my MISTI and position the same previously used butterfly stamp from the Beautiful Butterflies 3 Stamp Set in the center. Using my ink cubes, I first take Lemon Drop Ink and ink up the center of the stamp. I then use my Mini Blending Brush and tap it at the outside edges of the ink, this will help to soften the edges allowing the ink colors to blend without any harsh lines. I then stamp the image onto the cardstock. I repeat this stamping a couple of times until I have the shade of ink I want. Next, I take my Sea Glass Ink and ink up the stamp, overlapping where the yellow ink is just a little to create a green shade that transitions into the blue. I then take my Mini Blending Brush and tap the area that over laps the yellow to soften the ink blend then stamp it onto the cardstock. To add a darker edge to the image, I use Blue Raspberry Ink and add it just to the outside edge of the stamp, then stamp it onto my panel.
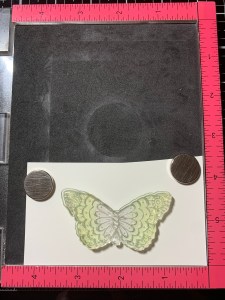
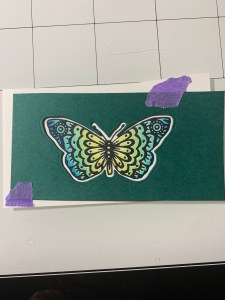
Next, I take the same coordinating image, this time from the Beautiful Butterflies 2 Stamp Set and line it up over my stamped image. I then stamp this image using Amalgam Obsidian Black Ink over my previously stamped image. You can see how beautiful these two stamp sets work together, so cool!! *The images are simple to line up as you can see through the stamp and see the colors fit into the openings, all white areas will be stamped with this image, if that makes sense?
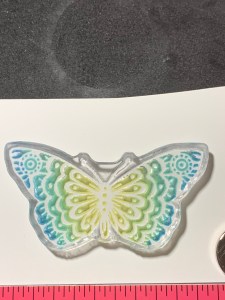
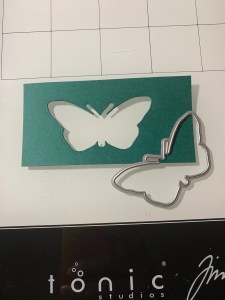
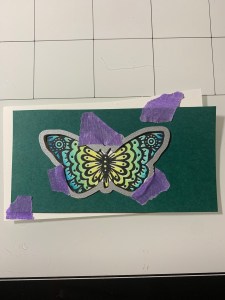
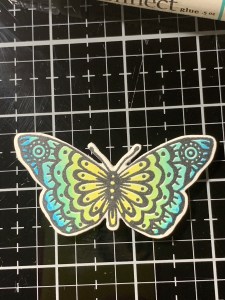
To cut out my image, I take the coordinating die from the Beautiful Butterflies Die Set and cut out of a scrap piece of cardstock, this will serve as a guide to ensure a perfect alignment. I then center the negative piece over my stamped image and tape it into place. Next, I place the die over the image and wiggle it around until I feel in drop into place, then tape it down and run them through my Big Shot. I now have and evenly die cut image.
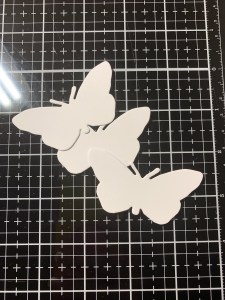
To help this image stand out more on my panel and give it dimension, I use the same die and cut out of White Cardstock three times, running them through my Big Shot. I then stack and glue them together then glue my image onto the top using Liquid Glue and set it aside while I work on the rest of my card.

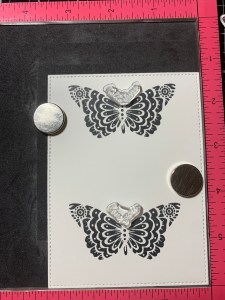
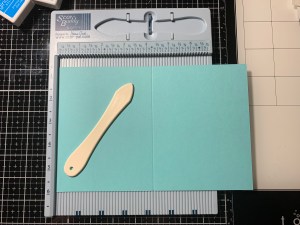
Using the large layering die from the Master Layouts 2 Die Set I cut out of Black Cardstock, running them through my Big Shot. I then add Liquid Glue to the back of my stamped panel and adhere the two panels together. Next, I place a 8 1/2″ x 5 1/2″ piece of Sea Glass Cardstock into my Scor Buddy and score it at 4 1/4″, creating a side folding card base. Using Liquid Glue I center and adhere my panel onto the card base. I now take my stacked die cut and add Liquid Glue to the back of it and mount it onto my card front making sure it is centered between the two stamped images.

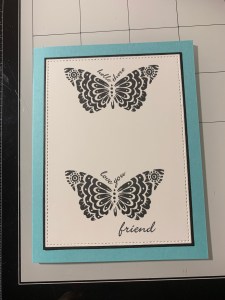

Taking my Jewel Picker I add some Silver Pearls using Liquid Glue and this completes my card.
I hope you enjoyed today’s card and have a chance to check out the new release! I love the added versatility that the new Beautiful Butterflies 3 stamp set gives to the collection. Also remember, the original dies from Beautiful Butterflies will work with all three stamp sets, such a well thought out series! If you are unable to watch the live tonight, you can always catch it on the replay on YouTube. It’s fun seeing all of the new products up close, hearing from the illustrators and seeing their samples. Gina also has a quick card project at the end. Don’t forget to check out the beautiful new incentive stamp set available when you purchase $75.00 or more ( your total must be at least $75.00 after any discounts, coupons or gift cards and before shipping and tax is added). Remember also, shipping is always free at $50.00! (same rules apply) Have a great day, I hope you find lots of inspiration from all of the designer’s creations tonight!
If this is your first time visiting my blog, welcome and I hope you return. If you are a returning visitor, thank you so much for your support!
If you would like to be notified by email each time I post a new project, there is an option to add your email (located at the top menu, or on the right side of my page) then hit the subscribe button. Should you have any questions or comments please leave them in the comments section. I’d love to hear from you and what you thought about today’s card.
Thank you for visiting and I hope you come back soon!
Happy Stamping and God Bless!!
Jeannie
