
I want to start out by thanking everyone for the support and nice comments you all leave for me. I truly appreciate the support of this blog!! I enjoy card making and bringing my creations to you, this wouldn’t be possible without your support, so again, thank you!! *Affiliate links are used at no additional cost to you. When you purchase products through my links I receive a small commission from these sales, which helps me to purchase new products for the cards I share on my blog. Thank you so much for your support, it is greatly appreciated!! Don’t forget to check out my previous blog for many more card projects! You can find them HERE.
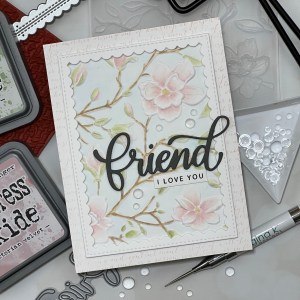
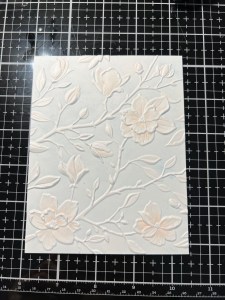
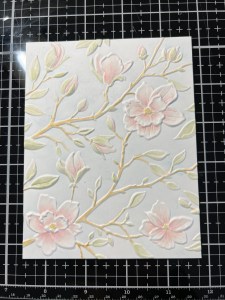
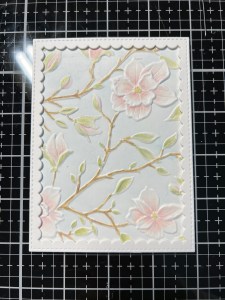
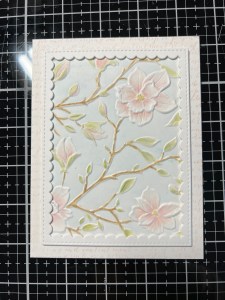
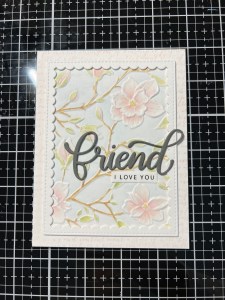
Today, I have a card that focuses on watercoloring images that are created with embossing folders. Embossing folders are so versatile and can be used with so many different techniques. I love to add soft colors to dry embossed areas for a different look, making the images really stand out. I chose to use Oxide inks for my watercoloring as I love the creamy opaque formula in this ink, it gives a nice soft blend. For today’s card, I also added some pale blue ink to the background of the folder to create a bit of contrast against the images. Adding ink to the background also looks beautiful when the images are left white, giving a soft delicate look. To keep the look of my card soft, I took one of the ink colors used to watercolor the flowers and stamped a script background to mount my piece onto. When wanting to add a soft elegant touch to a backdrop, a script background is my favorite go to. This post will be a bit longer with more photos as I try to be as detailed as I can with my explanations. Let me know if you have any questions about my process. ***If you’d like to see another variation of a soft watercolored card from my previous blog, you can find it HERE. Let’s get started!!
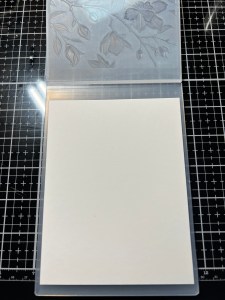
I will be doing all of my work today on my Tim Holtz Glass Media Mat.
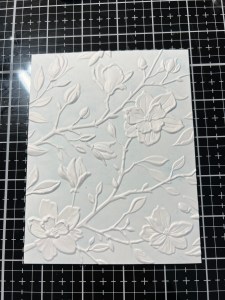
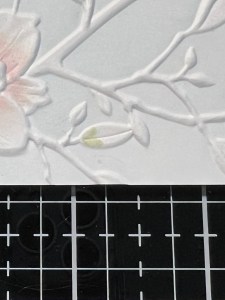
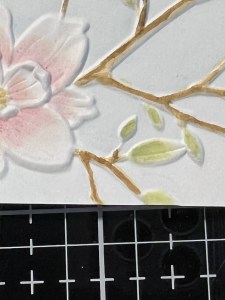
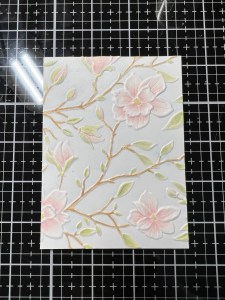
To start, I use my Guillotine Paper Trimmer and cut a 4 1/4″ x 5 1/2″ piece out of White Cardstock. I then use a Brayer to apply Tumbled Glass Distress Oxide Ink to the smooth side of my Magnolia Branches Embossing Folder. *The smooth side will be the side where all of the images are inverted into the folder, so the ink only touches the background. Once I have the embossing folder inked up, I place my cardstock panel onto the side that has no ink then close the folder and run it through my Platinum 6 Die Cut Machine. I now have a dry embossed panel with a pale inked background, so beautiful! At this point, you could leave the panel as is but I want to step it up by watercoloring the images. *Darker shades of ink can be used for a more bold background, but today I wanted just a soft tint to make it more subtle.

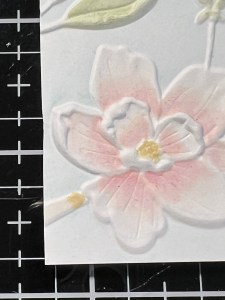
Now it’s time to start my watercoloring, I take and press some of my Oxide ink pads onto my Glass Mat of the colors that I want to use (I do end up using more than what is pictured). I will use this as my palette. Taking my Water Brush Pen filled with clean water I pick up some Tattered Rose Distress Oxide Ink and add it to the base of my first petal. I then blend and fade the color out towards the end of the petal with my Water Brush Pen. I repeat this process for the rest of the petals of each flower, including the buds. This creates the base color for my flowers. *I ran my water brush pen through the ink on my glass mat to dilute the color just a bit before applying to give it a soft shade. I did this with all of the colors. Remember, you should always start out on the lighter side to see if it is the shade you want, you can always add more ink or another layer if needed. **A tip for you… before adding the color to your project, brush the color onto a scrap of the same cardstock you are using and blend it out to see if you are happy with it.

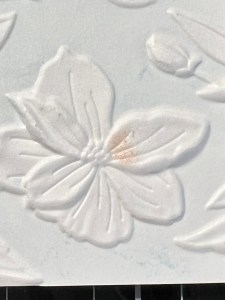


To add some color variation and depth to the flowers I take my Water Brush Pen and pick up some Victorian Velvet Distress Oxide Ink and add it to the base of the petal. I then blend and fade the color out just a bit, keeping the color towards the base of each petal and being careful not to completely cover up the previous color. I repeat the process for all of the petals on each flower, including the buds.
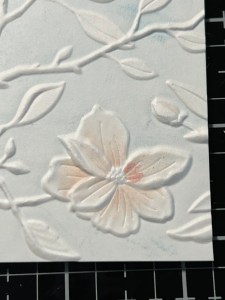
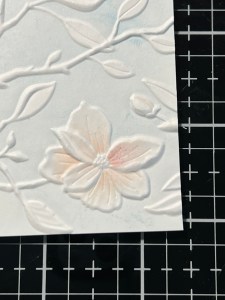
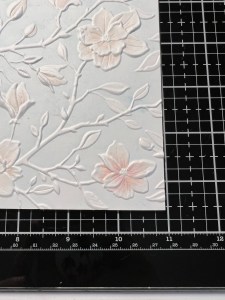

I now work on the leaves. Using my Water Brush Pen, I pick up Bundled Sage Distress Oxide Ink and add it to the base of my first leaf then blend the color out to the end of the petal. I repeat this process for all of the leaves. For the center stamen section of each flower I pick up Antique Linen Distress Oxide Ink and just paint it on.
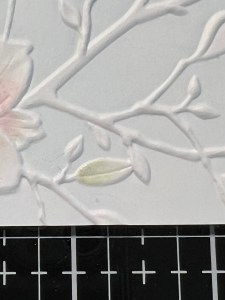

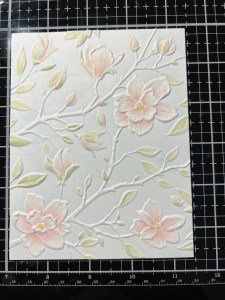
Now it’s time to work on the branches. Using my Water Brush Pen, I pick up Vintage Photo Distress Oxide Ink and add it to a section of the branch and blend it out. I repeat this process for all remaining branch sections. To add a little color variation and texture to the branches, I pick up Ground Espresso Distress Oxide Ink and add a thinner line over a section of the branch being careful not to completely cover up my previous color. I repeat this process for the remaining branches. After completing the branches I felt like the leaves were too light and didn’t stand out enough so I picked up some Peeled Paint Distress Oxide Ink and added it to the leaves towards the base and inside crevices. I then blended it out, being careful not to completely cover up the previous color. I felt like this additional color added a bit of depth and variation.

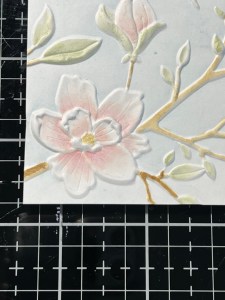
Looking at my watercoloring, I now felt like the branches were too dark, LOL. I liked the texture of the branches but wanted to dull the color down. To do this, I took my clean Water Brush Pen and wet small sections at a time then took a paper towel and laid it over that section to pick up the water along with some of the color. I repeated this process for the remainder of the branches and I am now satisfied with the look. My watercoloring is now complete and I set it aside.

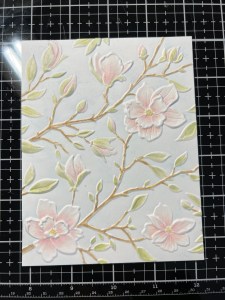
Next, I create a panel that my watercoloring will be later mounted to. Using my Guillotine Paper Timmer, I cut a 4 1/4″ x 5 1/2″ panel out of White Cardstock. I then place the Script Bold Background Stamp onto the door of my MISTI Stamp Positioner and place my cardstock onto the stamp, making sure the text is straight. Next, I close the base of my MISTI onto it’s door, now when I open my MISTI my panel is perfectly lined up and held into place on my Sticky Mat. I ink up the stamp using Tattered Rose Distress Oxide Ink and stamp it onto my panel.


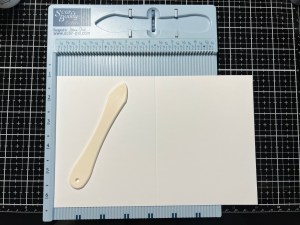
Now, I place a 5 1/2″ x 8 1/2″ piece of White Cardstock into my Scor Buddy and score it at 4 1/4″, creating a side folding card base. Using Liquid Glue I adhere my stamped panel onto the card base. *You could have totally stamped the script onto the front of the card base, saving a step in having to mount the panel but I most of the times like to stamp a panel then mount it in case I mess up. Either way works.

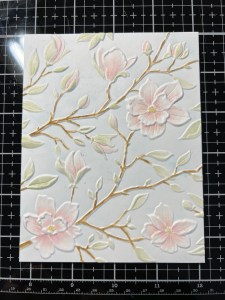
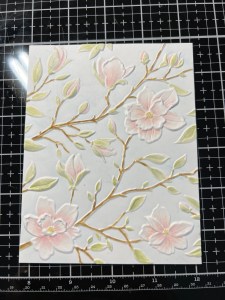
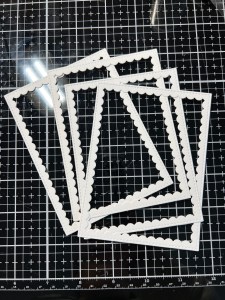
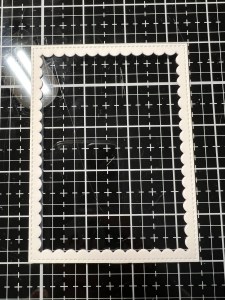
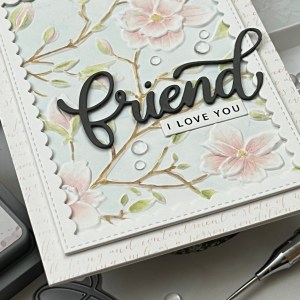
To create a frame for my watercoloring I cut out of White Cardstock four times using the larger die from the Stitched Scallop Rectangles Die Set, running them through my P6. Using Liquid Glue I stack the die cuts together for some dimension. I trim my watercolored panel down to be 3 1/2″ x 4 3/4″ then adhere the frame over it and mount it onto my card base using Liquid Glue.
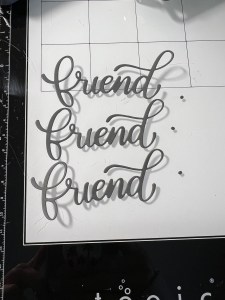
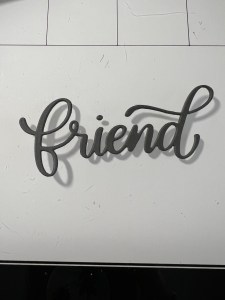
For my greeting, I cut out of Storm Clouds Cardstock three times using the outline die from the Big Friends Dies, running them through my P6. Using Liquid Glue I stack the dies together (including the tiddle) then mount the greeting onto my card front, just below center and allowing it to hang off the edge of the frame.

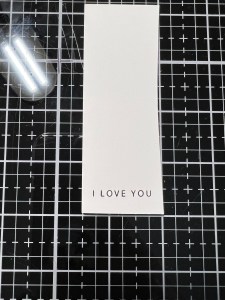
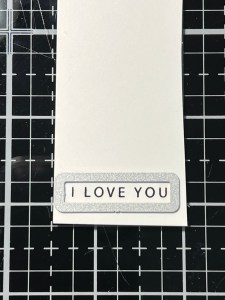
Next, I choose a sentiment from the Enjoyable Greetings Stamp Set and stamp it onto a piece of White Cardstock with Versafine Clair Nocturn Ink, using my MISTI. Taking a die from the Sentiment Strips Die Set I cut out my sentiment, running them through my P6. Using Liquid Glue, I adhere my sentiment just below the greeting.
Using my Pick & Stick Tool, I add some Clear Round Drops with Liquid Glue and this completes my card.

Thank you for reading through my lengthy blog today, I appreciate your time. I really love how this card turned out and it’s softness. To cut down on some of the steps, instead of trimming down the watercolored panel it could have been kept as a full card front with the added greeting and sentiment. However, I really do love adding layers and dimension to my projects. I thought adding a frame over the watercoloring helped it to stand out a little more. Using a water brush along with dye or Oxide inks allows for such a wide range of available colors! I definitely use my ink pads more for watercoloring than I do my actual watercolors! I used regular cardstock for my watercoloring today with minimal water being added. When using regular cardstock, the more water you use there is a good chance the cardstock will pill. To avoid this, I recommend using watercolor cardstock or Bristol Smooth cardstock if you plan on using more water. I hope you give this technique a try, it really is fun!!
If this is your first time visiting my blog, welcome and I hope you return. If you are a returning visitor, thank you so much for your support!
If you would like to be notified by email each time I post a new project, there is an option to add your email (located at the top menu, or on the right side of my page) then hit the subscribe button. Should you have any questions or comments please leave them in the comments section. I’d love to hear from you and what you thought about today’s card.
Thank you for visiting and I hope you come back soon!
Happy Stamping and God Bless!!
Jeannie

What a beautiful card! I will have to try that technique, honestly never thought of water coloring over a 3d embossed card…
LikeLike
Thank you for your kind words Betty!! This is a fun technique!
LikeLike