
I want to start out by thanking everyone for the support and nice comments you all leave for me. I truly appreciate the support of this blog!! I enjoy card making and bringing my creations to you, this wouldn’t be possible without your support, so again, thank you!! *Affiliate links are used at no additional cost to you. When you purchase products through my links I receive a small commission from these sales, which helps me to purchase new products for the cards I share on my blog. Thank you so much for your support, it is greatly appreciated!! Don’t forget to check out my previous blog for many more card projects! You can find them HERE.
Today, I have a card using the brand new Poly Glaze foiling sheets from Gina K. Designs!! I created one foiled panel and made three cards out of the one panel using a worded die. By using this die to cut out of other colors of regular cardstock, I was able to create three cards! *A fourth card could have been created by using the negative piece of foil on black toner paper. If you enjoy foiling but don’t want to invest in a foiling system, this is a great alternative… all you need is a regular heated laminator, Deco foil and these Poly Glaze foil panels. Such an easy, inexpensive way to add beautiful foiling to your projects! I watched Gina’s live where she used these Poly Glazed sheets to create a beautiful foiled design then used die cut letters to cut from her panel. I love the shiny design over the ink blended panel so much, that I just had to try it out for myself! I originally planned on making the one card, then decided to show how the leftover pieces could be used to create two more cards. I love when a technique or product can be used to create multiple cards! My camera and lighting doesn’t pick up the true beauty and reflection of the foil so I will be showing some close up photos, I hope that helps. Let’s get started!!

I will be doing all of my work today on my Tim Holtz Glass Media Mat.
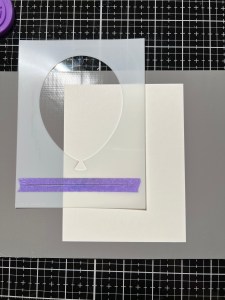
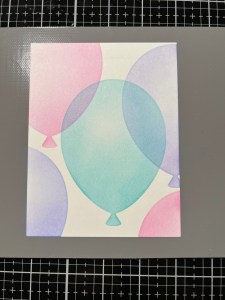
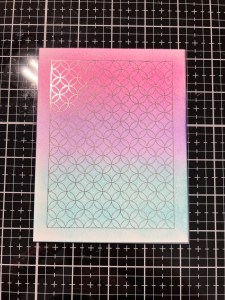
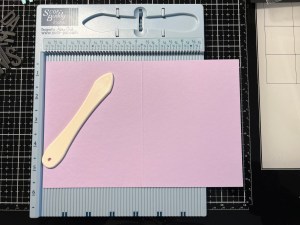
To start, I create a base for my die cut letters to be mounted onto. I cut a 4 1/4″ x 5 1/2″ panel out of White Cardstock using my Guillotine Paper Trimmer. To make my stenciling a little easier and avoid using tape to hold my project down, I place a piece of Media Grip onto my work surface and place my cardstock panel onto it. I then place the Big Balloon Stencil over my panel to start my ink blending. Placing the stencil off the edge of my panel, I use my Blending Brush to blend Bubble Gum Pink Ink over the open area of the stencil, fading the ink out towards the middle of the balloon to create a bit of highlight. I then clean off my stencil and move it over to the right side of the panel and shift it down a little. I blend Light Lilac Ink over the open area, again fading the ink out towards the center.

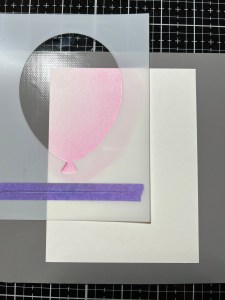
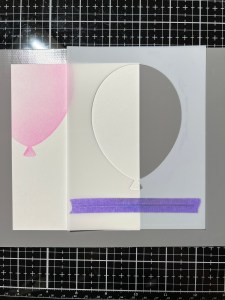
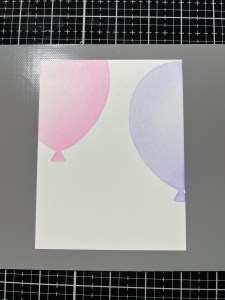
Next, I clean off the stencil and place it over the center of my panel, shifting it down a little lower than the previous balloon. I take my Blending Brush and blend Turquoise Sea Ink over the open area and fade the ink out towards the center of the balloon. I use the same colors and stencil to fill in a couple of the open areas.


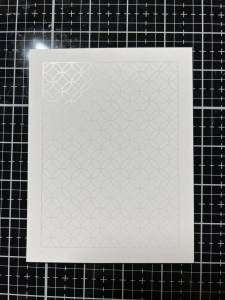
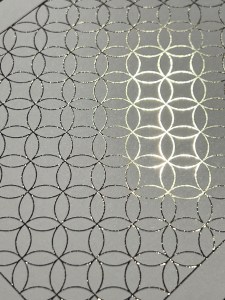
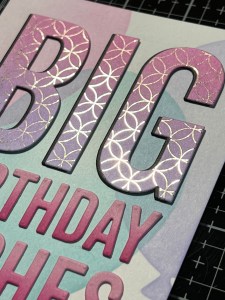
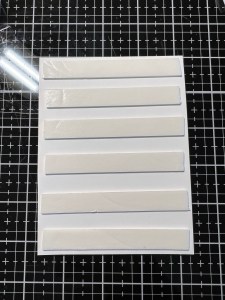
Now it’s time for the foiling! I take one of my Art Deco Poly Glaze Foiling Sheets (it has a light gray design so you are able to see where the pattern is for adding the foil) and cut a piece of Champagne Deco Foil as big as my panel, which is 4 1/4″ x 5 1/2″. I place my Art Deco Poly Glaze Sheet into a folded Carrier Sheet and place my foil, shiny side up over it. I fold the carrier sheet then run it through my heated laminator. I then peel the foil from the panel and now have a gorgeous foiled piece, it’s that simple!!


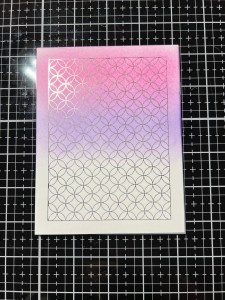
I now want to add some color to my foiled piece. Taking my Blending Brush I blend Passionate Pink Ink over the top third portion of the panel. I then blend Wild Lilac, followed by Turquoise Sea Ink. I do go back with each color to blend where the previous colors meet to create a seamless blend. *The foil resists the ink, to be sure there is no ink sitting on top of the foil, I lightly buff my panel with a soft cloth.

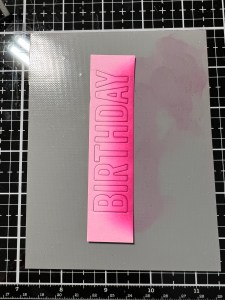
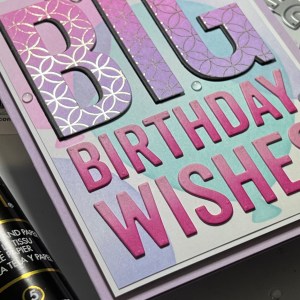
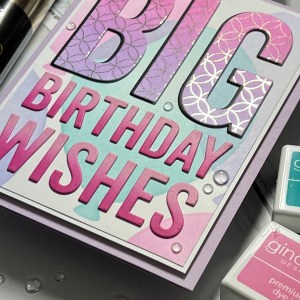
Next, I take my Big Birthday Wishes Die and center it over the foiled panel and run them through my Platinum 6 Die Cut Machine. I remove all of the pieces and set them aside, including the negative background piece.

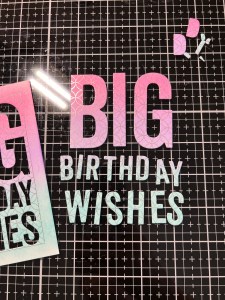
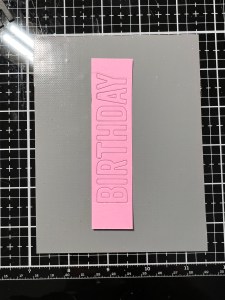
Using the same Big Birthday Wishes Die, I cut out of Black Cardstock two times, running them through my P6. Using my Fine Tip Bottle filled with Liquid Glue, I stack and adhere the pieces together then set them aside. Next, I take the same die and cut the “birthday wishes” out of Bubble Gum Pink Cardstock, running them through my P6. Leaving the letters in the cardstock, I place the strip onto my Media Grip and use my Mini Blending Brush to blend Passionate Pink Ink over the lower half of the letters to add some shading and set them aside.
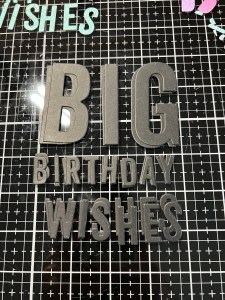

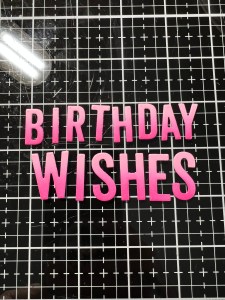
To create a template to evenly place my letters onto my balloon panel, (I will also use some of these white letters for stacking later) I use the same Big Birthday Wishes Die and cut out of White Cardstock, running them through my P6. I remove all of the pieces then place it over my balloon blended panel and secure it with some tape. Next, I add some Liquid Glue onto the back of the black die cut letters and adhere them into the openings of the template being cautious to not add too much glue as I don’t want the glue oozing out onto my template. *These black die cut pieces will add a little dimension to my letters and will create a “shadow”.


I now go back to my pink letters and stack them onto the leftover white letters (from my template) using Liquid Glue. I then add Liquid Glue to the back of each letter and adhere them into the openings of the template, again, being careful not to add too much glue. I give the letters a minute or two to dry then carefully remove the template. Now all of my letters are lined up straight onto my panel.


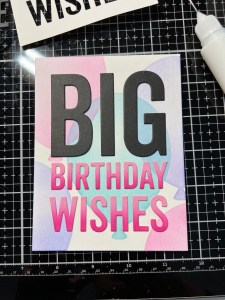
It’s time now to add the foiled letters. Using Liquid Glue I mount each of my foiled letters onto the black letters and shift them over just a little to the right, creating a shadow effect. *Creating a shadow effect helps the letters to stand out a bit more and gives a fun look. Here also, is a close up of the foil, so pretty!!

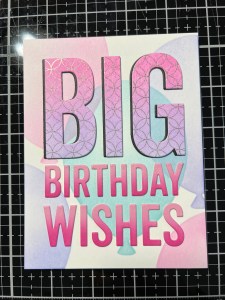
Next, I trim my panel down to be 3 3/4″ x 5″ and also cut a 4″ x 5 1/4″ out of White Cardstock using my Guillotine Paper Trimmer. Using Liquid Glue I mount the panels together. For my card base I place a 5 1/2″ x 8 1/2″ piece of Lovely Lavender Cardstock into my Scor Buddy and score it at 4 1/4″ creating a side folding card base. For some added dimension to my panel, I add Foam Tape to the back, remove the release paper and mount it onto my card base.
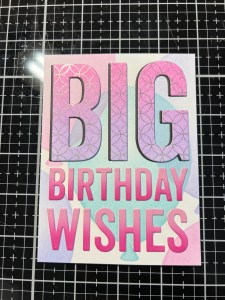
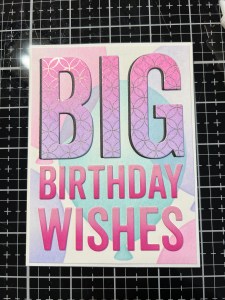
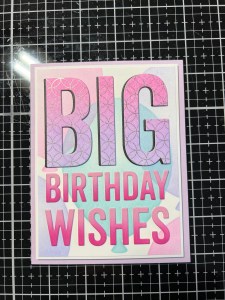
Using my Pick & Stick Tool I scatter and add some Dew Drops with Liquid Glue and this completes my card.
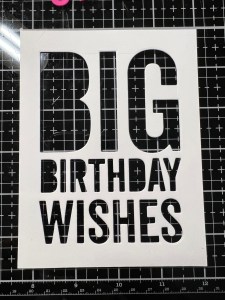
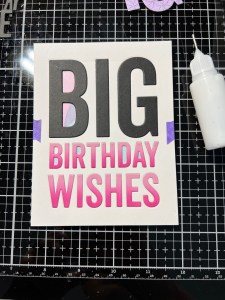
For my two bonus cards I’m not going to go into as much detail as they are both pretty much the same process as my main card. Of course, if you have any questions on either of them just leave a comment and I will answer you back. For my second card I used Slate Cardstock for the card base and “BIG” letters ( I used the leftover white letters to stack behind the “BIG” slate letters) as well as the shadow layer behind the smaller foiled letters. The background is Lovely Lavender Cardstock and I finished off my card with a scattering of Clear Quartz Solid Sequins.

For my third card I used the smaller rectangle die from the Master Layouts 1 Die Set to cut out of my foiled negative background piece. I then used the large layering die from the Master Layouts 2 Die Set to cut out of Black Cardstock and adhered the two panels together. I inlaid the Matte Gold “BIG” letters into the openings and stacked the smaller black letters two high then glued them into the negative openings. To finish, I added Foam Tape to the back of the panel and mounted onto a White Cardstock base.


I hope you enjoyed today’s cards, I had so much fun making them!!! Such a quick easy way to add foil and so inexpensive. I can’t wait to see what other patterns Gina comes up with in the future! You can check out Gina’s YouTube channel for tips and to see more creations using these Poly Glaze sheets. ***Poly Glaze Foiling Sheets will only work with Deco Foil or Fancy Foils, I believe Heidi Swap foils as well. Hot Foils will not work as intended with this product, only foils that are to be used with a heated laminator. I just realized that I didn’t do any stamping on my three cards, but I love the look that this die cut gives!!
If this is your first time visiting my blog, welcome and I hope you return. If you are a returning visitor, thank you so much for your support!
If you would like to be notified by email each time I post a new project, there is an option to add your email (located at the top menu, or on the right side of my page) then hit the subscribe button. Should you have any questions or comments please leave them in the comments section. I’d love to hear from you and what you thought about today’s card.
Thank you for visiting and I hope you come back soon!
Happy Stamping and God Bless!!
Jeannie

Jeannie, You always make the most beautiful cards. I look forward to seeing your next posts.
LikeLike
Thank you so much Pam, you are so sweet!
LikeLike