I want to start out by thanking everyone for the support and nice comments you all leave for me. I truly appreciate the support of this blog!! I enjoy card making and bringing my creations to you, this wouldn’t be possible without your support, so again, thank you!! *Affiliate links are used at no additional cost to you. When you purchase products through my links I receive a small commission from these sales, which helps me to purchase new products for the cards I share on my blog. Thank you so much for your support, it is greatly appreciated!! Don’t forget to check out my previous blog for many more card projects! You can find them HERE.
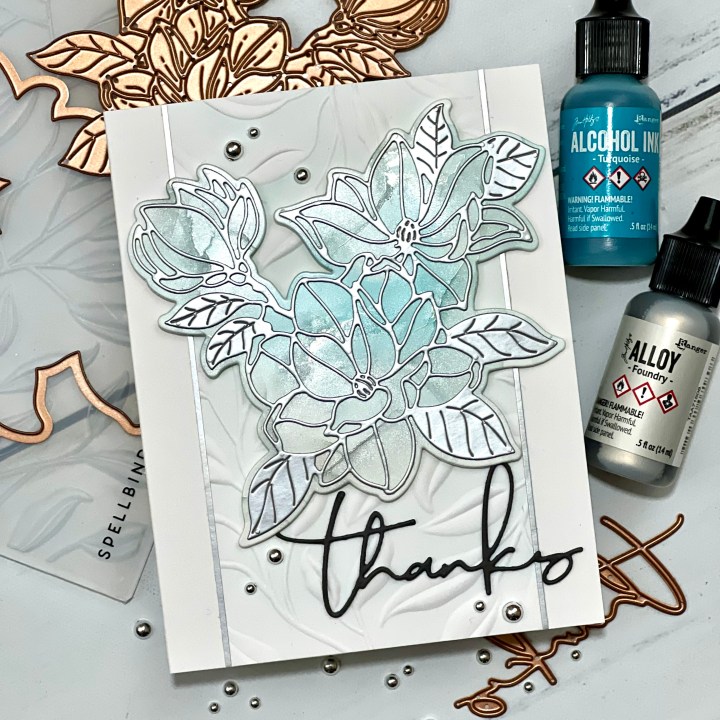
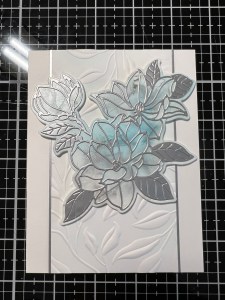
Today, I have clean and simple card that is stepped up a bit by using alcohol inks and an inked embossing folder. I wanted to create a soft feel to go along with my delicate die cut focal image. I knew I wanted to incorporate alcohol inks into my flowers, to bring in a soft flowy look without overpowering the color. While I love a white on white dry embossed look, I wanted to create a color separation from my card base without clashing with the alcohol ink blend. I added a slight tint of aqua color to the embossed panel, creating a shade that wouldn’t take away from the focal image. To keep with the softness of the card I added a simple delicate script greeting, which I think tied everything together beautifully. Let’s get started!!

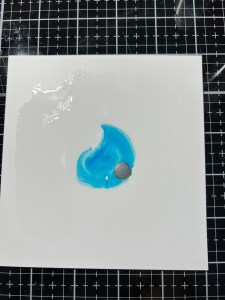
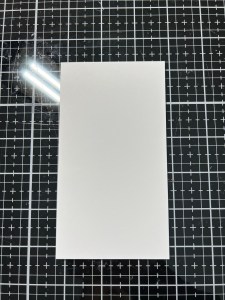
I will be doing all of my work today on my Tim Holtz Glass Media Mat.
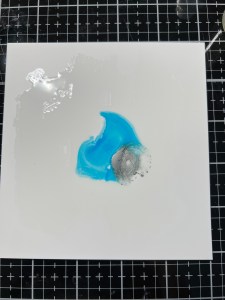
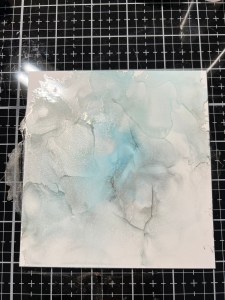
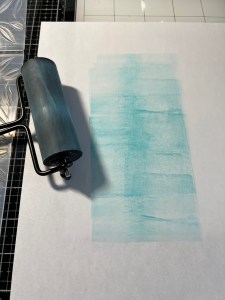
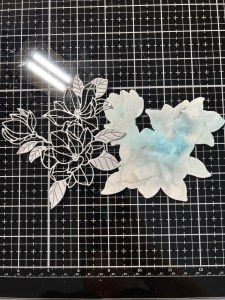
To start, I cut a piece of Yupo Paper (big enough to fit the floral die I will be using) with my Guillotine Paper Trimmer. I then add some Blending Solution to the panel along with one drop of Turquoise Alcohol Ink along with a small drop of Foundry Alloy and add one more drop of Blending Solution over the Alloy. *Adding the blending solution over the alloy allows the alloy to move around freely and blend well. Using my Air Blower, I move the inks around and blend them until I am satisfied with the look. I then set the panel aside to dry while I work on my background. I chose to use the foundry alloy over the sterling as it was a good match to go along with the matte silver cardstock I would later be using. If I were using shiny mirrored cardstock, I would have went with the sterling alloy. *I only used one drop of color on my panel as I was going for a soft muted look. If you want more vibrant color, simply add more drops of ink to the panel.

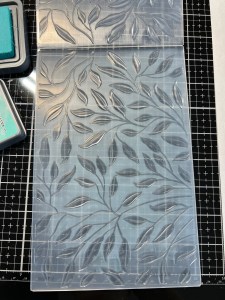
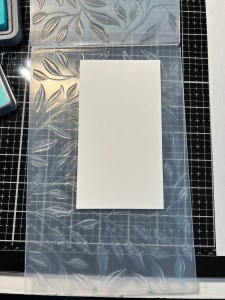
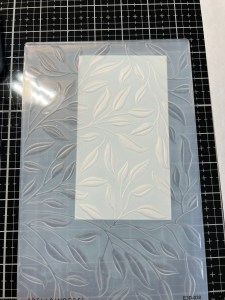
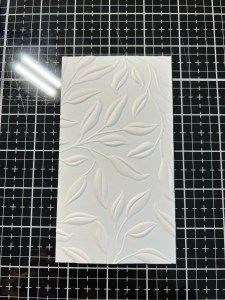
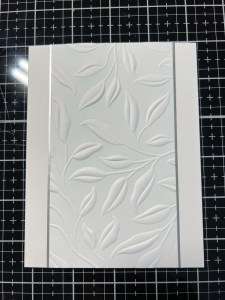
For my background piece, I cut a 3″ x 5 1/2″ panel out of White Cardstock using my Guillotine Paper Trimmer. Next, I took my Brayer and inked it well with Salvaged Patina Distress Oxide Ink then took a piece of copy paper and rolled my Brayer over it removing most of the ink. I then took the Brayer with the remaining ink left on it and rolled it over the “inverted” side (the side where the design is pushed into the plastic leaving just the background exposed) of my Leafy 3D Embossing Folder back and forth to get smooth, even coverage. Taking my panel, I line it up over the un-inked side of the embossing folder where I like the design, then close the inked side over it and run it through my Platinum 6 Die Cut Machine. I now have a dry embossed panel with only a slight tint of color over the background. *The only reason I removed most of the ink from my brayer is because I wanted only a “tint” of color. If you wanted the color to really show up then don’t remove any ink from the brayer before rolling onto the folder.
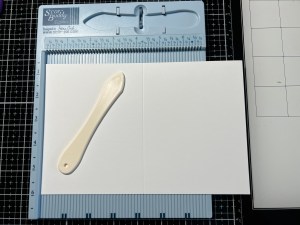
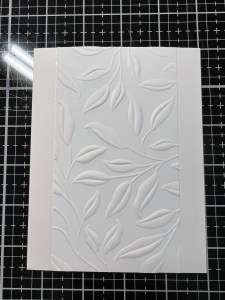
Next, I place a 5 1/2″ x 8 1/2″ piece of White Cardstock into my Scor Buddy and score it at 4 1/4″, creating a side folding card base. Using Liquid Glue, I adhere the embossed panel to the center of my card front. To give the edges of the panel more of a finished look, I use my Guillotine Paper Trimmer to cut two very thin strips of Matte Silver Cardstock. I then take my Fine Tip Bottle filled with Liquid Glue and add small drops to the back of the strips and adhere them against either side of the panel and cut off the overhang. These strips help add separation to the panel from the card front and will match my die cut image of my finished card.


Now that my alcohol inked panel has had a chance to completely dry, I take the outline die from the Magnolia Blooms Die Set and place it over the panel then run them through my P6.


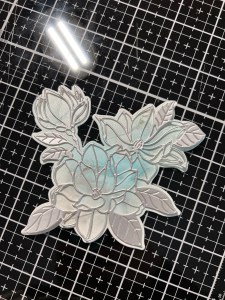
Taking the outline die from the same Magnolia Blooms Die Set I cut out of Matte Silver Cardstock, running them through my P6. Using Liquid Glue I adhere this die cut to the previously cut shadow layer piece. To add some dimension I add Foam Tape to the back then mount it onto my card front just above center.
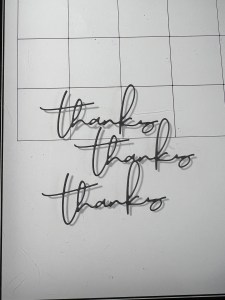
For my sentiment, a choose a die from the Blooms Collection Layered Script Sentiments Die Set and cut out of Slate Cardstock three times, running them through my P6. I stack and glue the die cut pieces together then adhere the sentiment onto my card front using Liquid Glue.

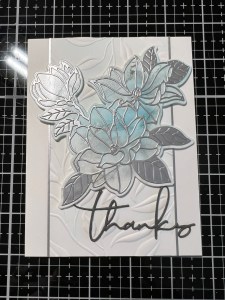
Using my Pick & Stick Tool I add Silver Pearls with Liquid Glue and this completes my card.

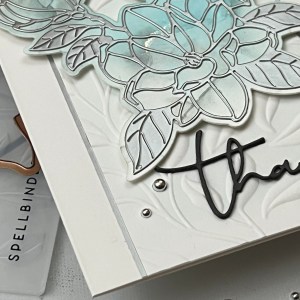
I love how this card turned out, the results of the embossed panel with the added ink was just enough color to make the embossed images stand out a bit more without taking away from the floral die cut. I was very satisfied with the way the alcohol ink and alloy mixed together, creating soft colors that went well behind the matte silver cardstock. This floral die cut would also look great over an ink blended or watercolored background, and can be used for so many different occasions.
If this is your first time visiting my blog, welcome and I hope you return. If you are a returning visitor, thank you so much for your support!
If you would like to be notified by email each time I post a new project, there is an option to add your email (located at the top menu, or on the right side of my page) then hit the subscribe button. Should you have any questions or comments please leave them in the comments section. I’d love to hear from you and what you thought about today’s card.
Thank you for visiting and I hope you come back soon!
Happy Stamping and God Bless!!
Jeannie
