I want to start out by thanking everyone for the support and nice comments you all leave for me. I truly appreciate the support of this blog!! I enjoy card making and bringing my creations to you, this wouldn’t be possible without your support, so again, thank you!! *Affiliate links are used at no additional cost to you. When you purchase products through my links I receive a small commission from these sales, which helps me to purchase new products for the cards I share on my blog. Thank you so much for your support, it is greatly appreciated!! Don’t forget to check out my previous blog for many more card projects! You can find them HERE.
***The Tropical Blooms Card Kit has sold out, HOWEVER… ThermoWeb has more on the way!! These kits are normally not restocked, but because of it’s popularity and selling out so quickly, ThermoWeb has ordered more! If you missed out on this kit, be sure to click on the “Notify Me” option under the product to be notified when they are restocked. You can also get to the product HERE.***
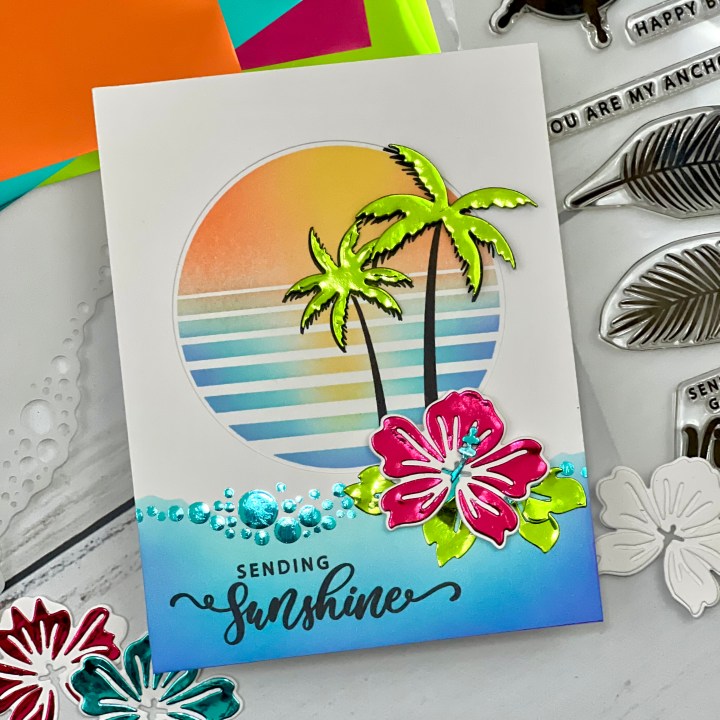
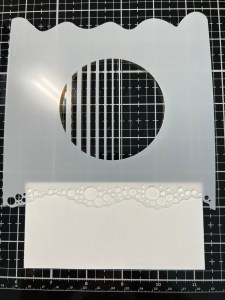
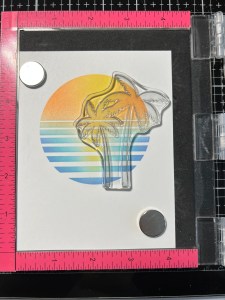
Today, I have created a card using the brand new Tropical Blooms Card Kit, a collaboration of ThermoWeb and Gina K. Designs! Right now you can purchase this kit from ThermoWeb to create all kinds of tropical themed cards! This is a limited edition kit, meaning, once it sells out it’s gone and will not be restocked. I did some ink blending on my card using the stencil and added some foil to the elements using the contents of the kit. *Inks not included. The kit includes a large 6 x 8 stamp set, 14 piece die set, a stencil, two colors of foil and toner panel card fronts… everything needed to create lots of beautiful cards! The foil included can be added using a heated laminator or by using Deco Transfer Gel and can even be used with Gina’s new Poly Glaze sheets!! There are so many possibilities with this kit! I love that the images from the stamp set are solid which makes them great to use for silhouette stamping over ink blended panels. Let’s get started!!

I will be doing all of my work today, on my Tim Holtz Glass Media Mat.
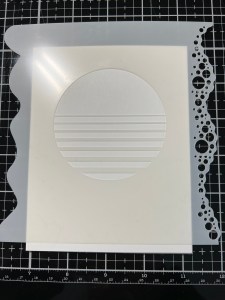
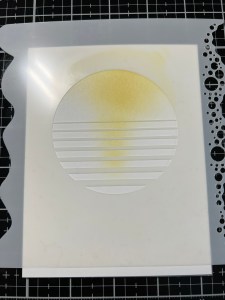
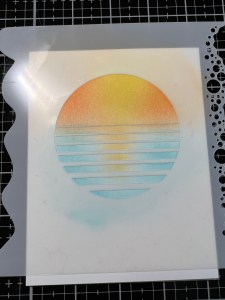
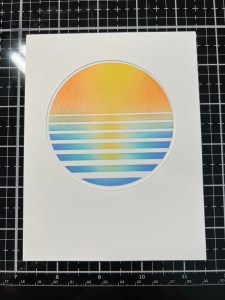
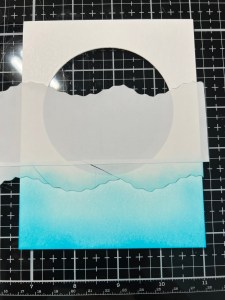
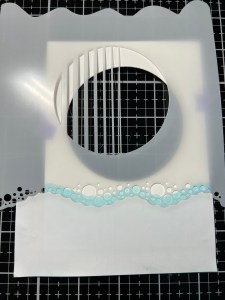
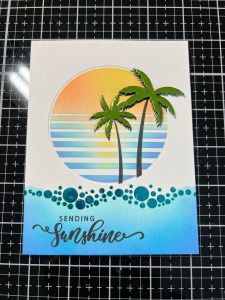
To start, I cut a 4 1/4″ x 5 1/2″ panel out of White Cardstock using my Guillotine Paper Trimmer. I lightly spray the back of my Tropical Blooms Stencil with Pixie Spray. After allowing my stencil to dry for several minutes I place the circle opening onto my panel, slightly above center and gently press down over the thin stripes to adhere down. *Because the area of the stencil that I want to use has some thin lines and I don’t want them to move around when ink blending, I use my Pixie Spray which is a low tack spray that holds things in place. Using my Blending Brush, I blend Sweet Corn Ink to create a circular blend coming out from the top of the stencil circle. Using my Mini Blending Brush, I blend the same Sweet Corn Ink and create a narrow blend down over the lines of the stencil, this will be a reflection from my sun. Next, I blend Sweet Mango Ink around my previous blend and lightly over the narrow blend. To brighten my sun, I take Wild Dandelion Ink and blend it over the sun image and fade it out to the mango ink.
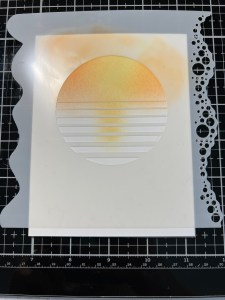
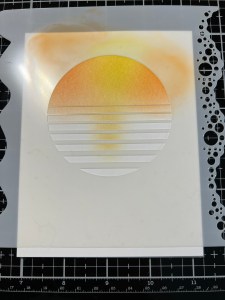
For the water of my image, I use my Blending Brush to blend Turquoise Sea Ink around the sun reflection being careful not to blend into the yellow ink as I want to avoid turning it to green. Next, I blend Blue Lagoon Ink around the edges and fade it into the previous color. To finish, I take my Mini Blending Brush and blend Wild Wisteria Ink around the very edges of the water to create some depth and color variation. Now that my ink blending is finished I remove the stencil.
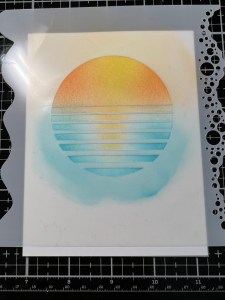

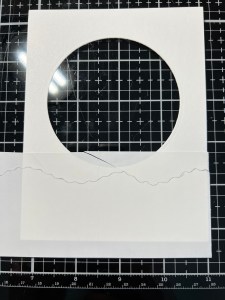
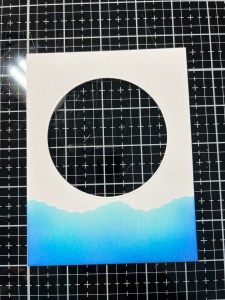
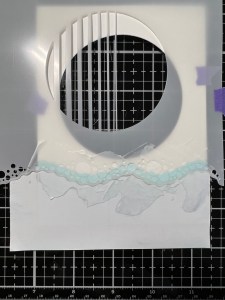
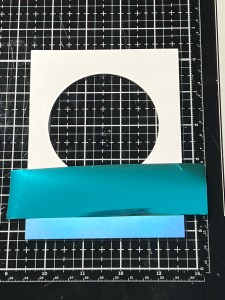
Next, I cut another 4 1/4″ x 5 1/2″ panel out of White Cardstock. I take the plain circle die from the Master Layouts 8 Die Set and eyeball the placement to match my blended panel and run them through my Platinum 6 Die Cut Machine. I temporarily place this panel over my blended panel, matching up the cut out window to the blended circle and trim off any uneven cardstock showing around the edges from the blended panel. My panels now match each other with the blended image evenly showing through the window.

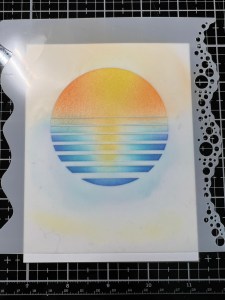
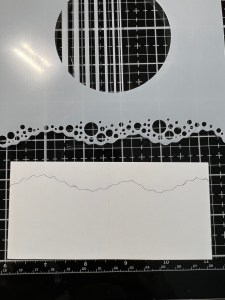
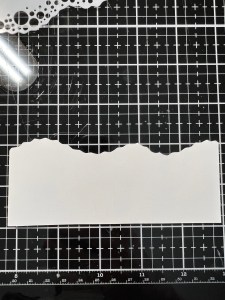
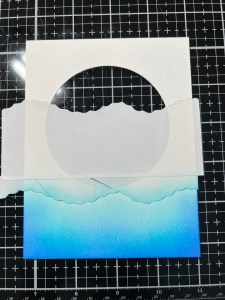
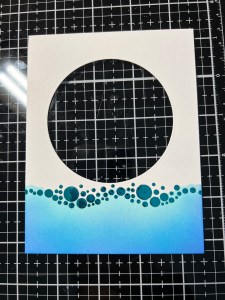
Now it’s time to decorate my top panel. I want to add some ink blended water to the bottom portion of my panel with waves at the top. I cut a 3″ piece of Masking Magic then place the edge of the Tropical Blooms Stencil over it and take a pencil to trace over the waves. I then cut along the pencil marks to create a mask for my ink blending. I take the bottom portion of the mask, remove the release paper and stick it over the bottom portion of my panel where I want the waves to be. I then place the top portion of the mask and fit it back into place. Once I have the top of the mask matched up, I remove the bottom mask to expose my panel where I want the ink blending to be. To protect the rest of my panel from any ink, I place the bottom mask above the waves.
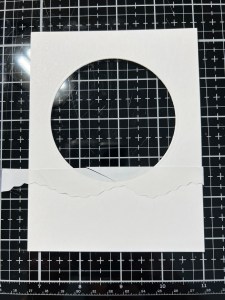
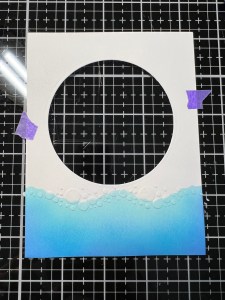
Using my Blending Brush, I blend Turquoise Sea Ink over the entire masked off portion of my panel. Next, I blend Blue Lagoon Ink around the sides and bottom and fade into my previous color. To finish off, I blend Wild Wisteria Ink around the sides and bottom, fading into the previous color. Now that my ink blending is finished, I remove the masks.
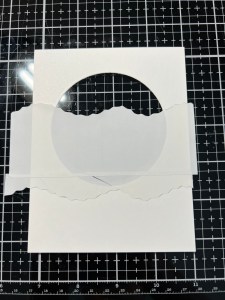
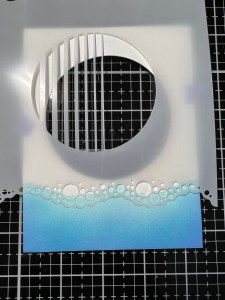
Taking the same edge of the Tropical Blooms Stencil, I line it up where I want to add some foiled bubbles to the top of the waves, just below the inked edge. I then line up and place the mask that I previously cut and adhere it against the edge of the stencil. I tape the stencil down then add Transfer Gel Duo over all of the bubbles using a palette knife. Once I have even coverage, I carefully remove the stencil and mask and set the panel aside to dry while I work on the rest of my card.
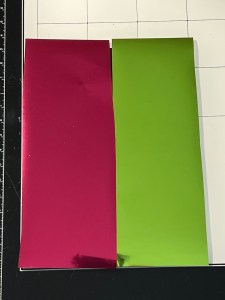
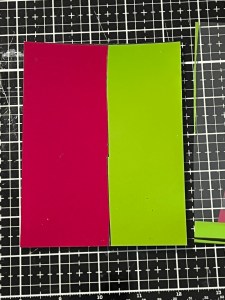
Now it’s time to work on the foiled elements. I cut a strip of Grass Green Foil and Passionate Pink Foil and lay them side by side onto a Toner Panel, place them into a Carrier Sheet then run them through my heated laminator. *Because I have a very cheap laminator, I like to run the panel through twice just to be sure. I wave the panel through the air for a few seconds to cool it down then remove the foil sheet and I am left with a panel of two foil colors to cut my elements from.
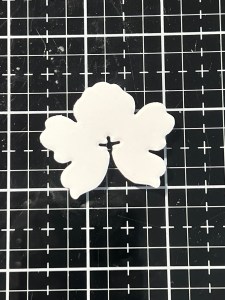
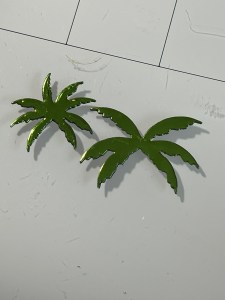
Taking some of the dies from the Tropical Blooms Kit, I place them onto the foiled panel and run them through my P6. *I did cut out two of the different flower petals as I wasn’t sure which one I wanted to use, however, I only use one for my card.
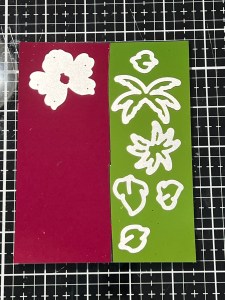

Taking the solid flower die, I cut out of White Cardstock then took the same palm dies to cut out of Black Cardstock. Using Liquid Glue I adhered the petals to the flower die cut and the palms to the black cardstock pieces then set them aside. *I also foiled the small stamen piece using Turquoise Sea Foil.


I go back to my ink blended panel and place it into my MISTI Stamp Positioner. I choose and image from the Tropical Blooms Stamp Set and stamp it towards the right side of my ink blending using Amalgam Obsidian Black Ink. I ended up stamping this image a couple of times to get a good crisp image. I set the panel aside to allow the ink to dry while I work on the rest of the card.

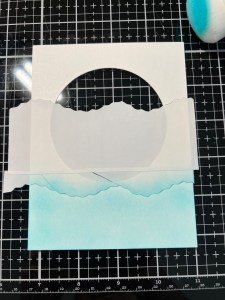
Now that my gel has had a chance to completely dry (you will know the gel is dry when it turns completely clear) I cut a strip of Turquoise Sea Foil and place it over the gel. I then place the panel into a Carrier Sheet then run them through my heated laminator. I wave the panel through the air for a few seconds to cool it down a bit then remove the foil piece. I now have beautiful foiled bubbles/foam floating over my waves!

Next, I place the panel into my MISTI and stamp a greeting from the Tropical Blooms Stamp Set onto the lower left corner using Amalgam Obsidian Black Ink.


Using Liquid Glue I adhere my two panels together then onto a white card base. I take the smaller palm and glue it offset just a bit to give it a shadow effect onto the top of the tree. For a little dimension, I add small pieces of Foam Tape to the large palm and adhere it offset a bit to the top of the tree.

I add Foam Tape to the back of the flower and mount it over the waves and into the frame a bit along with the small stamen piece. I glued the leaves down flat under the flower using Liquid Glue and this completes my card.
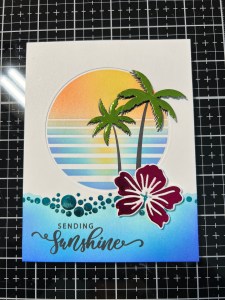

I hope you enjoyed today’s card! I love how the foiled accents added so much shine and bright color to the ink blending. While I layered foiled petals to my flower, white on white cardstock looks gorgeous also! You can see an example of it in the final photo, at the lower right side. This card kit is filled with so much fun… there are many images, sentiments and occasions to choose from with the stamp set… dies to create fun elements as well as a greeting with shadow… a stencil that can be used three different ways, toner card fronts and two packs of foil! These foils are great to use with Gina’s new Poly Glaze panels as well, so much versatility!!
If this is your first time visiting my blog, welcome and I hope you return. If you are a returning visitor, thank you so much for your support!
If you would like to be notified by email each time I post a new project, there is an option to add your email (located at the top menu, or on the right side of my page) then hit the subscribe button. Should you have any questions or comments please leave them in the comments section. I’d love to hear from you and what you thought about today’s card.
Thank you for visiting and I hope you come back soon!
Happy Stamping and God Bless!!
Jeannie

This is a really beautiful card! I’m so happy I found your blog. Your step by step instructions with photos is so very helpful for new card makers! Thank you.
LikeLike
Thank you so much, Jennifer for visiting my blog and your kind words!! I try to be as detailed as I can with my instructions so that even new card makers can follow along… I’m so happy you found my blog helpful!
LikeLike