
I want to start out by thanking everyone for the support and nice comments you all leave for me. I truly appreciate the support of this blog!! I enjoy card making and bringing my creations to you, this wouldn’t be possible without your support, so again, thank you!! *Affiliate links are used at no additional cost to you. When you purchase products through my links I receive a small commission from these sales, which helps me to purchase new products for the cards I share on my blog. Thank you so much for your support, it is greatly appreciated!! Don’t forget to check out my previous blog for many more card projects! You can find them HERE.
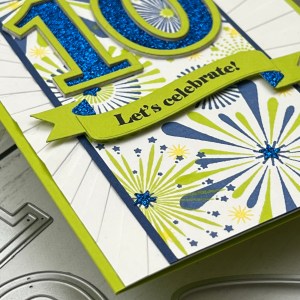
I’m back today with a card I made for my grandson, our oldest is now double digits… where does the time truly go?! The stamps and dies are new to me and I couldn’t wait to try them out! I went with a lime and blue ink to create this card and pulled in the coordinating cardstock as well as a blue glitter cardstock, which ended up working perfectly. This is such a versatile stamp set that has so many elements to it that can create endless images, and has so many small filler pieces, I just love it! The number dies are such a great size that can be used to personalize cards for anyone and also great for scrapbook pages, so much fun! I think the banner die is my favorite because of it’s versatility for any occasion and will become a useful staple in my crafting. Let’s get started!!

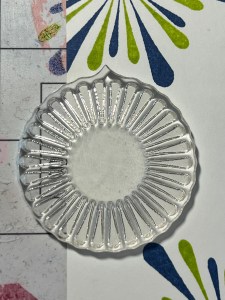
I will be doing all of my work today on my Tim Holtz Glass Media Mat.
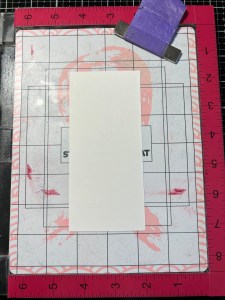
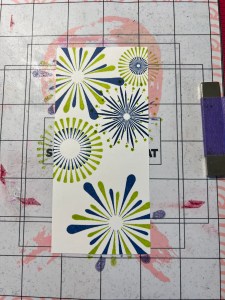
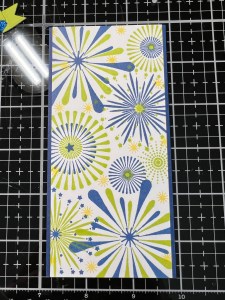
To start, I use my Guillotine Trimmer to cut a 2 1/2″ x 5 1/2″ panel out of White Cardstock. I then place the panel onto my Sticky Mat in my MISTI Stamp Positioner so that I am able to do some stamping off the edges. I take an image from the Festive Fireworks Stamp Set and position it over the top let portion of my panel. I then pick up the stamp with the door of my MISTI, ink it up with Blue Denim Ink and stamp it onto my panel. Next, I choose another stamp that is a bit smaller from the same set and position it over my previous stamped image so it’s offset. I ink up the stamp with Key Lime Ink and stamp it onto my panel. I then clean off the stamps and repeat this process for the bottom corner. *I will show you how to correctly line up these images in the next step, once the light bulb came on in my head, ha! **One thing to note, the images of this stamp set do have lines around them on the carrier sheet, grouping them together to show which stamps match up nicely, however, you could mix and match them to your own preference.
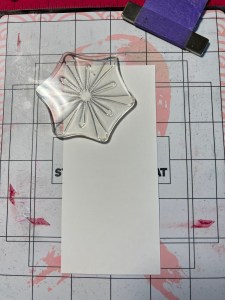
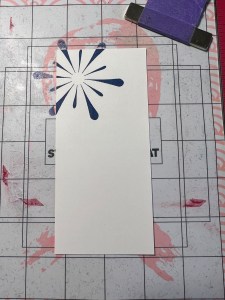
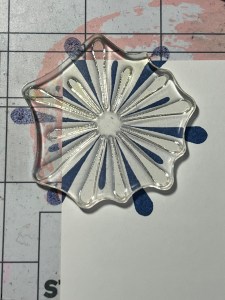


Choosing another image from the Festive Fireworks Stamp Set, I place it onto my panel where I want my next stamping to be. There is a small point or arrow at the top of the larger stamps that is there to help make it easy for you to line up your stamped images. After placing my stamp onto the panel, I make sure the arrow is pointing at the top of my panel and stamp it with Key Lime Ink onto my panel. I then choose a smaller image and place it over the previous image making sure the arrow is again pointing towards the top of my panel. For this image, I use Blue Denim Ink to stamp it onto my panel. As you can see, the images are lined up nicely. However, you don’t even have to be precise with this stamp set, the images look just as nice even when they overlap, I love this set!
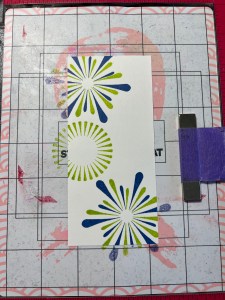

I continue on with this process using different images from the same set, mixing and matching until my panel is filled. For all of my images, I use Blue Denim Ink and Key Lime Ink.
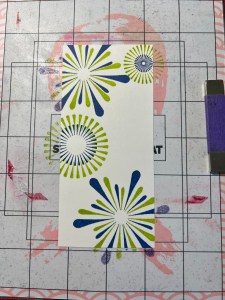

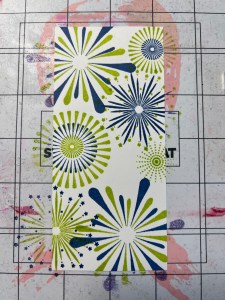
Now that I have all of the fireworks stamped onto my panel I take one of the tiny images from the same Festive Fireworks Stamp Set and using an acrylic block, I stamp to fill in and add a third color, Wild Dandelion Ink for a little subtle contrast and this completes my panel.
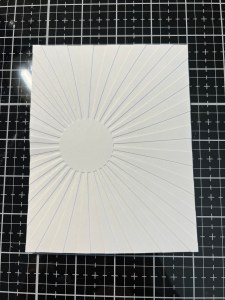
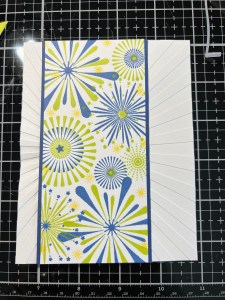
For my background piece, I place a 4 1/4″ x 5 1/2″ piece of White Cardstock into my Sunburst Embossing Folder off center and run them through my Platinum 6 Die Cut Machine.
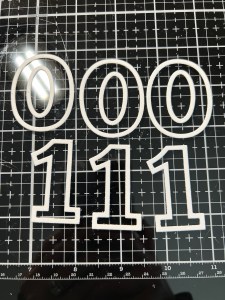
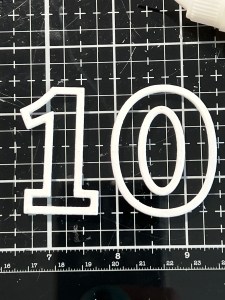
For the numbers, I take the “1” and the “0” dies from the Outline Numbers Die Set and cut three times from White Cardstock, I remove the centers then stack and glue them together using Liquid Glue. Using the same dies, I cut once from blue Glitter Cardstock and once from Key Lime Cardstock, running them all through my P6.


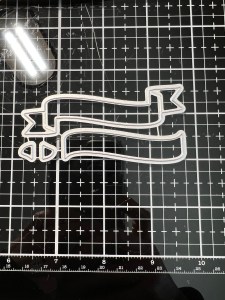
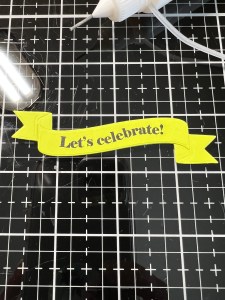
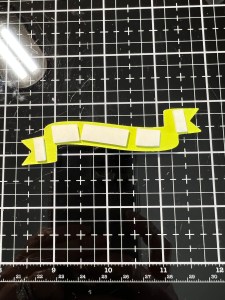
Next, I take my It’s A Banner Day Die and use the banners to cut out of Key Lime Cardstock and use the shadow pieces to cut out of blue Glitter Cardstock, running them through my P6.

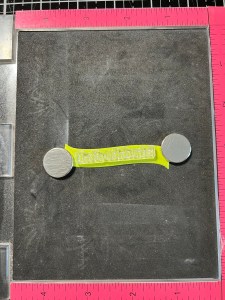
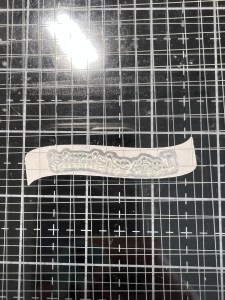
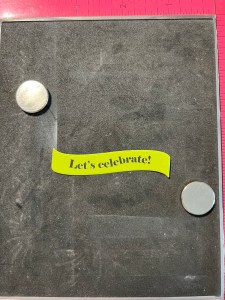
Now I want to stamp a greeting onto the front piece of the banner. I place the banner piece into my MISTI and hold it in place using the magnets. I then choose a greeting from the Birthday Bash Stamp Set and center it onto the banner then close the door of my MISTI onto it. Because this banner has a curve to it, I want my stamped greeting to also curve. To make sure my greeting curves correctly, I create a guide. To do this, I cut out the same banner piece then add some Dot Runner Adhesive to the back of it. With the door of my MISTI still closed, I place the guide over the green banner die cut piece that I want to stamp my greeting onto. I make sure it is lined it up then press down to adhere the guide onto the door of my MISTI (which is on the outside). This white guide piece is now lined up in the exact position as the green banner so when I position my greeting, I know it will stamp correctly.
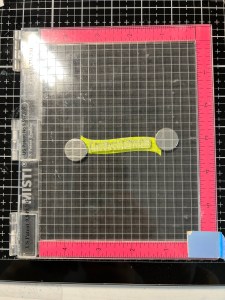


I can now open the door of my MISTI and curve the ends of my greeting to fit the curve of the guide. I then ink up my stamp with Versafine Claire Nocturne Ink and stamp it onto the green banner.
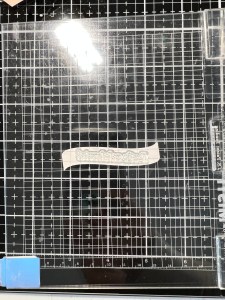
To assemble my banner pieces, I use Liquid Glue and apply it to the back of my stamped piece and adhere it to the main banner. I then add Liquid Glue to the glitter pieces and adhere them into place. Such a fun banner die!

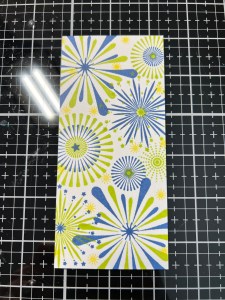
Next, I cut a 2 5/8″ x 5 1/2″ panel out of Blue Denim Cardstock. Using Liquid Glue I mount my stamped panel over it, centering it so that the blue cardstock shows evenly on both sides. I then take my white embossed panel and trim it down a bit on the right side, the finished size being 4″ x 5 1/2″. I then mount my stamped panel onto it a little off center, also using Liquid Glue.
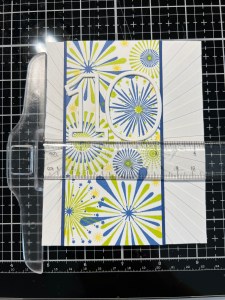
To help evenly line up my numbers, I use a T-Square Ruler and lay it across my panel. I then add Liquid Glue to the back of my outline numbers and adhere them to the panel. I then take the previously cut inside pieces of the Glitter Cardstock and glue (inlay) them into the inside of the numbers.
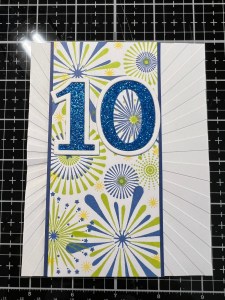
To give my banner a little dimension, I add Foam Tape to the back then mount it just below the numbers. To help the numbers stand out better, I glue the Key Lime outlines over them. Adding Liquid Glue to the back of my panel, I adhere it onto a Key Lime card base and center it so that there are even margins showing on each side.


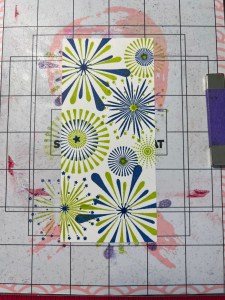
To finish off my card, I take my Stars Wafer Dies and cut out of blue Glitter Cardstock, running them through my P6 then adhere them to the centers of the fireworks images using Liquid Glue and this completes my card.

I hope you enjoyed today’s card, I think my grandson will love it! These stamps and dies can be used for so many other occasions, including anniversaries, graduations, New Years… anything that uses a special number! I love to color coordinate my stamping to fit a specific theme… how cute would it be for a first birthday or golden birthday card??! Or a special anniversary card using the colors from the wedding, so many fun possibilities!!
If this is your first time visiting my blog, welcome and I hope you return. If you are a returning visitor, thank you so much for your support!
If you would like to be notified by email each time I post a new project, there is an option to add your email (located at the top menu, or on the right side of my page) then hit the subscribe button. Should you have any questions or comments please leave them in the comments section. I’d love to hear from you and what you thought about today’s card.
Thank you for visiting and I hope you come back soon!
Happy Stamping and God Bless!!
Jeannie

Really love this birthday card for your grandson. But, where do I find a list of the products used for the card. ie stamp sets name /company, die sets/company, numbers dies/company.
Many thanks.
LikeLike
Thank you Lesley, this card was fun to make! I have all of the products linked in the description/instructions, they are highlighted in blue and are clickable. These links take you directly to the product page of the company. I hope this helps. Thank you for visiting my blog. 🥰
LikeLike